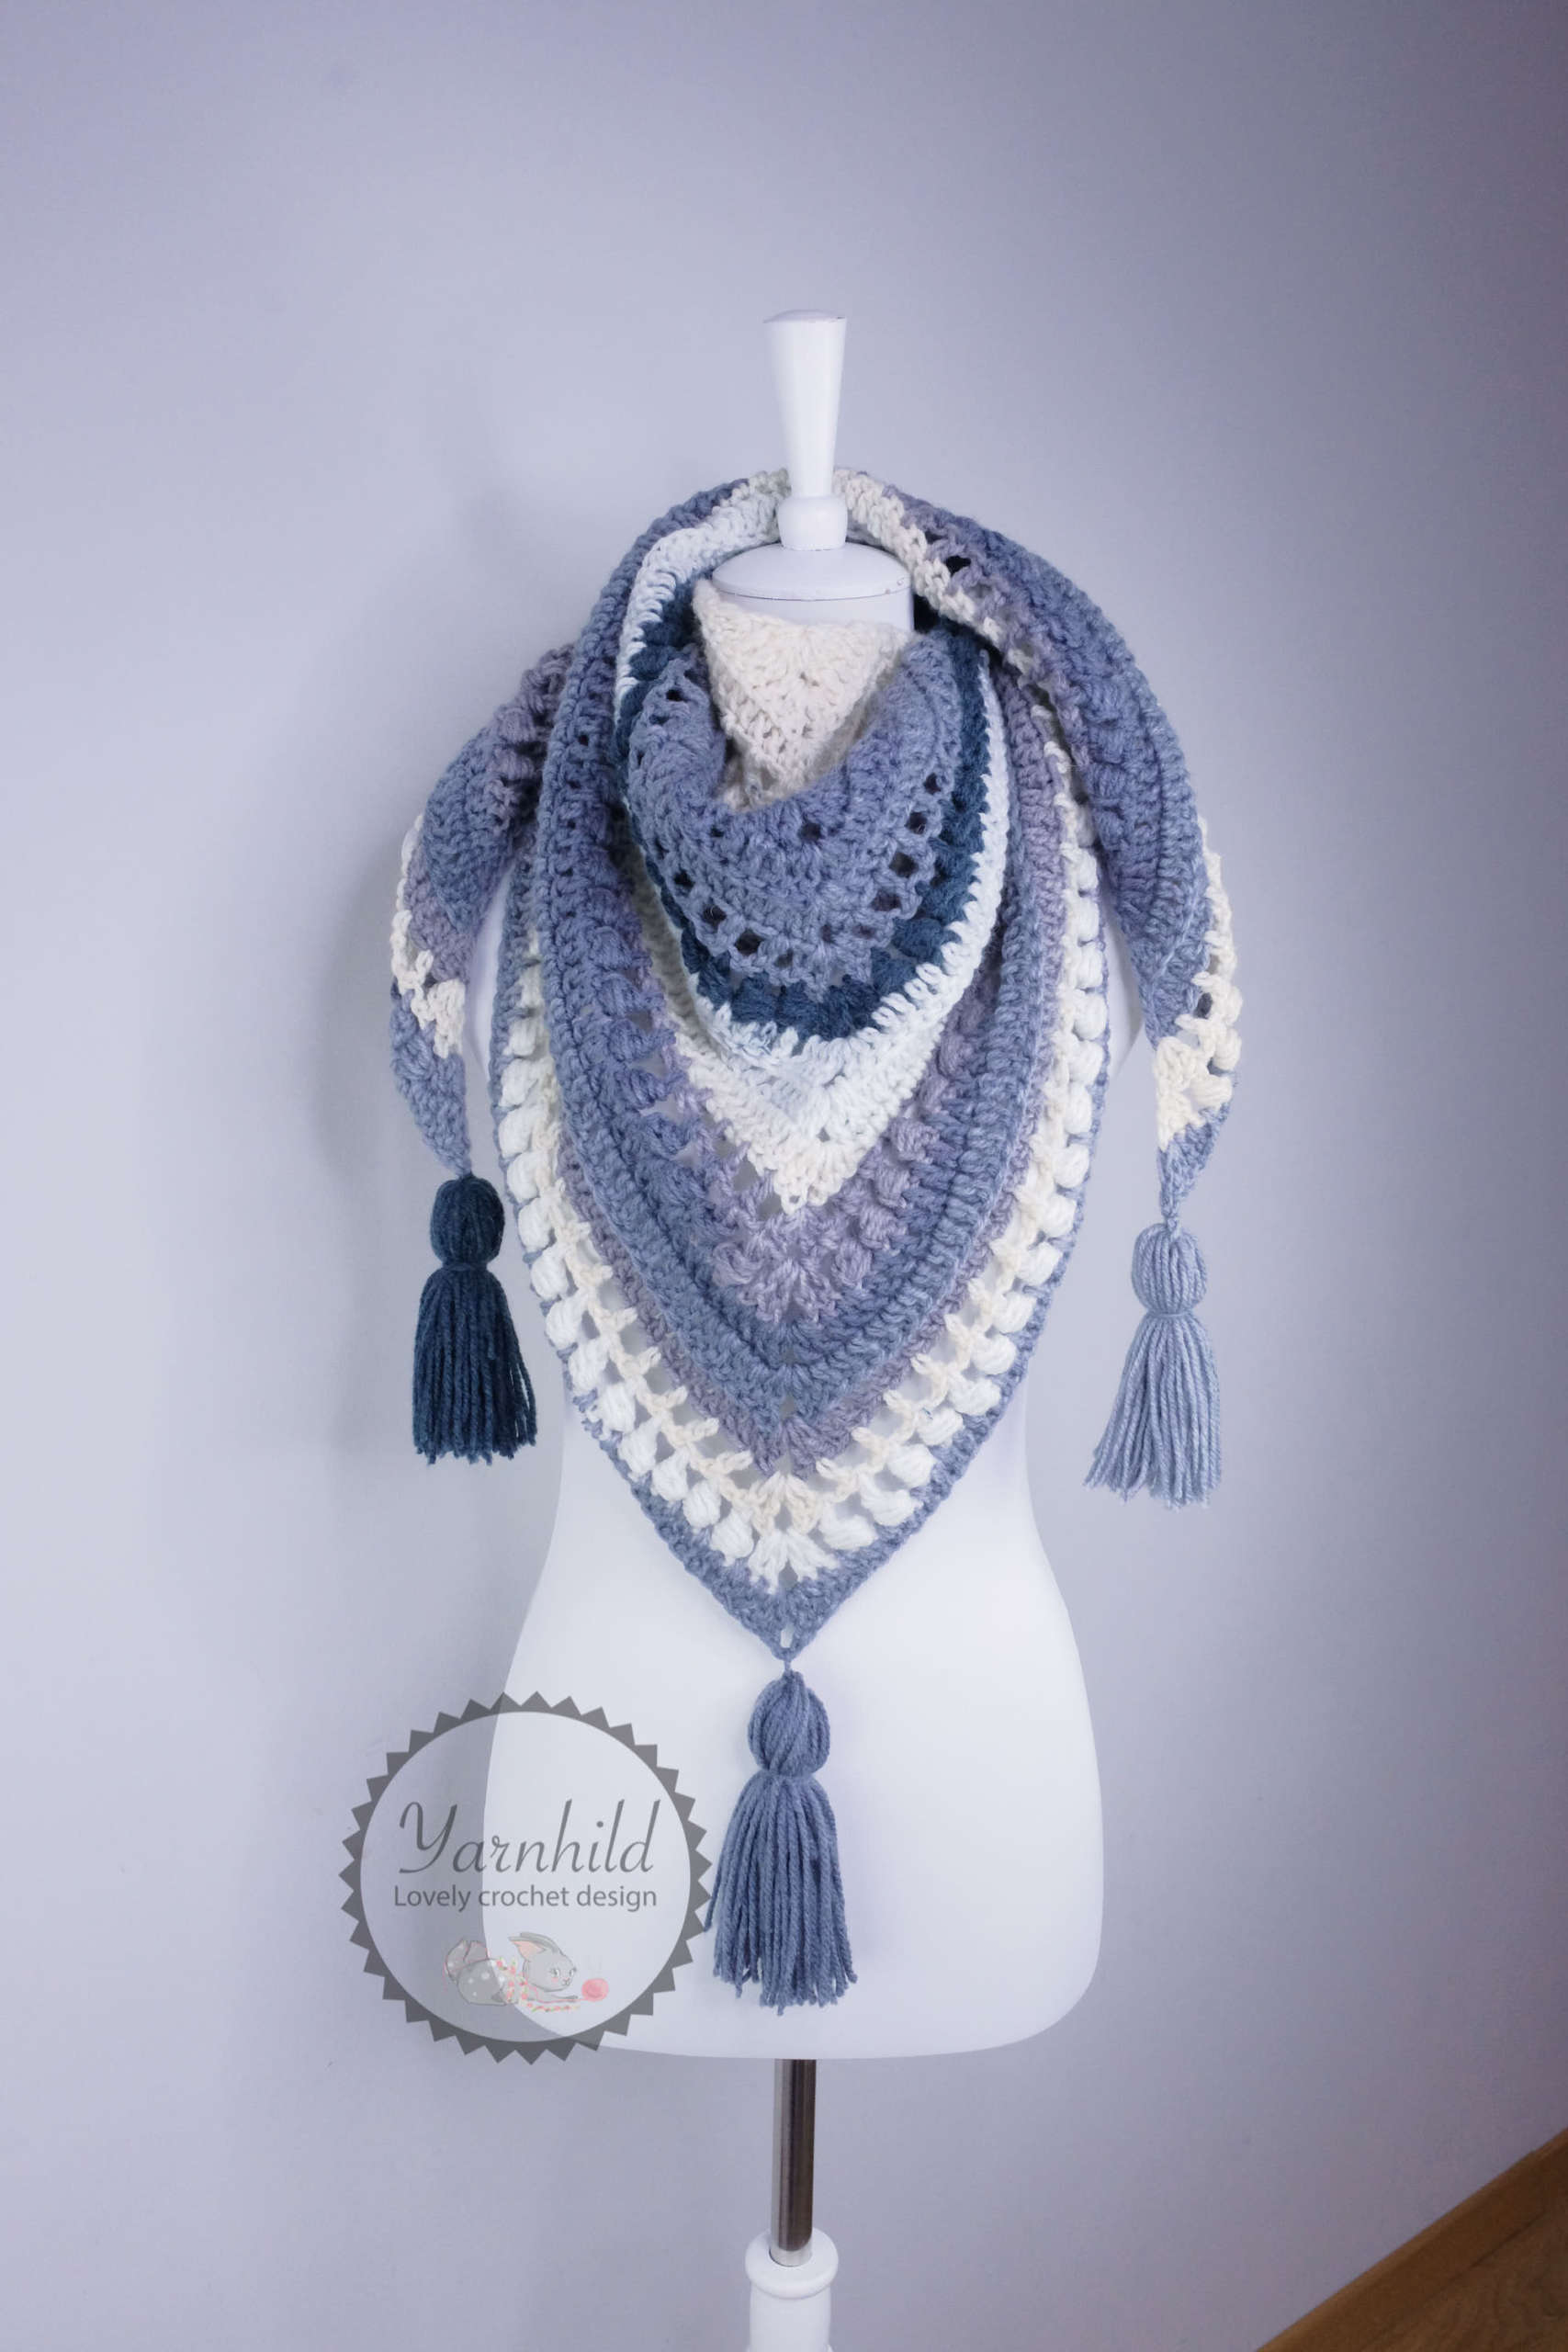
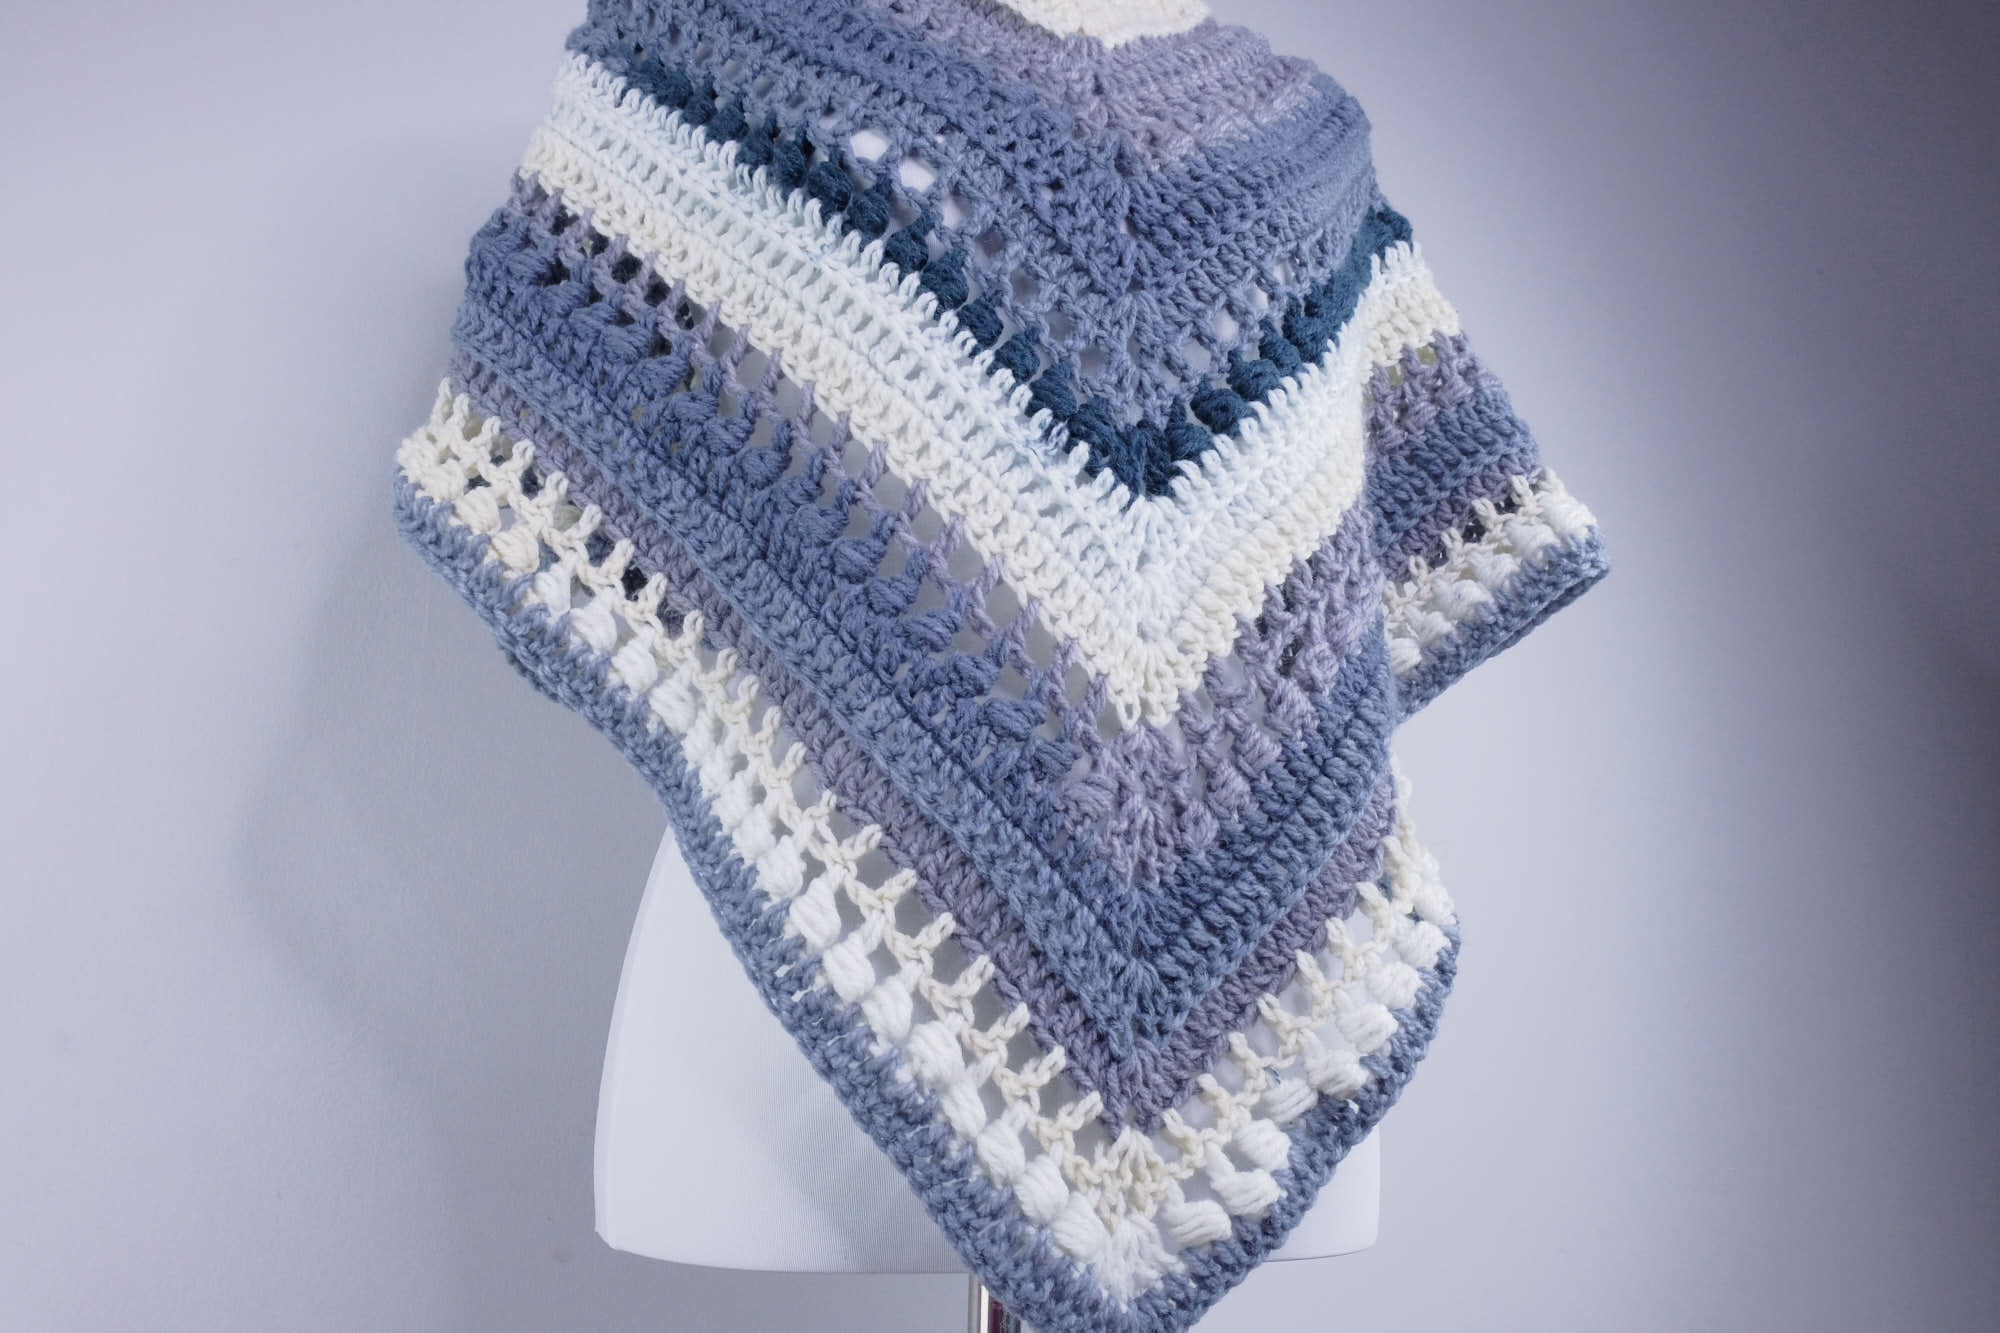
Crochet shawl pattern - The pearl shawl
Today I am excited to release another crochet shawl pattern! Now if you are looking for an easy project where you can memorize the pattern after a few rows, you have come to the right place!
I named this shawl The Pearl Shawl because the bead stitch that is used in this pattern.
Other languages
So far, I have translated the pattern in Norweigan. You can get it here!
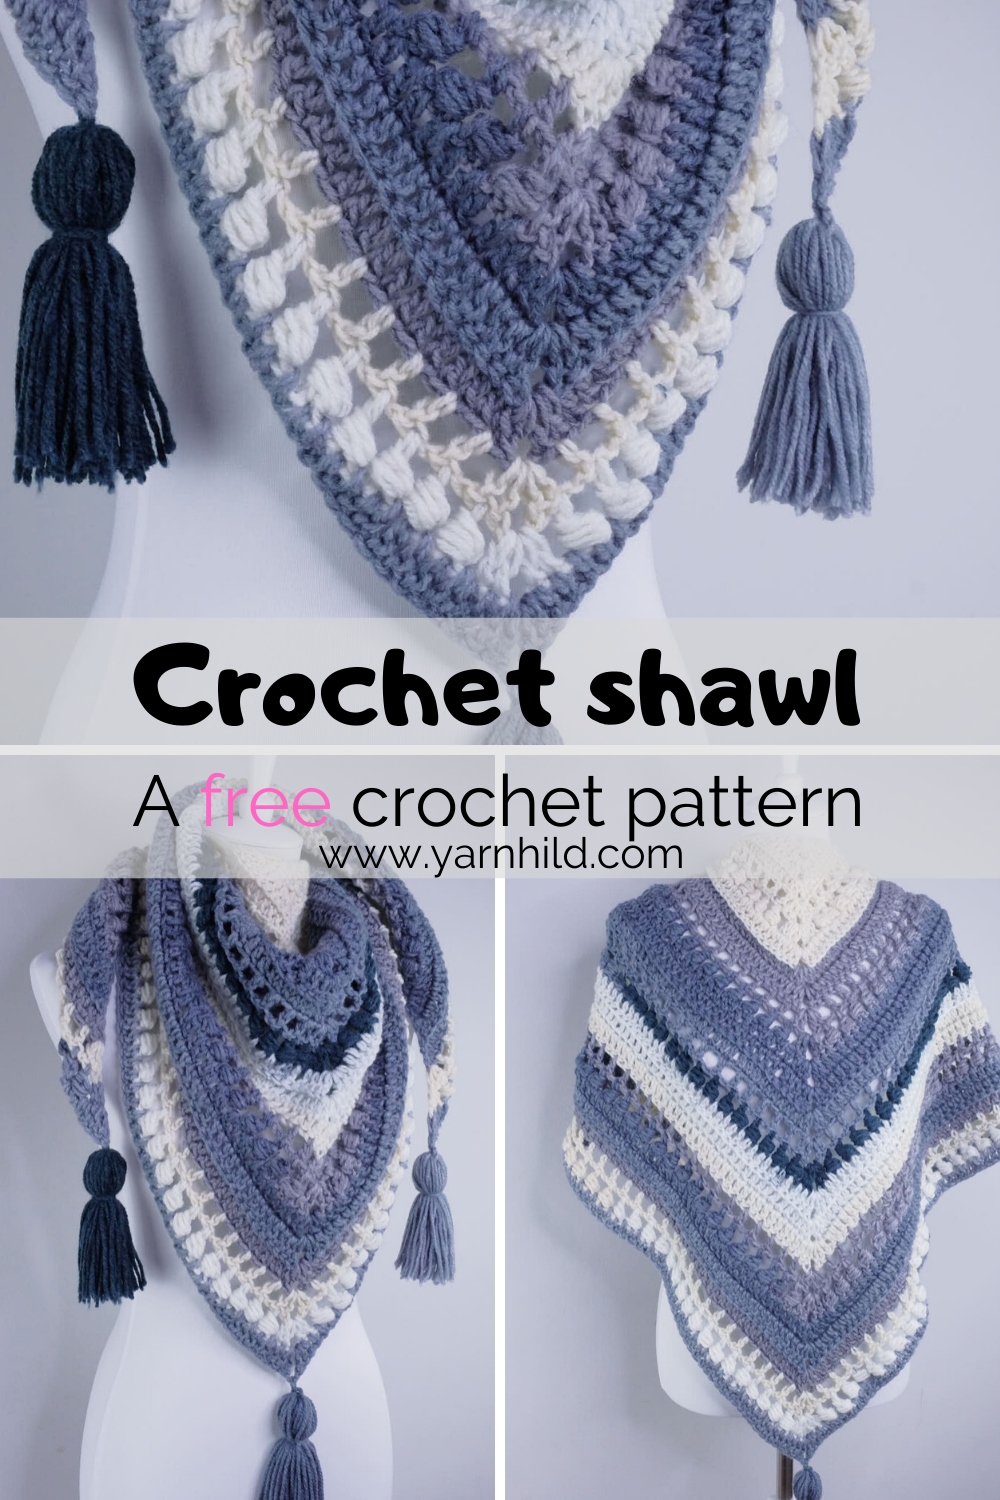
I am hooked on making wearables nowadays, and shawls are my favorite to make! This is a simple and repeating design, so it is beginner-friendly too!
I made two shawls with this design and already thinking of making more shawl patterns. Because let's face it, a girl can never have too many shawls!
Disclaimer: This blog post contains affiliate links. That means I earn a small commission if you purchase any of the products I recommend, on no extra costs on your behalf. Thank you for supporting my work!
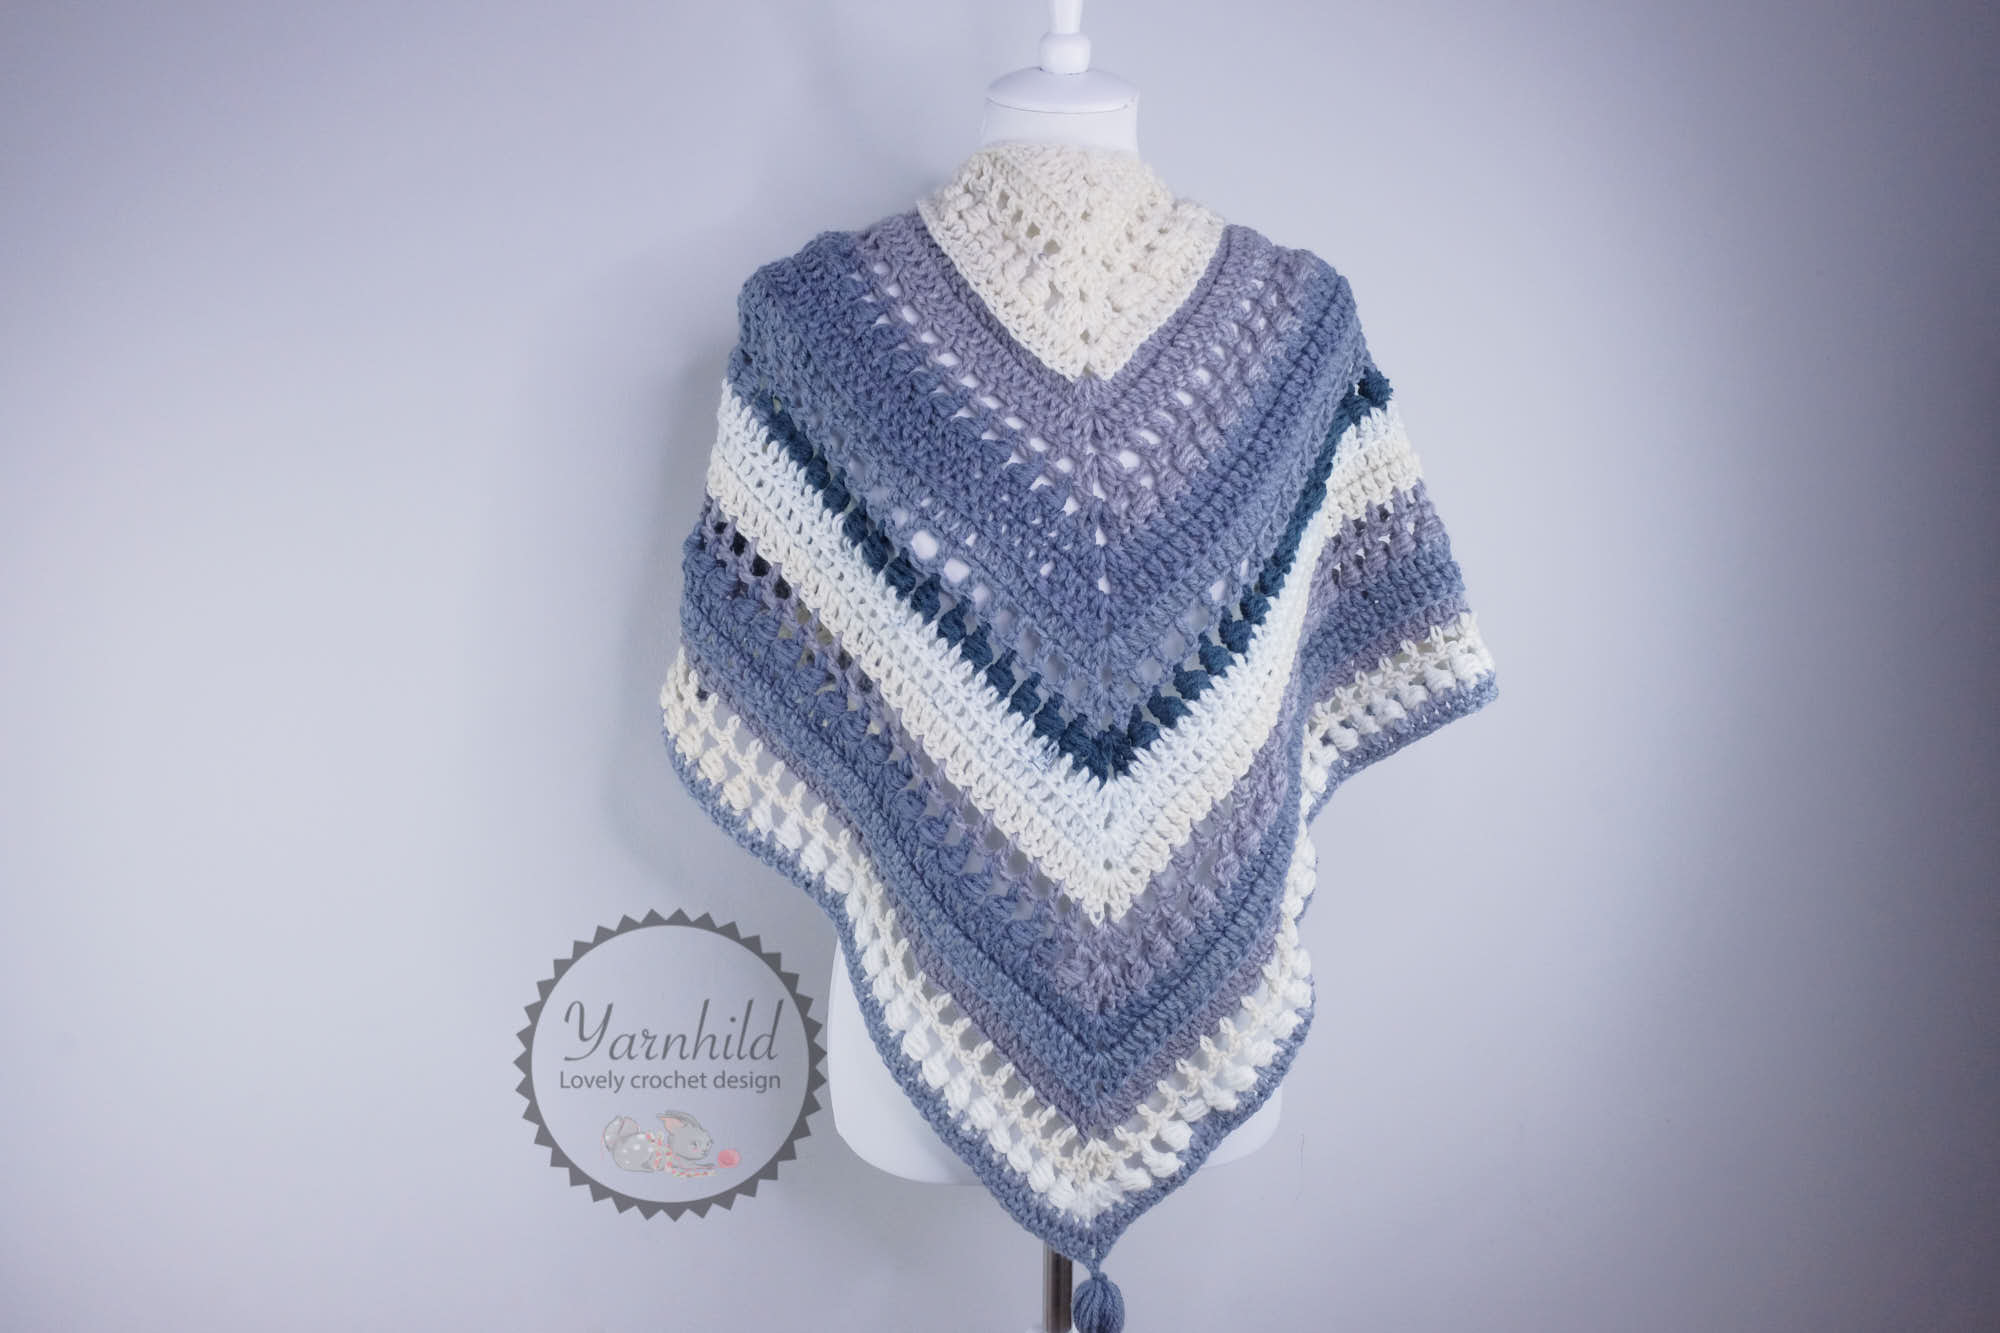
The stitches are creating a hight-textured shawl, and it would look great in many different colors.
Also, I'd love to see it in one color as well.
The inspiration behind the design
I actually designed this shawl some time ago. About a year ago, I made this bead stitch pouch using the bead stitch.
One can't help fall in love with the bead stitch! So I wanted to create more patterns using this pretty stitch. It's not so common to see in patterns either, so I decided to make something simple and elegant.
This is a mindless project, and you are just repeating 6 rows until you are happy with the size.
Printable pdf
You can also purchase the PDF on Etsy. So far, the pattern is available in Norweigan and English. Thank you for your support!
The Yarn
I used a yarn cake for this project. I got this yarn in Norway and it's a worsted weight yarn. The cake that I've bought has 200 g = 420 m, so I used a little about 600 g cake to get the right size.
Caron Big Cakes Self Striping Yarn ~(Cherry Cake)You can also check out Yarnsub!
You just going to need some worsted weight yarn for this project. I used a yarn cake. This is probably a brand you can't find outside of Norway, but I can recommend Caron Cakes as a substitute.
However, you don't have to buy new yarn for this project!
This can also be a stash buster. Just collect what you have, but stick to the same weight and you are good to go!
Video tutorial
There is also a video tutorial for this pattern. If you have never made the bead stitch before watching the video might be helpful for you.
Be sure to check out my channel and subscribe and hit the bell notification if you like video tutorials.
Materials
Besides the yarn, you'll only need a crochet hook, some scissors, and a tapestry needle.
Since we are working with a 5.5 mm, it's pretty fast to make as well. This shawl is great as a stylish gift as well, or you can keep it for your self to stay warm for the rest of the winter.

Let's connect
If you aren't on my newsletter list, you are very welcome to subscribe. You'll get an email every time there is a new, free pattern on the blog.
Also, I'd like to invite you to join our Facebook group to share a picture of your finished shawl
More free patterns
If you are looking for more free crochet shawl patterns, then check out this popular pattern from last year!
The Lavender Delight - Crochet shawl pattern
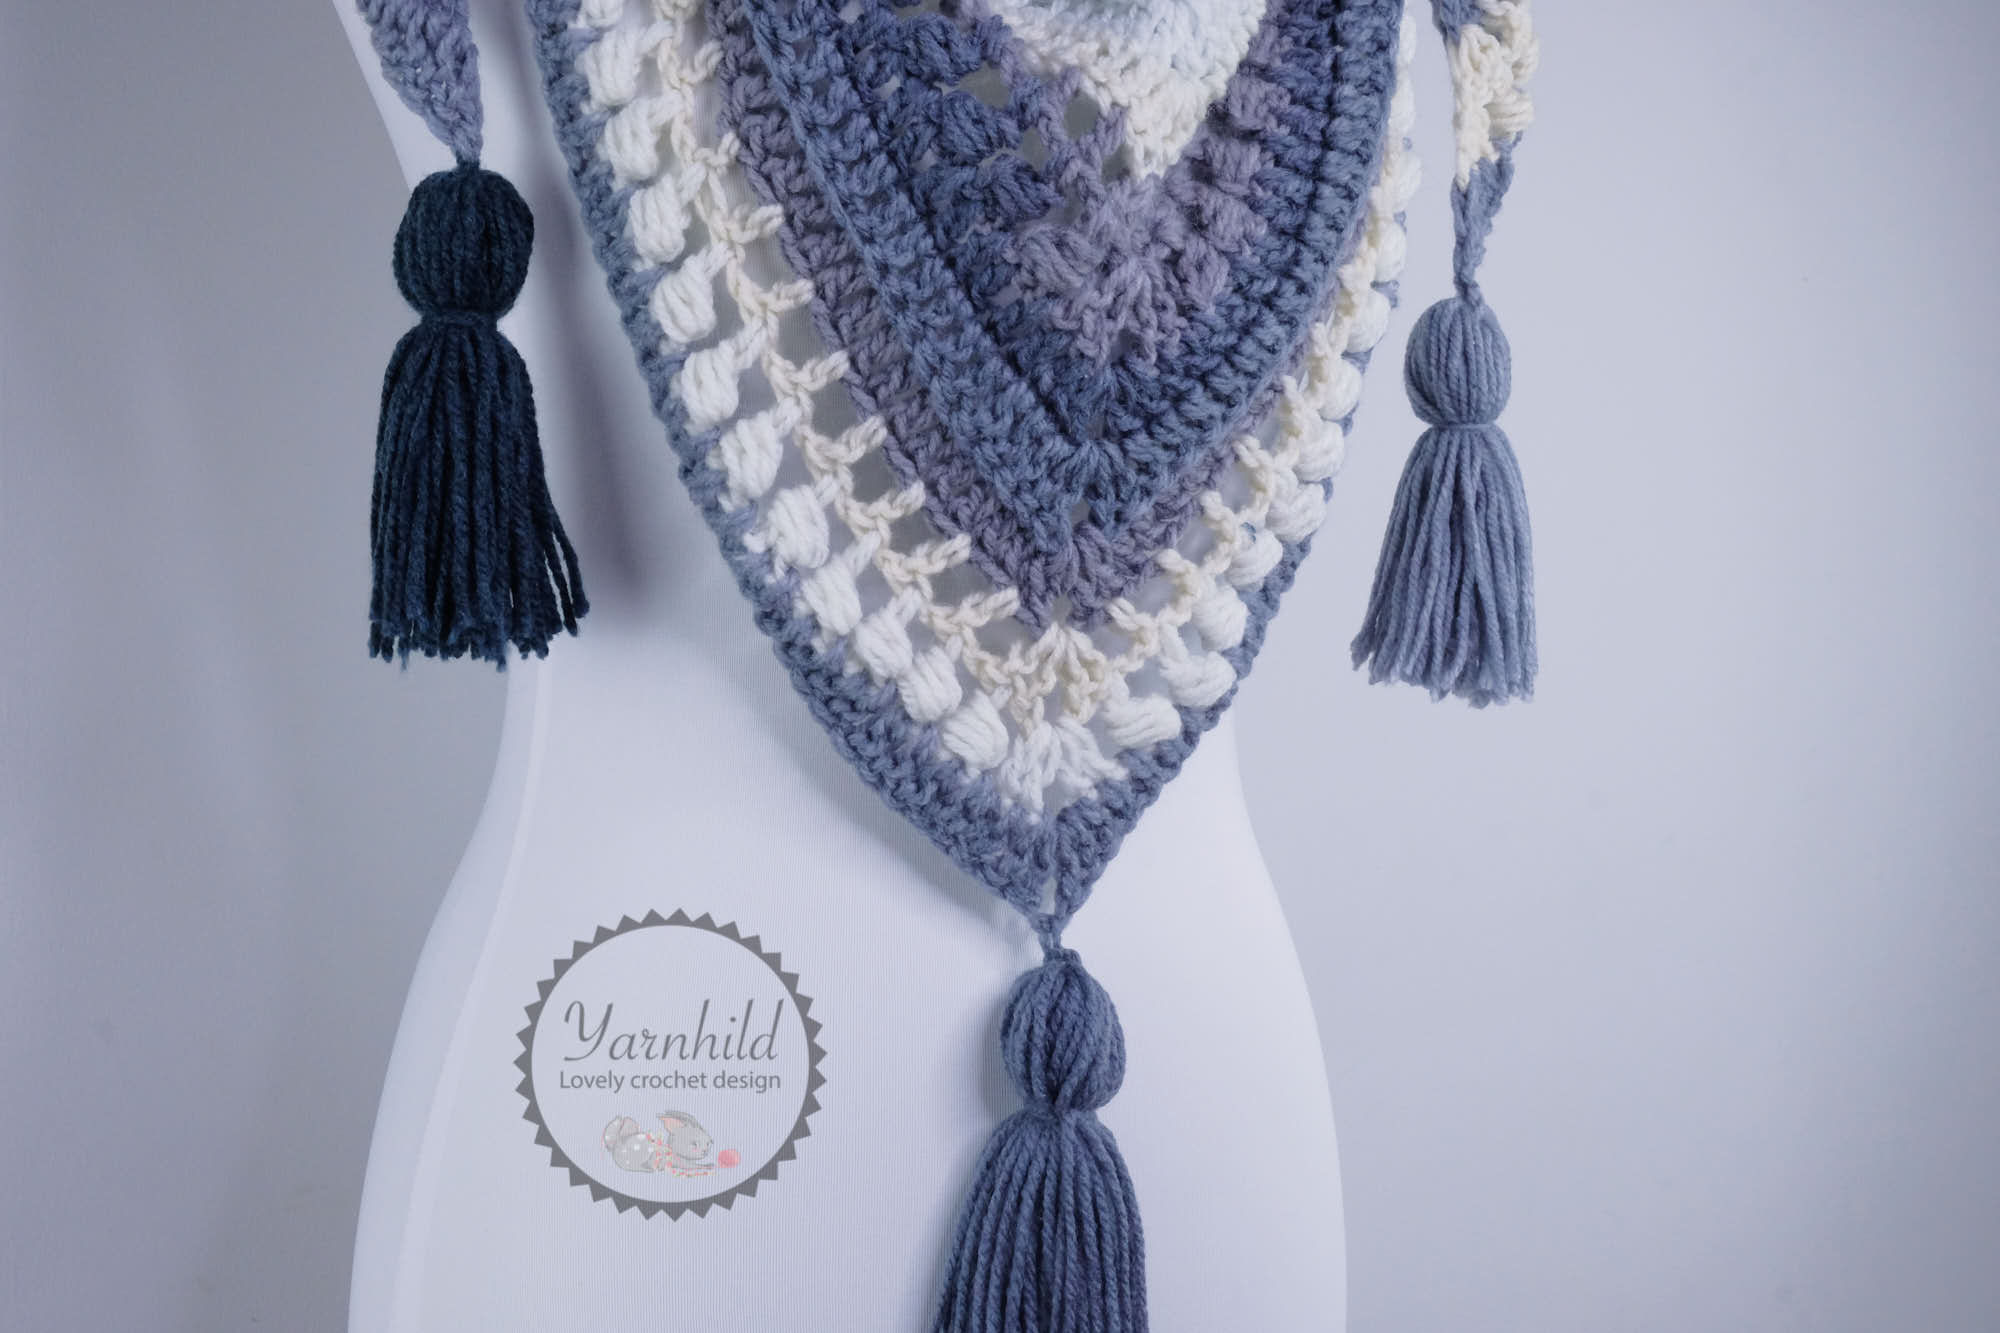
Tassels
To add that little extra to the shawl, I've added some tassels. If you want to use up some leftovers, tassels are a great stash-buster.
Here is a video on how to make tassels for your shawl.
Crochet shawl pattern
The Pearl Shawl
Crochet pattern written by Ragnhild Hynne Uebler – Yarnhild ©
This pattern is the intellectual property of Yarnhild. The pattern must not be altered, translated, copied or republished without approval.
You are welcome to sell the items that you have made from my patterns, but please be sure to give me credit for the pattern that you sell online. No mass production. 2020 – Yarnhild ©
Abbreviations used (US terms)
CH – chain
YO – yarn over
ST(S)– stitch(es)
ST ST – slip stitch
DC – double crochet
R – row(s)
{} – stitch count written in the parenthesis
CH SP– chain space
BST – bead stitch
*-* - repeat action
Materials used
Crazy wool cookie from Trysil (yarn cake). Worsted weight yarn. 200g =420. You need 1 ½ cake of this yarn. You can also use Caron Cakes big cakes as a substitute.
Crochet hook 5.5 mm
Tapestry needle
Scissors
Information
The shawl is made in rows. It starts with a magic ring which will be the center. We repeat 6 rows through the entire pattern. To make the shawl larger, simply repeat the rows as instructed in the pattern.
Note in row 6: Do 1 double crochet in every stitch, by that I mean in every chain 1 space and in every bead stitch. It may look like 3 stitches, but there is only 2 for each bead stitch and chain 1. The stitch count will increase by 8 stitches in each row, not including the chain 2 space in the middle.
Finished size: 130 cm across the top, 60 cm from top to point. I am a small person (160 cm) so I don’t like my shawls too big. Feel free to adjust the size by adding rows as you see fit!
Gauge:10 cm = 12 stitches and 5 rows
Extra help
How to crochet the bead stitch (BST)
Bead stitch – *yarn over, insert the hook behind the post of the double crochet that you just made, from front to back, yarn over and pull up a loop* Repeat from * to * 2 more times, 3 times total = Now you have 7 loops on the hook. Yarn over and pull through 6 loops, yarn over and pull through 2 loops.
R 1) Make a magic ring: CH 3 (counts as 1 dc through the entire pattern), 4 DC, CH 2, 5 DC, CH 3 turn = 10 DC
R 2) 2 DC (in same ST as CH 3, through the entire pattern) 1 DC in the BLO across. (2 DC, CH 2, 2 DC in CH 2 SP.). 1 DC in the BLO across until the last DC. 3 DC in the last ST, CH 3, turn = 18 DC
R 3) As row 2 = {will increase by 8}
R 4) 2 DC, * CH 1, skip 1 DC, 1 DC in next* Repeat *-*across to CH 2 SP. (2 DC, CH 2, 2 DC in CH 2 SP.). 1 DC in next ST, *CH 1, skip 1 DC, 1 DC in next* Repeat *-* across until last DC. 3 DC in last ST. CH 3, turn. = {will increase by 8}
R 5) 2 DC, *CH 1, skip 1 ST, 1 DC in the DC ST from the row below, and 1 BST around the previous DC, *-*repeat until there are 2 STS left before the CH 2 SP. CH 1, skip 1 ST, 1 DC in next ST. (2 DC, CH 2, 2 DC in CH 2 SP). *1 DC in next ST. CH 1, skip in next, 1 DC in next, 1 BST around the previous DC, CH 1*. repeat *-*across until last 2 DC, skip next ST, 3 DC in last ST. CH 3, turn.
{will increase by 8. You should have 7 bead stitches on each side}
R 6) 2 DC, 1 DC in every ST across. (2 DC, CH 2, 2 DC in CH 2 sp.). 1 DC in next ST and in every ST across. 3 DC in last ST = {will increase by 8}
R 7 -26) Repeat rows 2-6. You will end with a 6 row. If you wish to make it larger, simply add more rows.
Fasten off and weave in ends when you are finished.
Add tassels if you wish. Scroll up to get to the video!

3 Comments
Comments are closed.