How to crochet a cute frog
Today I am gonna show you how to crochet the cutest crochet frog! 'm thrilled to share this fun and cute amigurumi frog pattern that you can add to your amigurumi collection. Let's crochet an adorable frog!
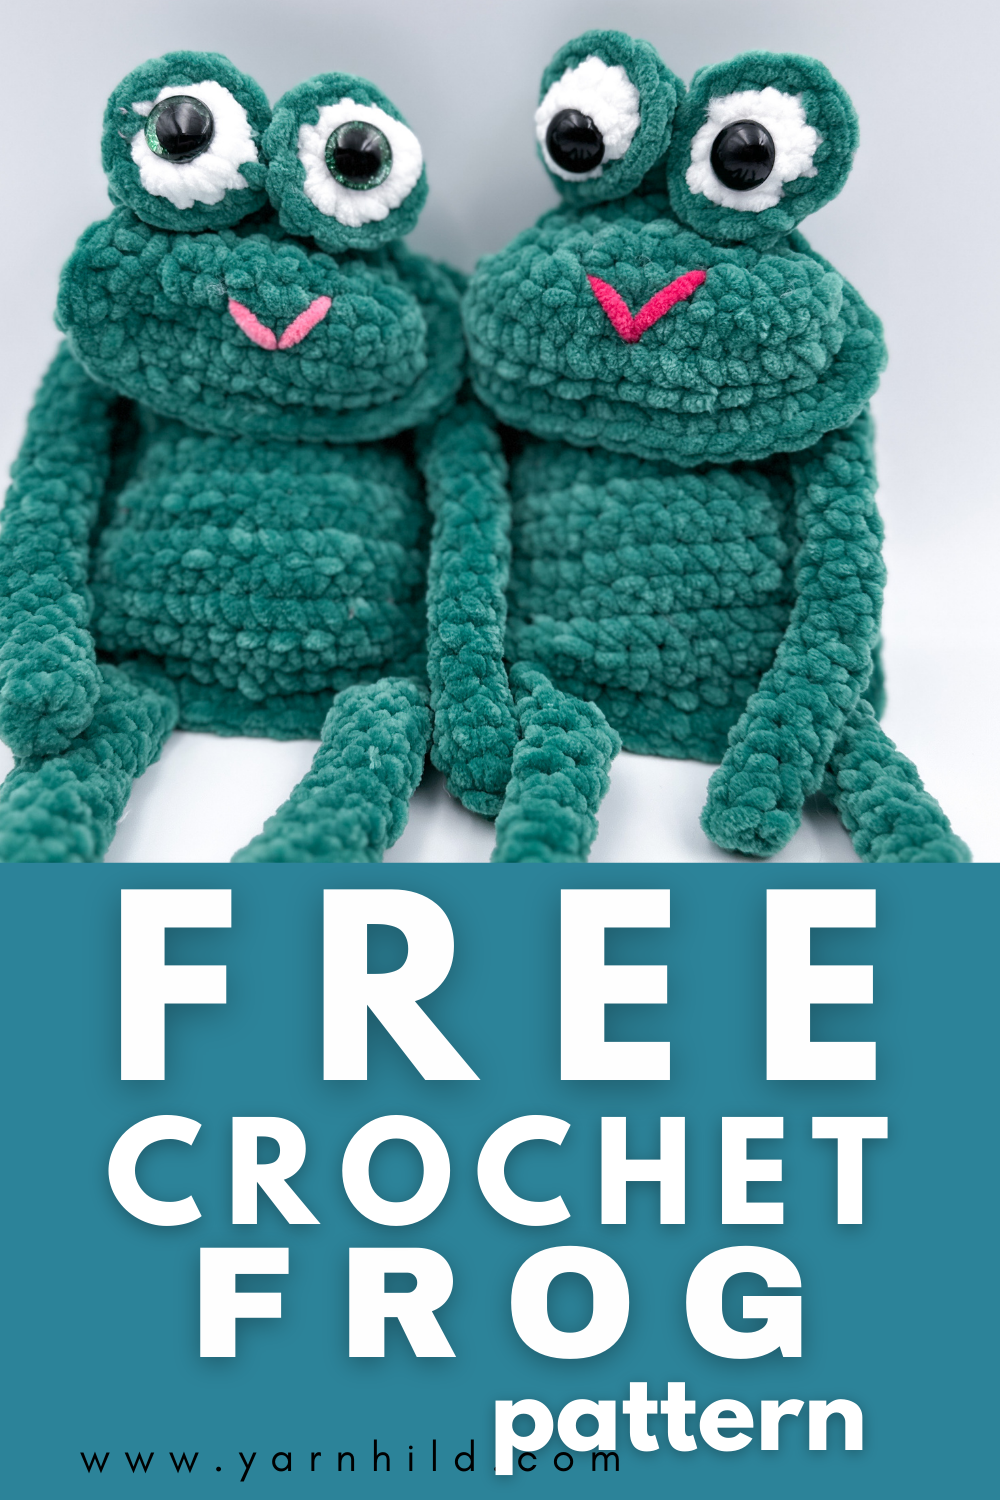
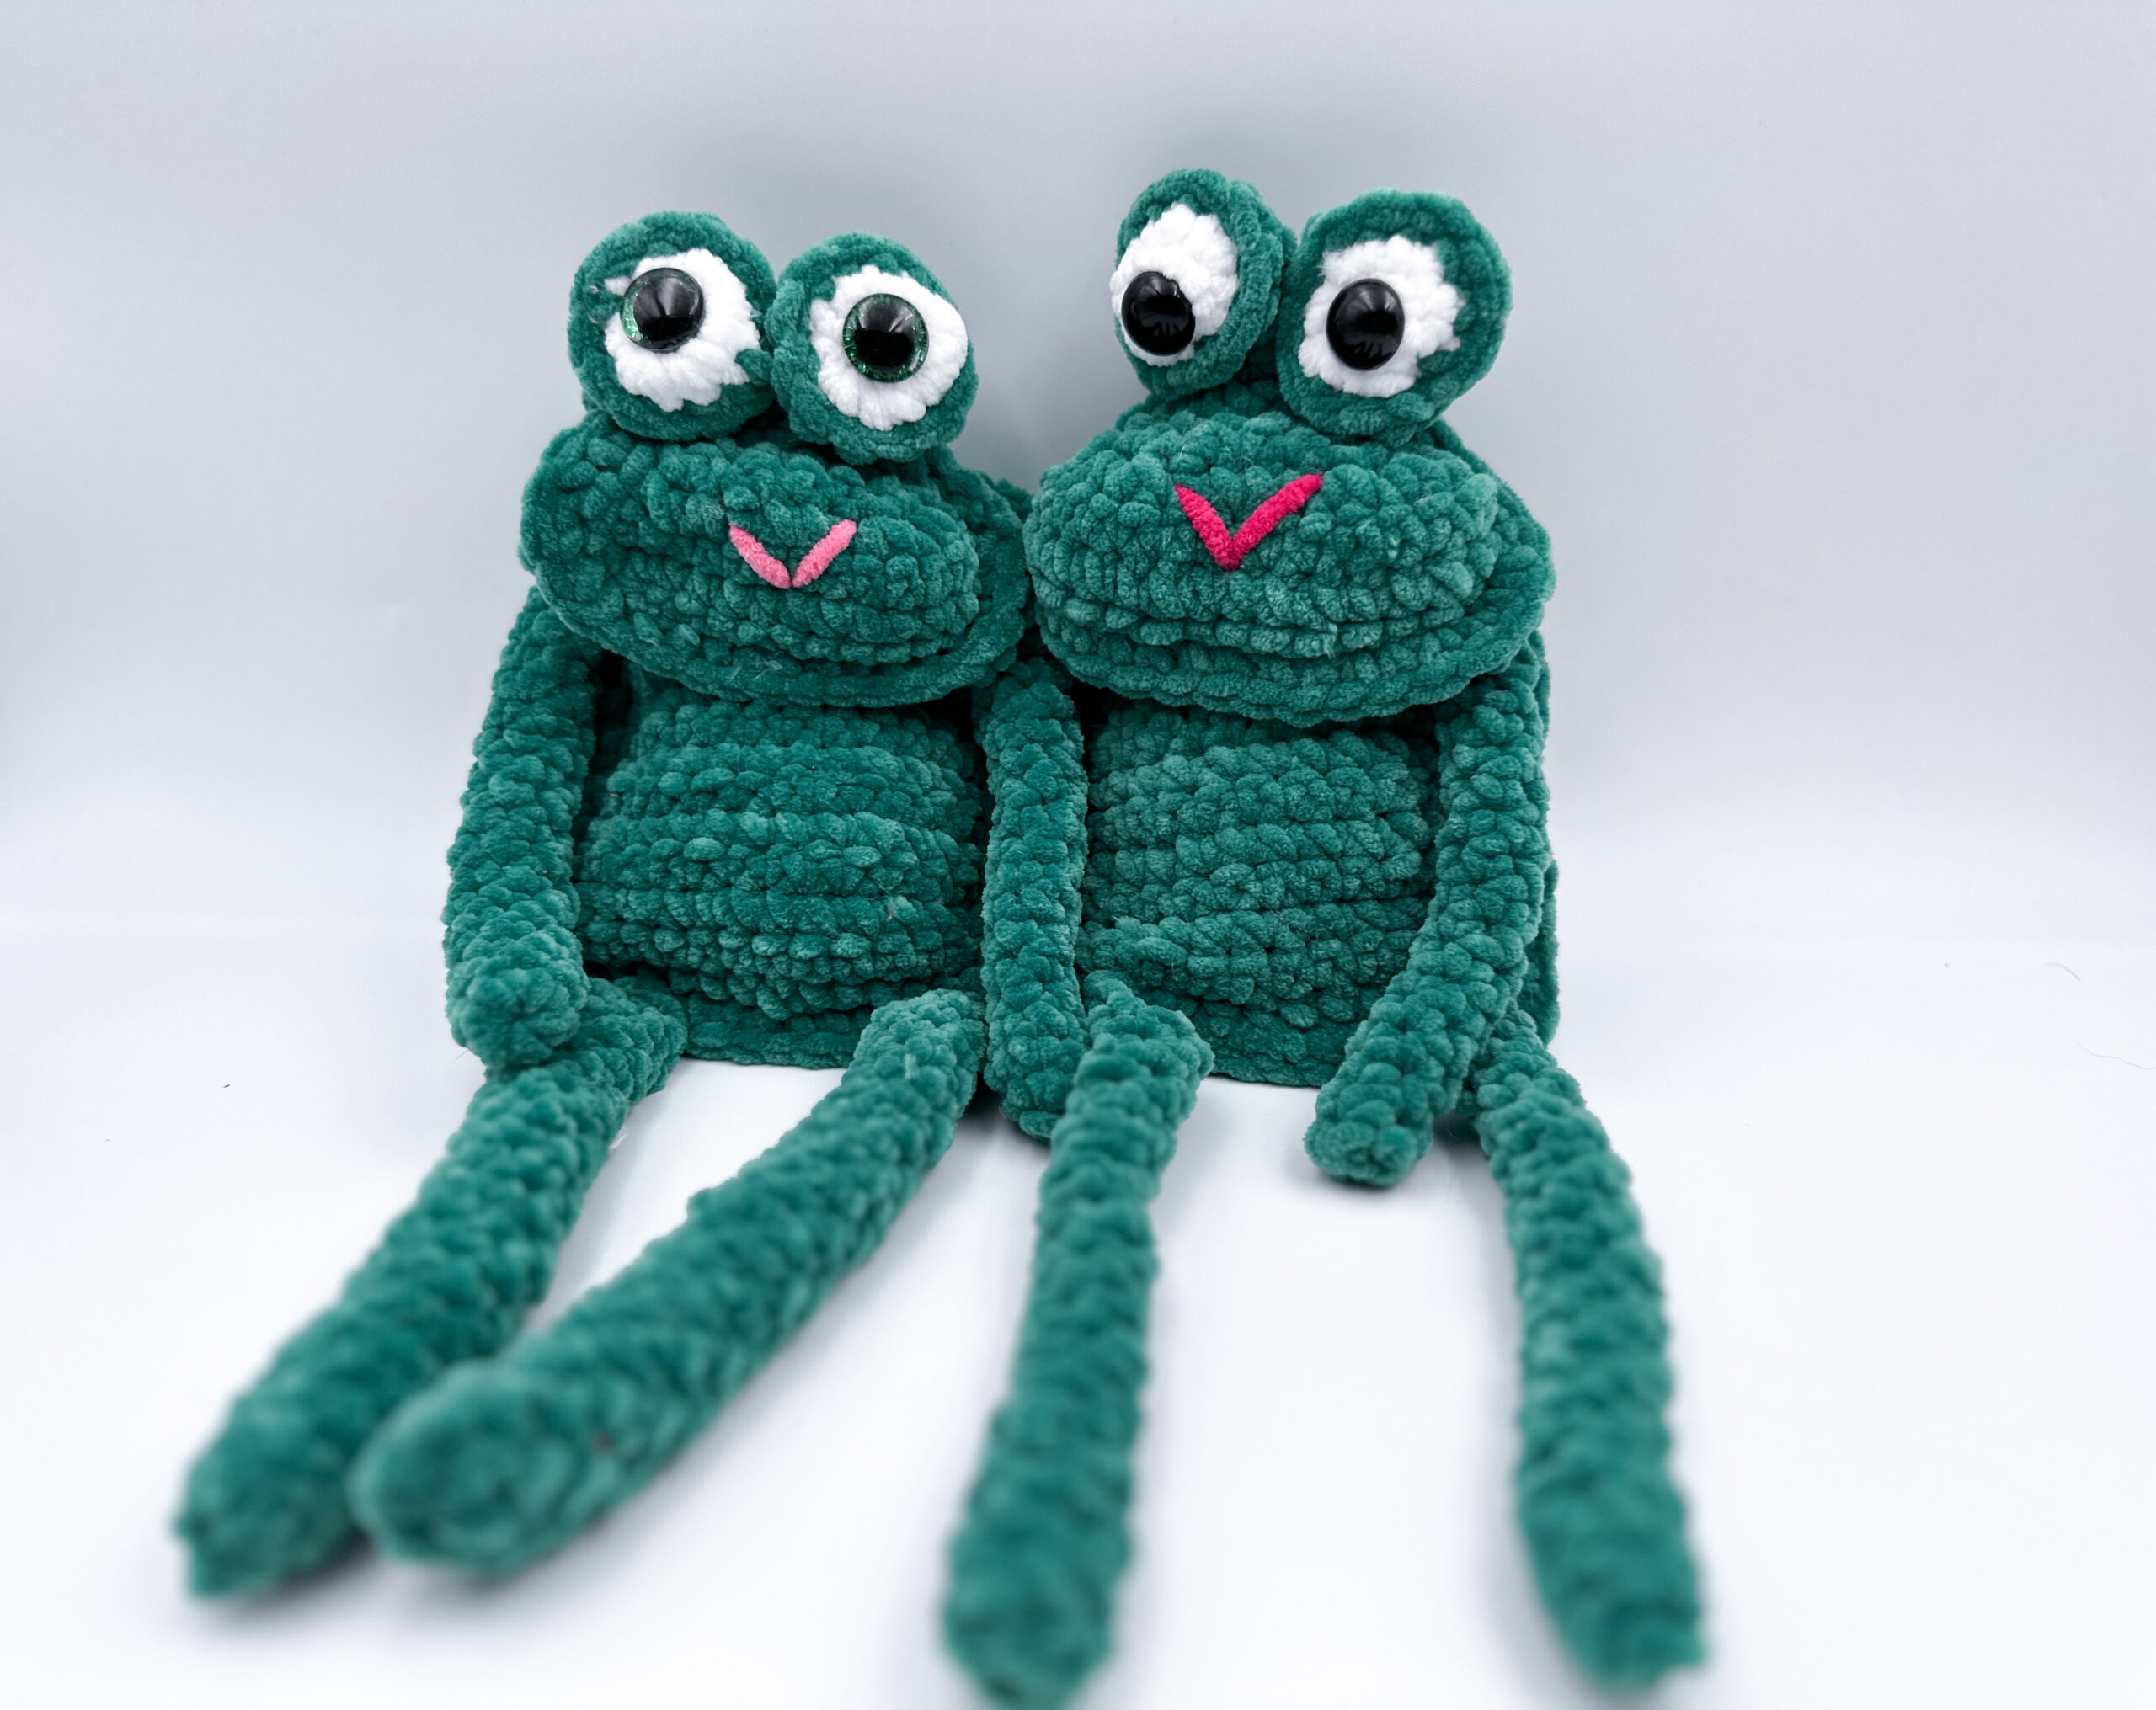
Meet the adorable frog; Leif Frogsson!
Get the pattern on Etsy here.
Die Anletitung gibt es such auf deutsch als Videotutorial. Einfach nach unten scrollen.
I wanted to make something whimsical and easy. I also like to make something "ragdoll-style" every once in a while. By ragdoll-style I mean crocheting two panels and joining them later to make a flat-style toy.
Why a Crochet Frog, You Ask?
A frog is something that I never crocheted before! I have made mice, whales, bees, unicorns, and lots of other crochet animals, but never a frog! So if you ask me, it is about time to make a frog. This is a fun crochet toy that you can make and give away as a gift. Or, do like me and display them on the couch! They are so fun and whimsical, I love them!
How to customize the crochet frog pattern?
You can make a frog with clothes, for example. Just try adding other colors to it. Or you can also play with the colors, it does not have to be green! In nature, there are frogs in many colors, like blue for example. The Blu Poison Dart Frog is blue. It is also extremely poisonous to humans! There are also yellow, red, orange, and purplish frogs, also very beautiful but poisonous.
My frogs, however, are completely safe.
Other free crochet patterns on this blog
Getting Started with Your Crochet Frog
To make a crochet frog, you'll need a few basic supplies:
- Yarn: I used the Honey Bunny yarn from Hobbii, but you can use other yarn to make a different look.
- Crochet Hook: I used a 4,5 mm crochet hook, or choose a hook that will match your yarn.
- Stuffing:
- Safety Eyes: I used 20 mm crochet eyes.
- A Stitch Marker
Video pattern
Deutsche Anleitung
How to crochet Leif Frogsson
Happy crocheting, everyone! 🐸💚
About the pattern
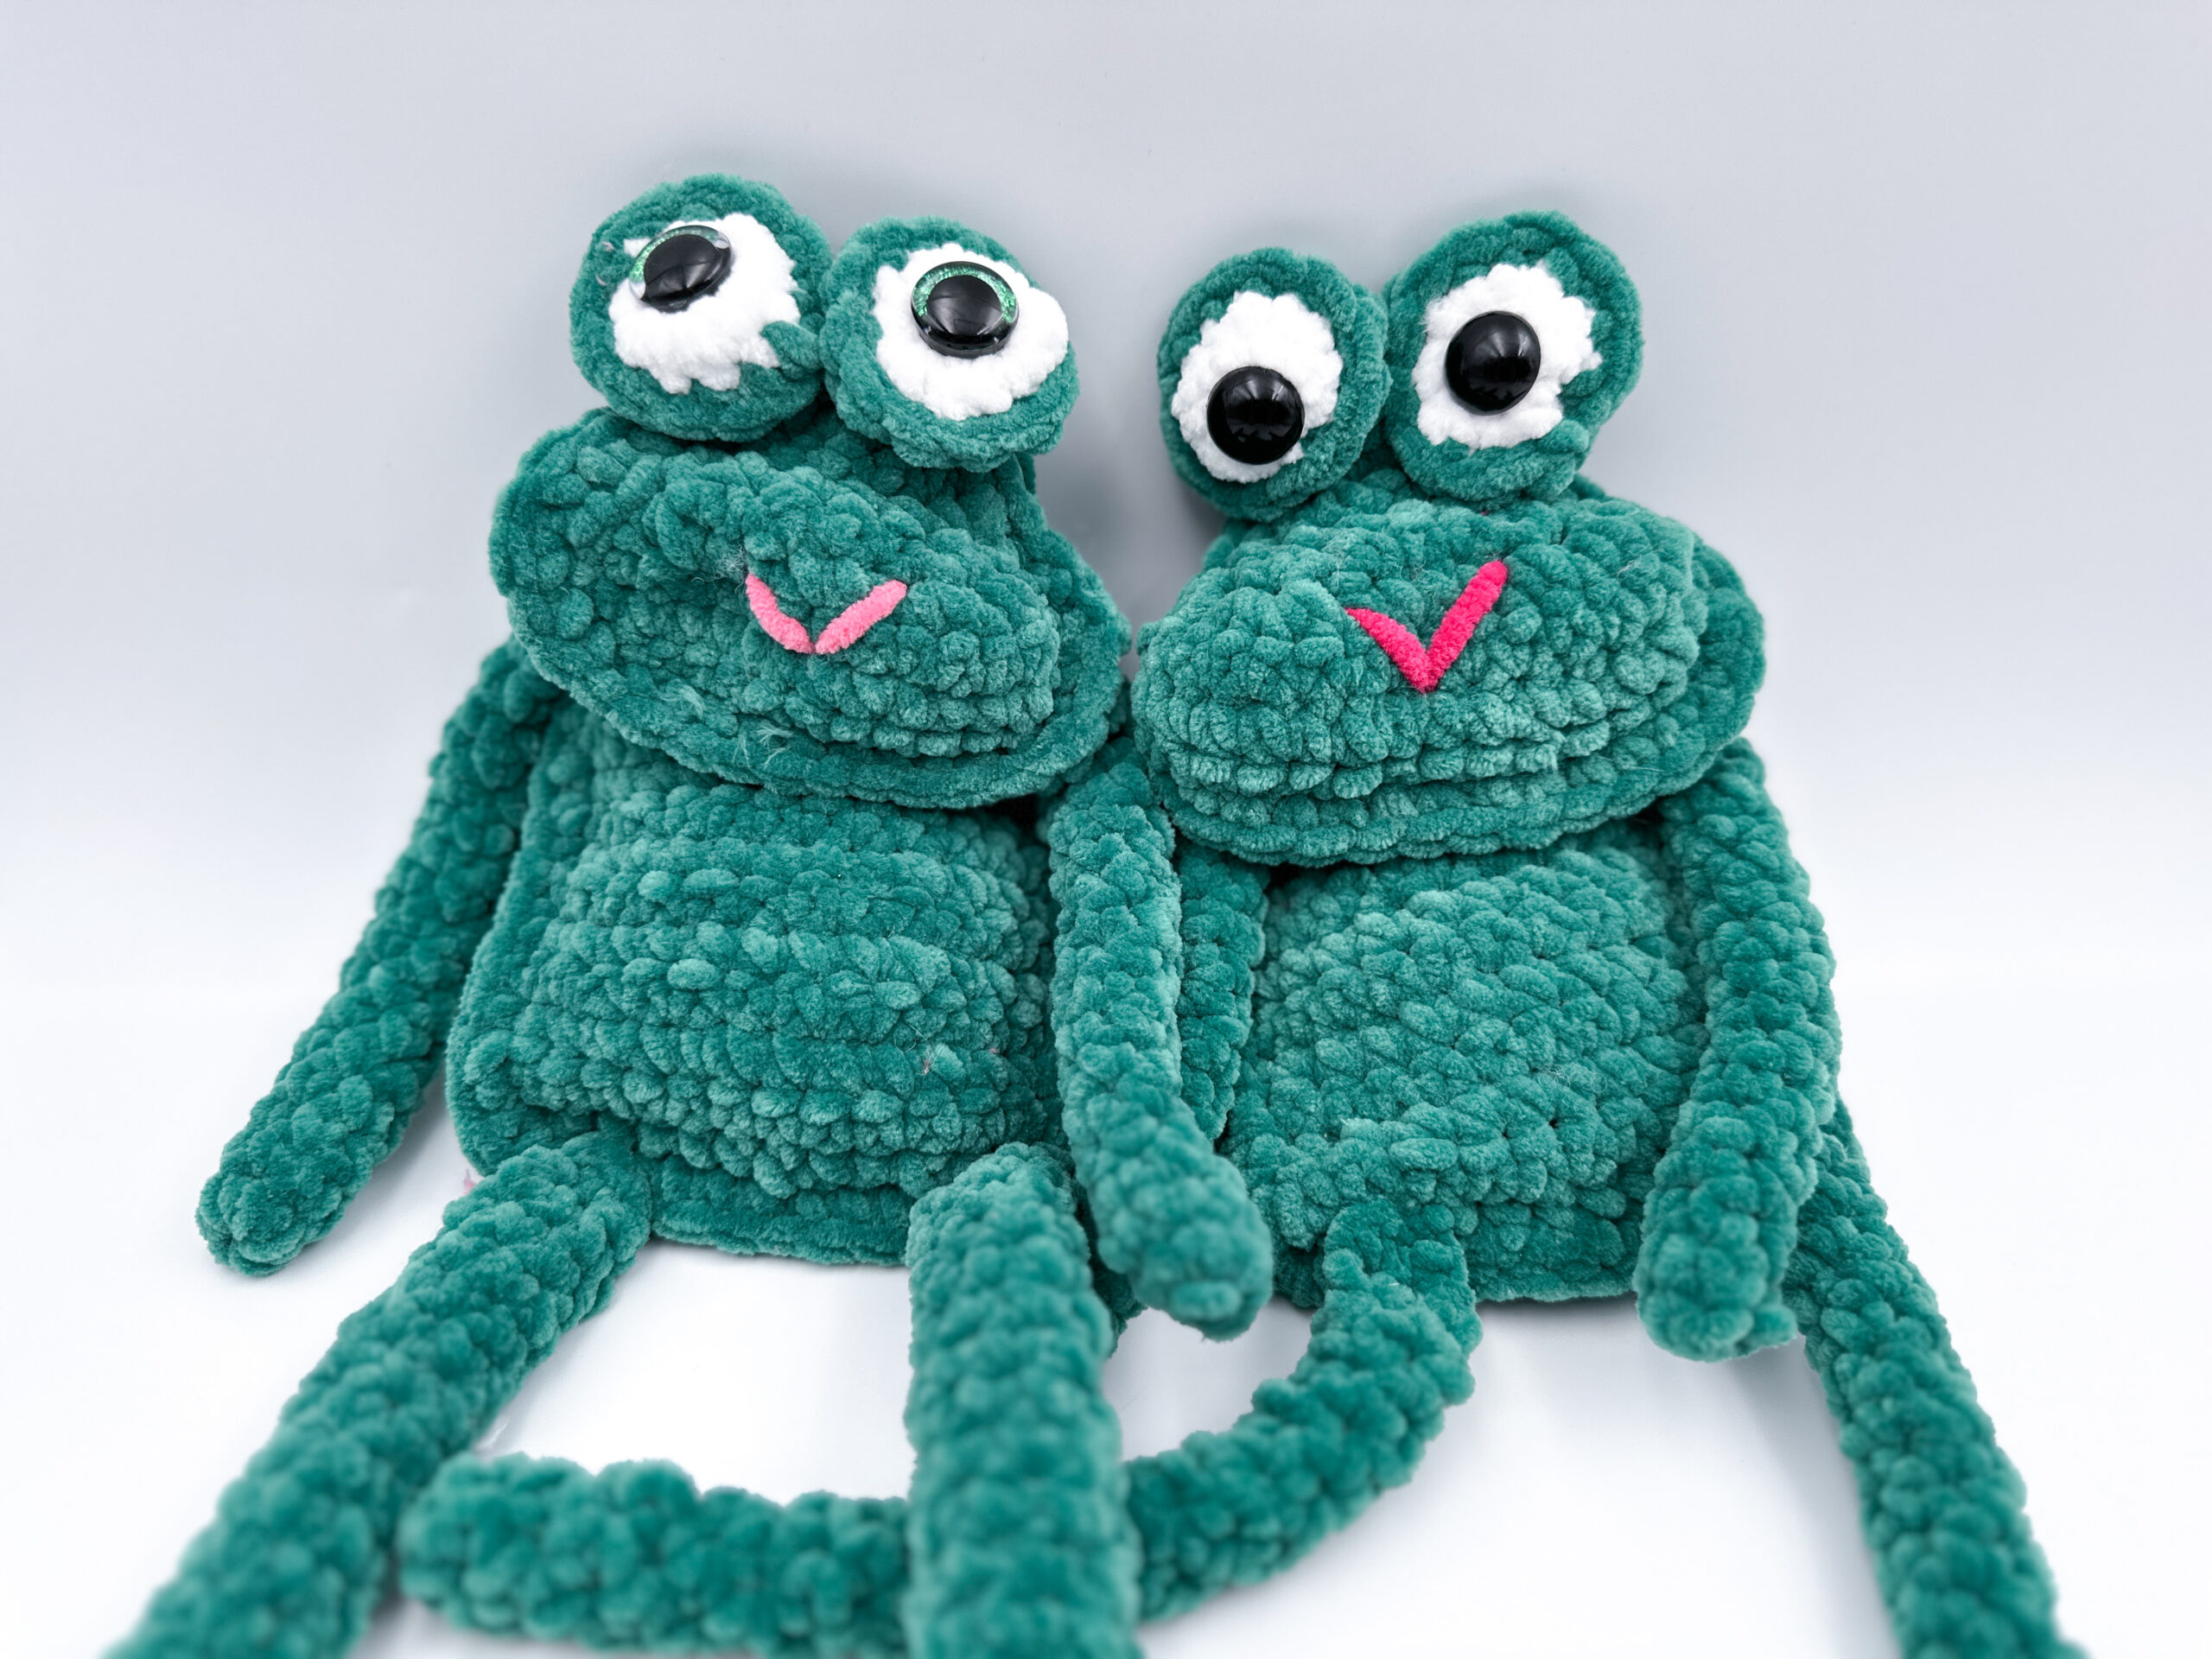
The head, eyes and body are worked in rows. Make two panels and crochet them together. A tip is to not cut the yarn on the second panel and simply crochet them together to avoid weaving in so many ends. I used plush yarn but you can use any kind of yarn. When crocheting in rounds always crochet in continuous rounds.
The finished size is 37 cm/14,5 inches.
Abbreviations – Us term
Ch-chain
Rnd–round
R-row
St–stitch
Sc–single crochet
Sc dec–single crochet decrease
Sc inc–single crochet increase, 2 single crochet in one stitch
Mr–magic ring
Sl st- slip stitch
Materials
Yarn. I used 1 skein of honey bunny in green from Hobbii and 10 g of white.
Safety eyes 20 mm
4,5 mm crochet hook
Leftover in pink for the mouth
Filling materials
Stuffing
Scissors
Let’s connect!
yarnhild@outlook.com
www.yarnhild.com
Youtube:Crochet with Yarnhild/ Häkeln mit Yarnhild
Instagram and Tiktok: @Yarnhild
Body
In green. Make 2 panels
R1) Ch 14, 1 sc across, ch 1, turn (13 sc)
R2- 12) 13 sc, ch 1, turn, (13 sc)
R13) sc dec, 9 sc, sc dec (11 sc)
R14) 11 sc. Cut the yarn and fasten off on the first panel, not the second one.
Lay the panels on each other and crochet them together with 1 sc in each st. Stuff lightly.
Arms
In green. Crochet in continuous rounds. Make 2
Rnd 1) 6 sc in a mr.
Rnd 2- 15) 6 sc
Pinch the hole flat and close in with sc.
Fasten off. Leave a long tail for attaching
Legs
In green. Crochet in continuous rounds. Make 2
Rnd 1) 6 sc in a mr.
Rnd 2- 20) 6 sc
Pinch the hole flat and close in with sc.
Fasten off. Leave a long tail for attaching.
Head
Make 2 panels
Crochet in rows. Using green yarn
R1) Ch 15, 1 sc across, ch 1, turn (14 sc)
R2) sc inc, 12 sc, sc inc , ch 1, turn (16 sc)
R3) 16 sc, ch 1, turn, (16 sc)
R4) sc dec x 3, 4 sc, sc dec x 3, ch 1, turn (10 sc)
R5) sc dec x 2, 2 sc, sc dec x 2, ch 1, turn (6 sc)
R6-8) 6 sc, ch 1, turn (6 sc)
When finishing the 2. panel, do not finish off, only finish and attach yarn on the first panel. Lay the panels on each other and crochet them together. 1 sc in each st. Stuff lightly before closing. Leave a tail for attaching the head to the body.
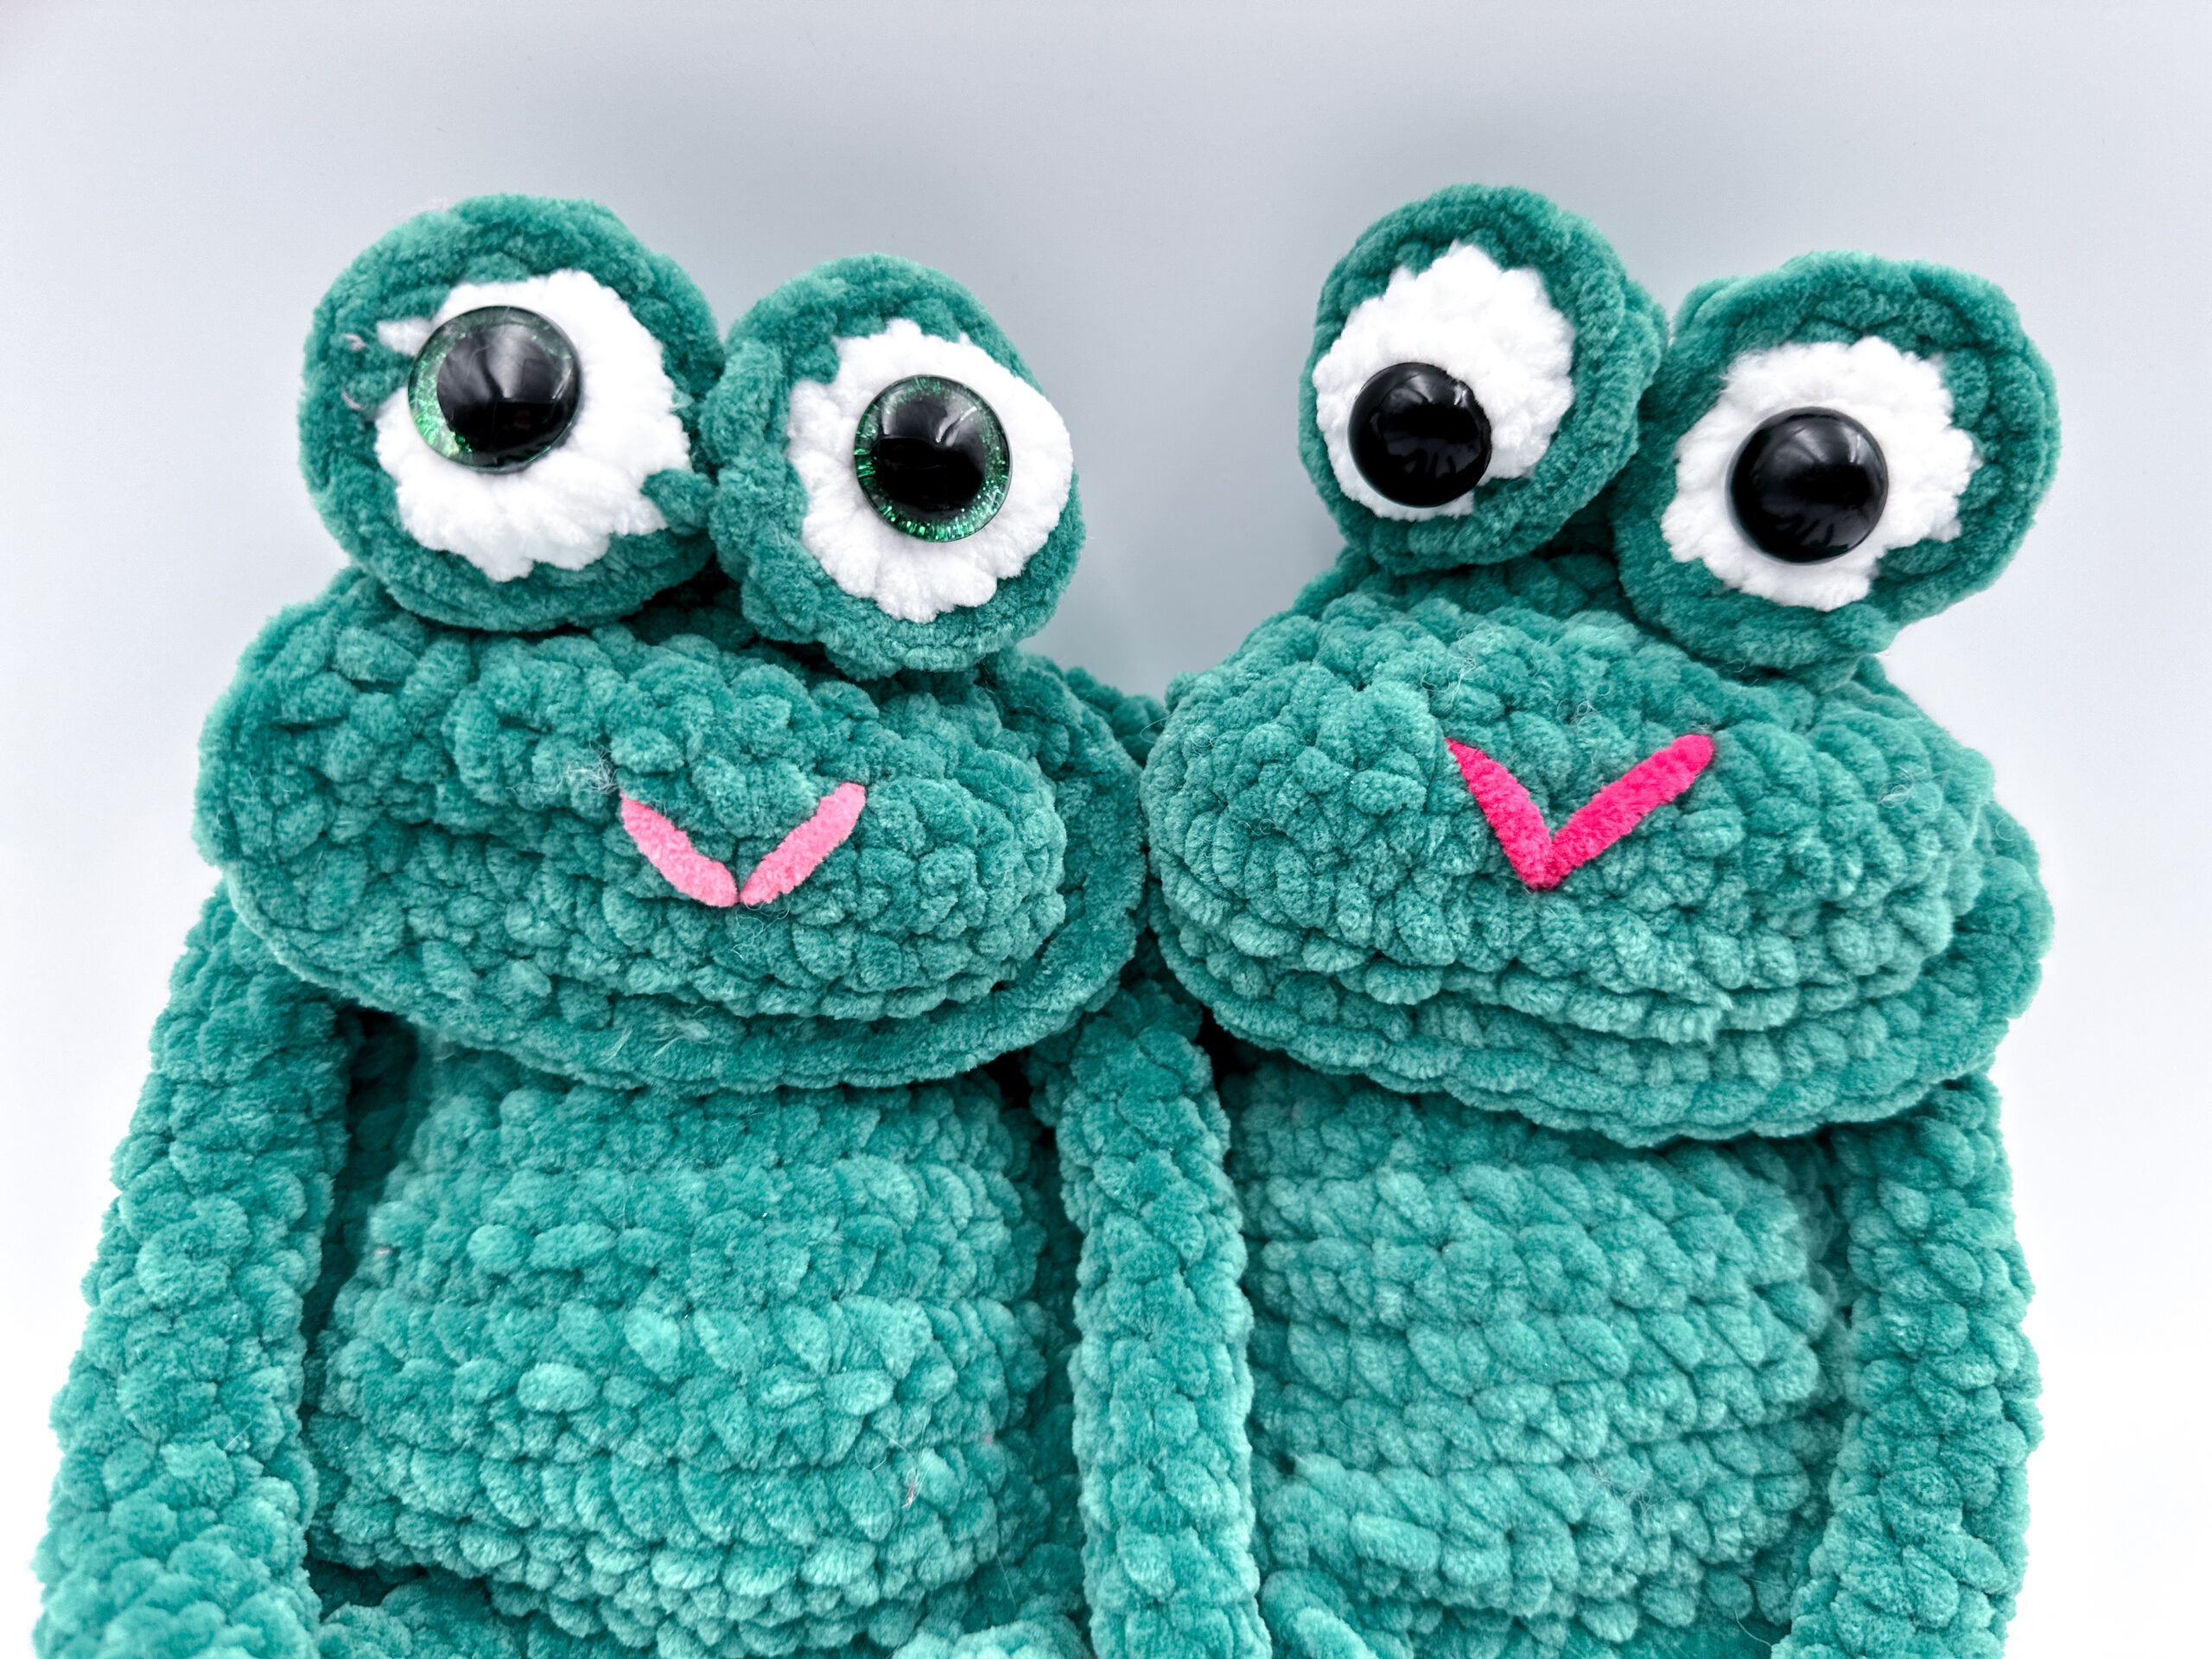
Eyes
Make 2. Using white and green yarn. Start with white
Crochet in rounds. Make 4 panels. Make the white ones first, then the green ones. Cut the yarn on the white panel, but not on the green one (easier to crochet the panels together).
In white
Rnd 1) 6 sc in a mr (6 sc)
Rnd 2) Sc inc x 6 (12 sc)
Fasten off.
Make the same using green. Make 4 panels.
Lay the 2 with white and green on each other with the white panel facing you and crochet them together with 1 sc in each st. Attach safety eyes before closing. Leave a longer tail for attaching.
Attaching
Sew eyes on the top of the head (narrowest part).
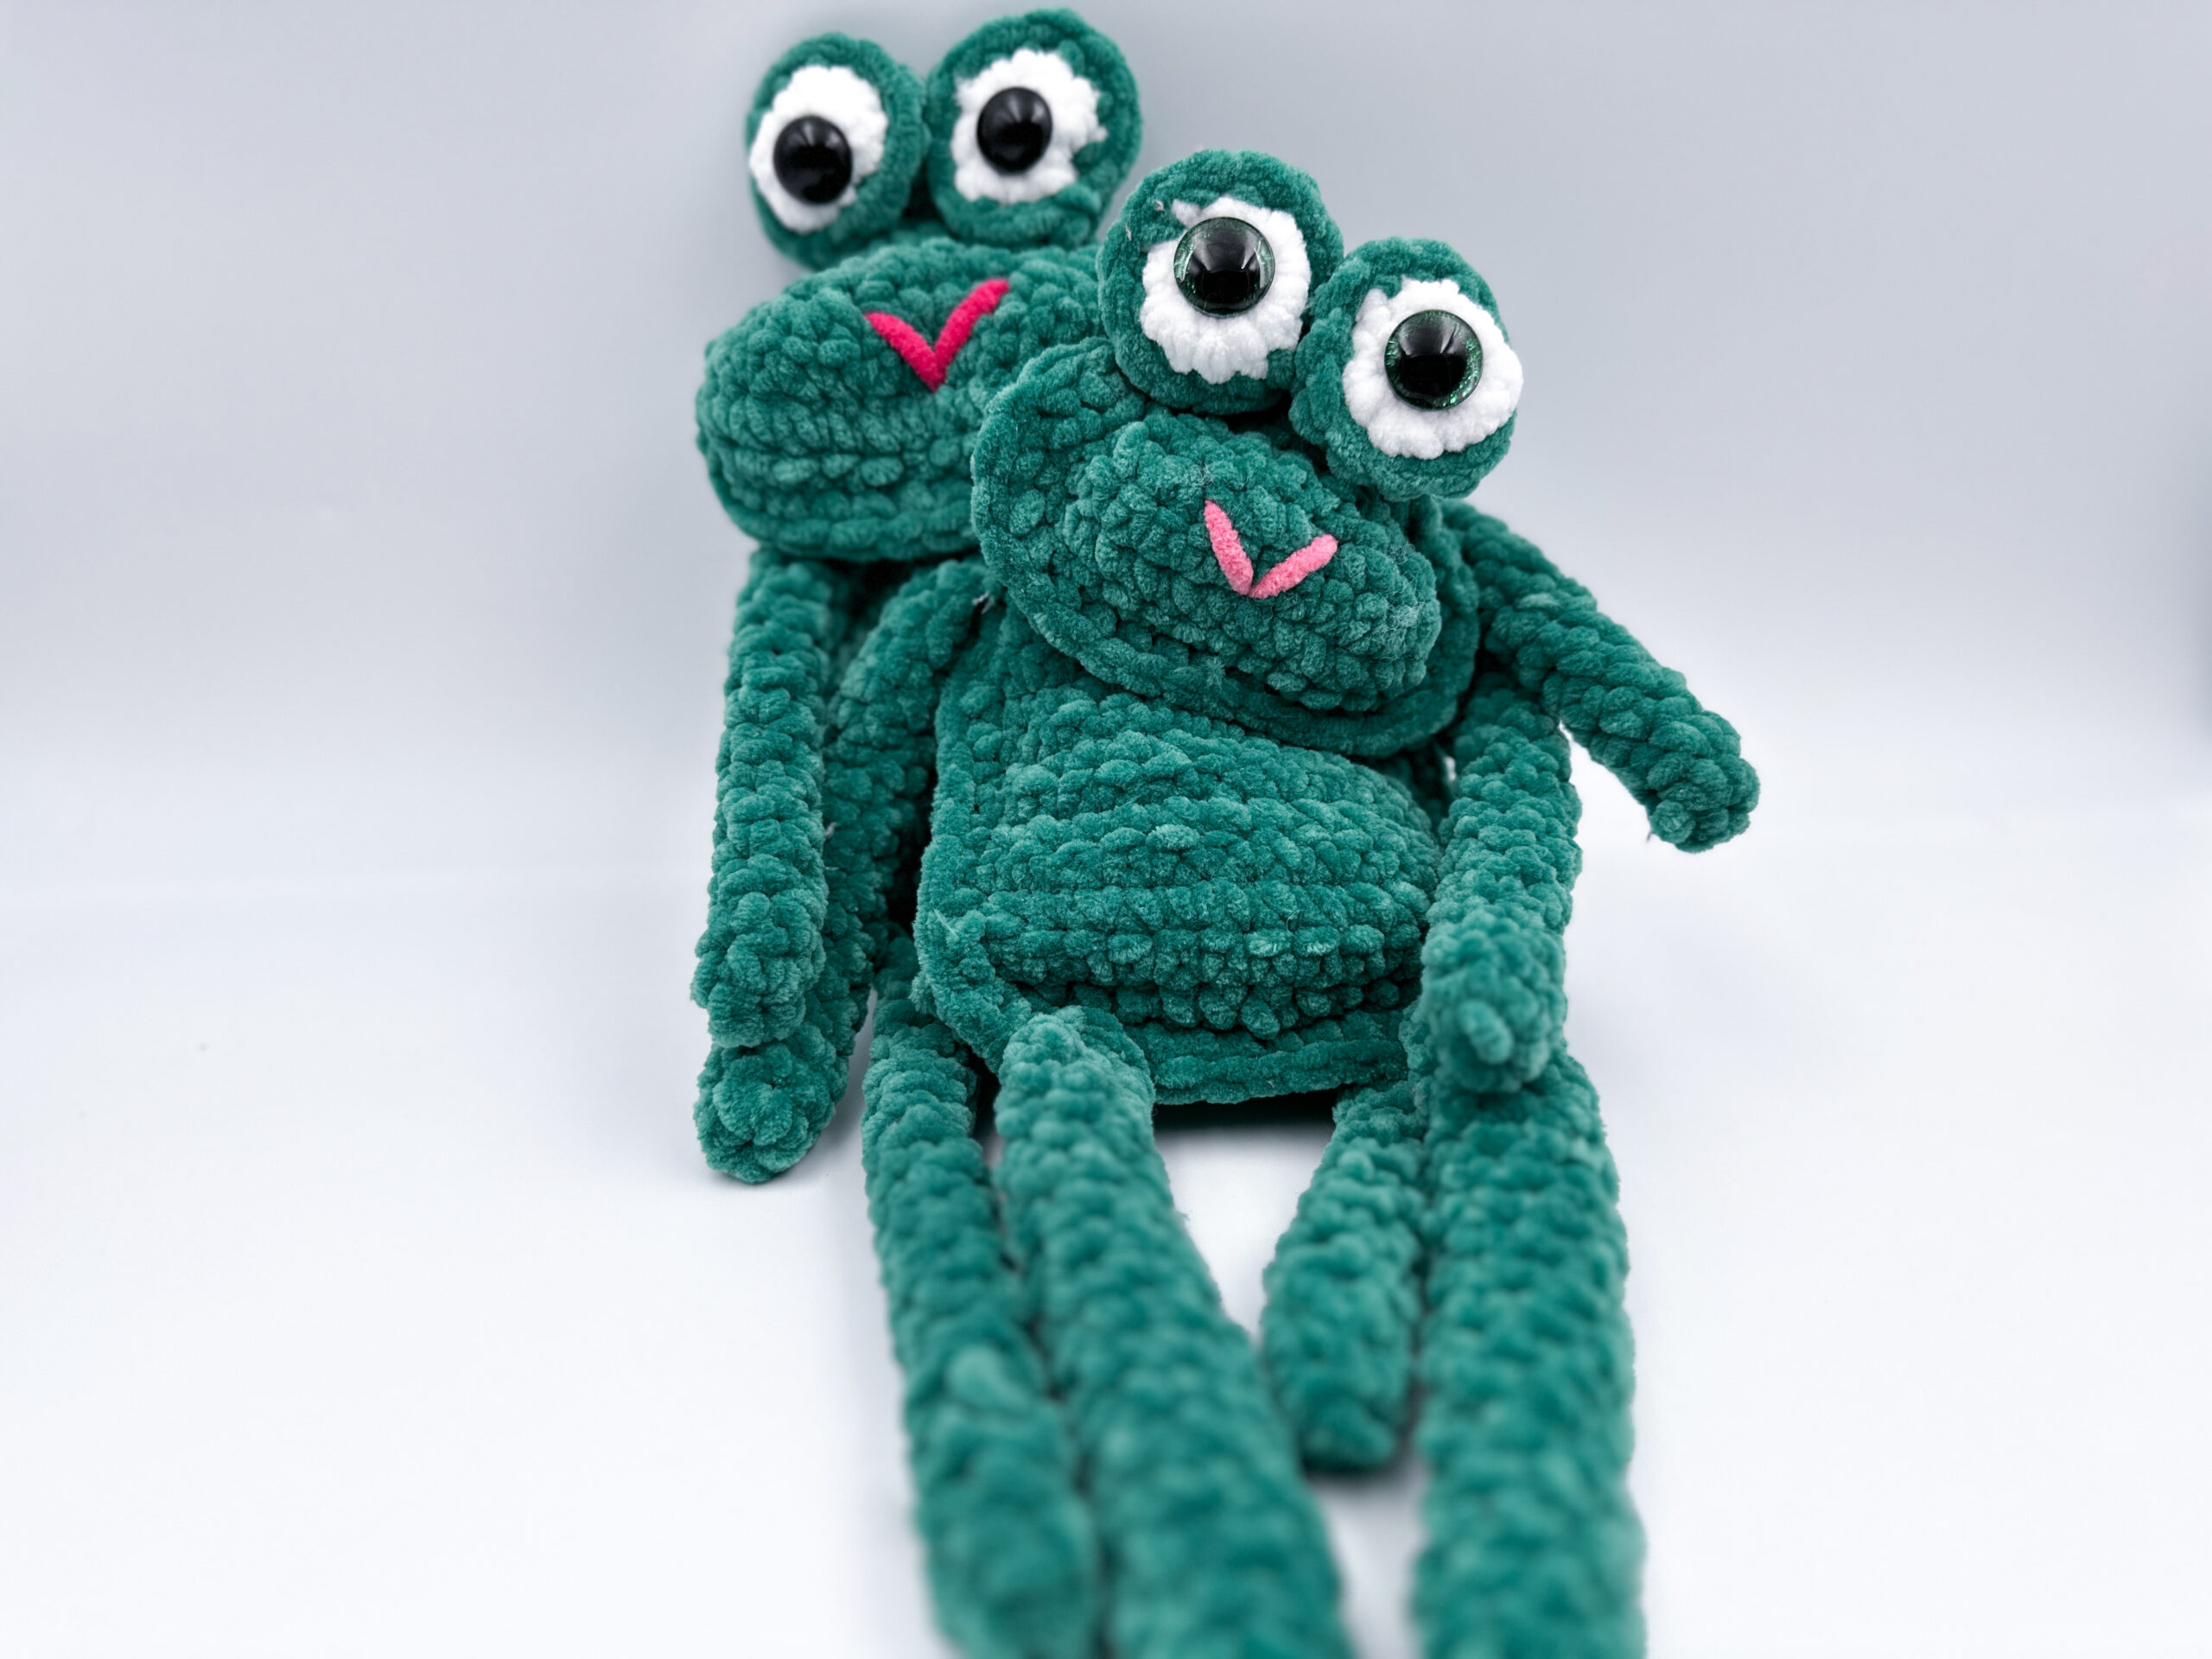
Embroider on a mouth in the middle of the widest part of the head. Attach the head between rows 11-13 on the body. Use the tail from the head to attach the head. Using small stitches to make it neat. Sew on the arms and the legs on the corners of the body.
Lay the panels on each other.
Crochet the panels together. Make sure to sew in the ends in the middle before doing this.
The head panel. Attach the eyes on the narrowest part.

Do excited to make for great grandson
Very cute frog! Can't wait to make one for my next show! Thank you for making this free for us! 💖