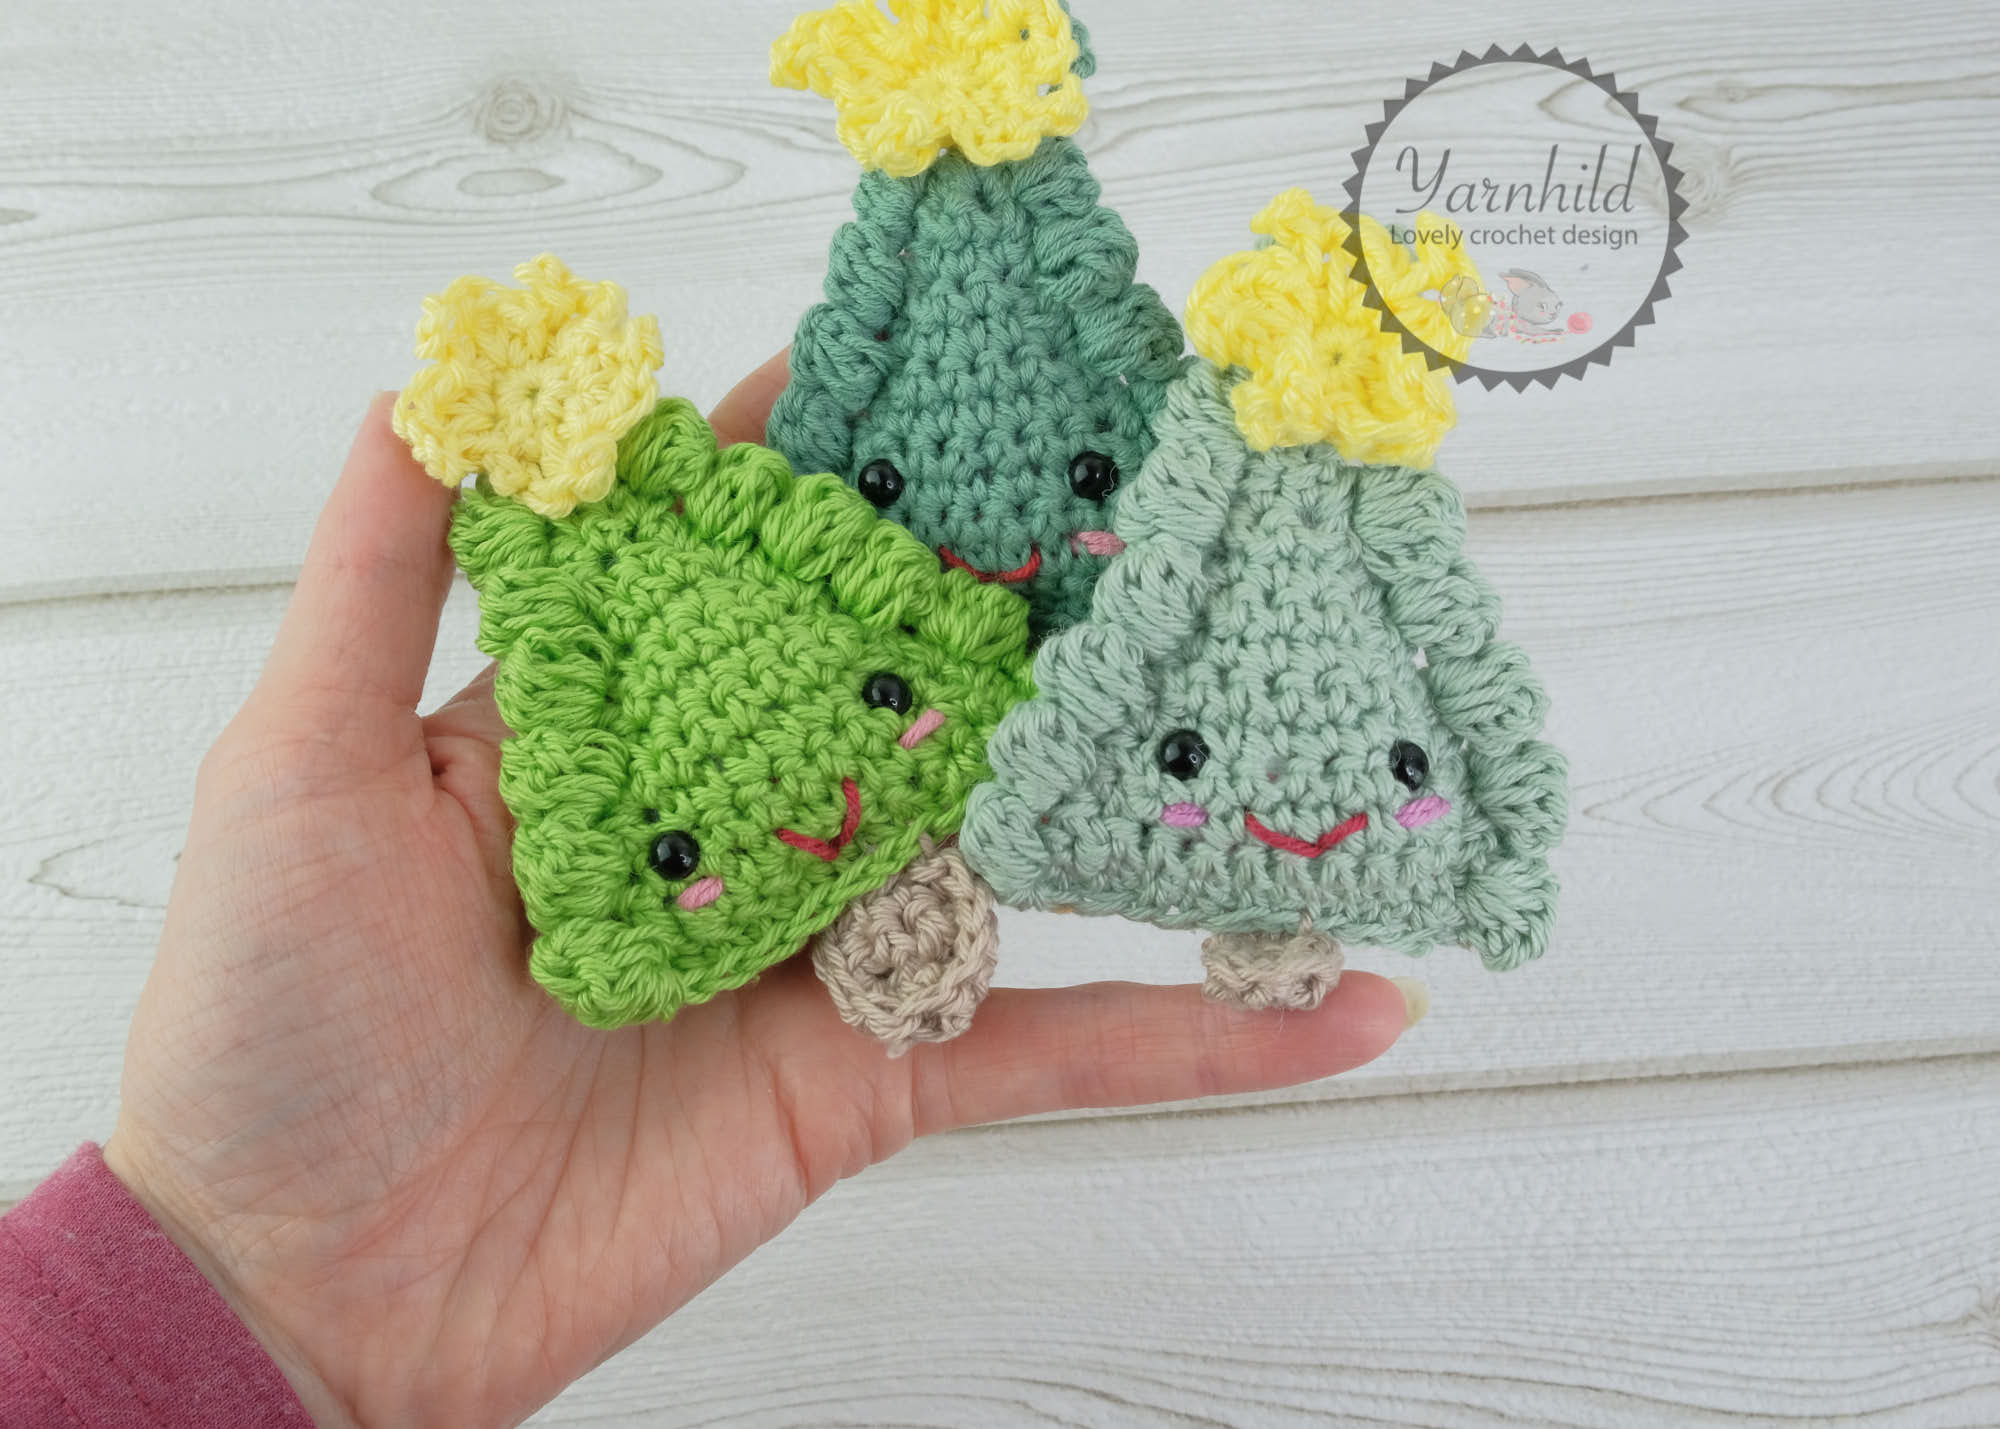
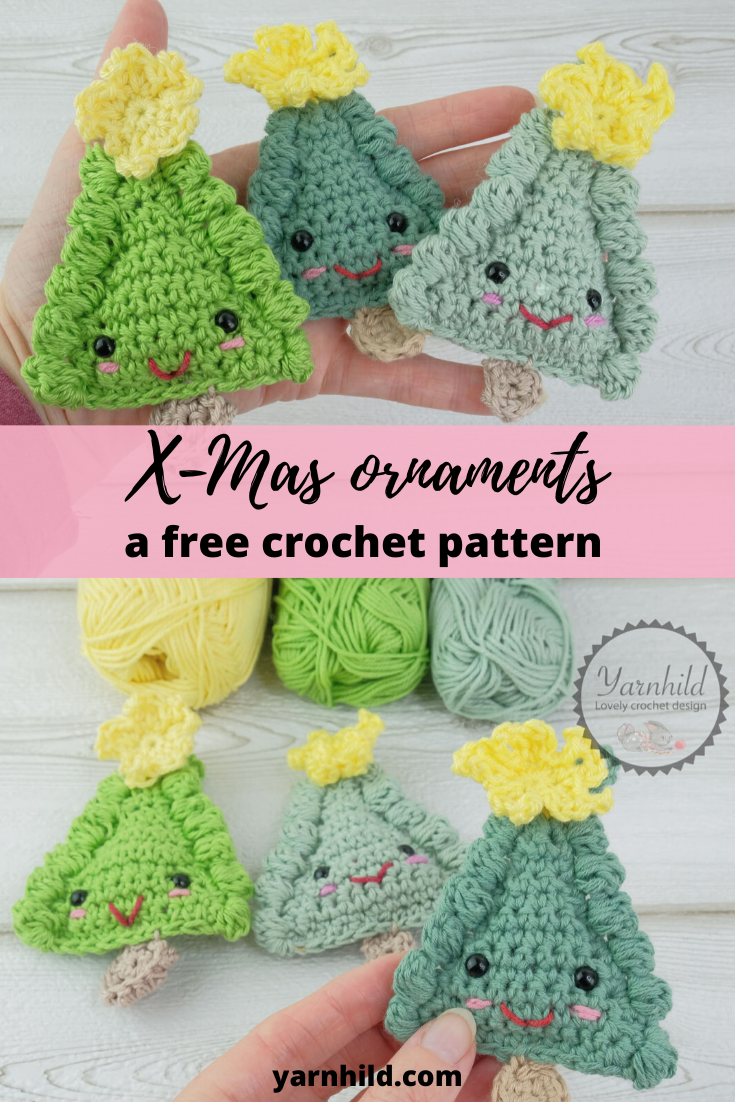
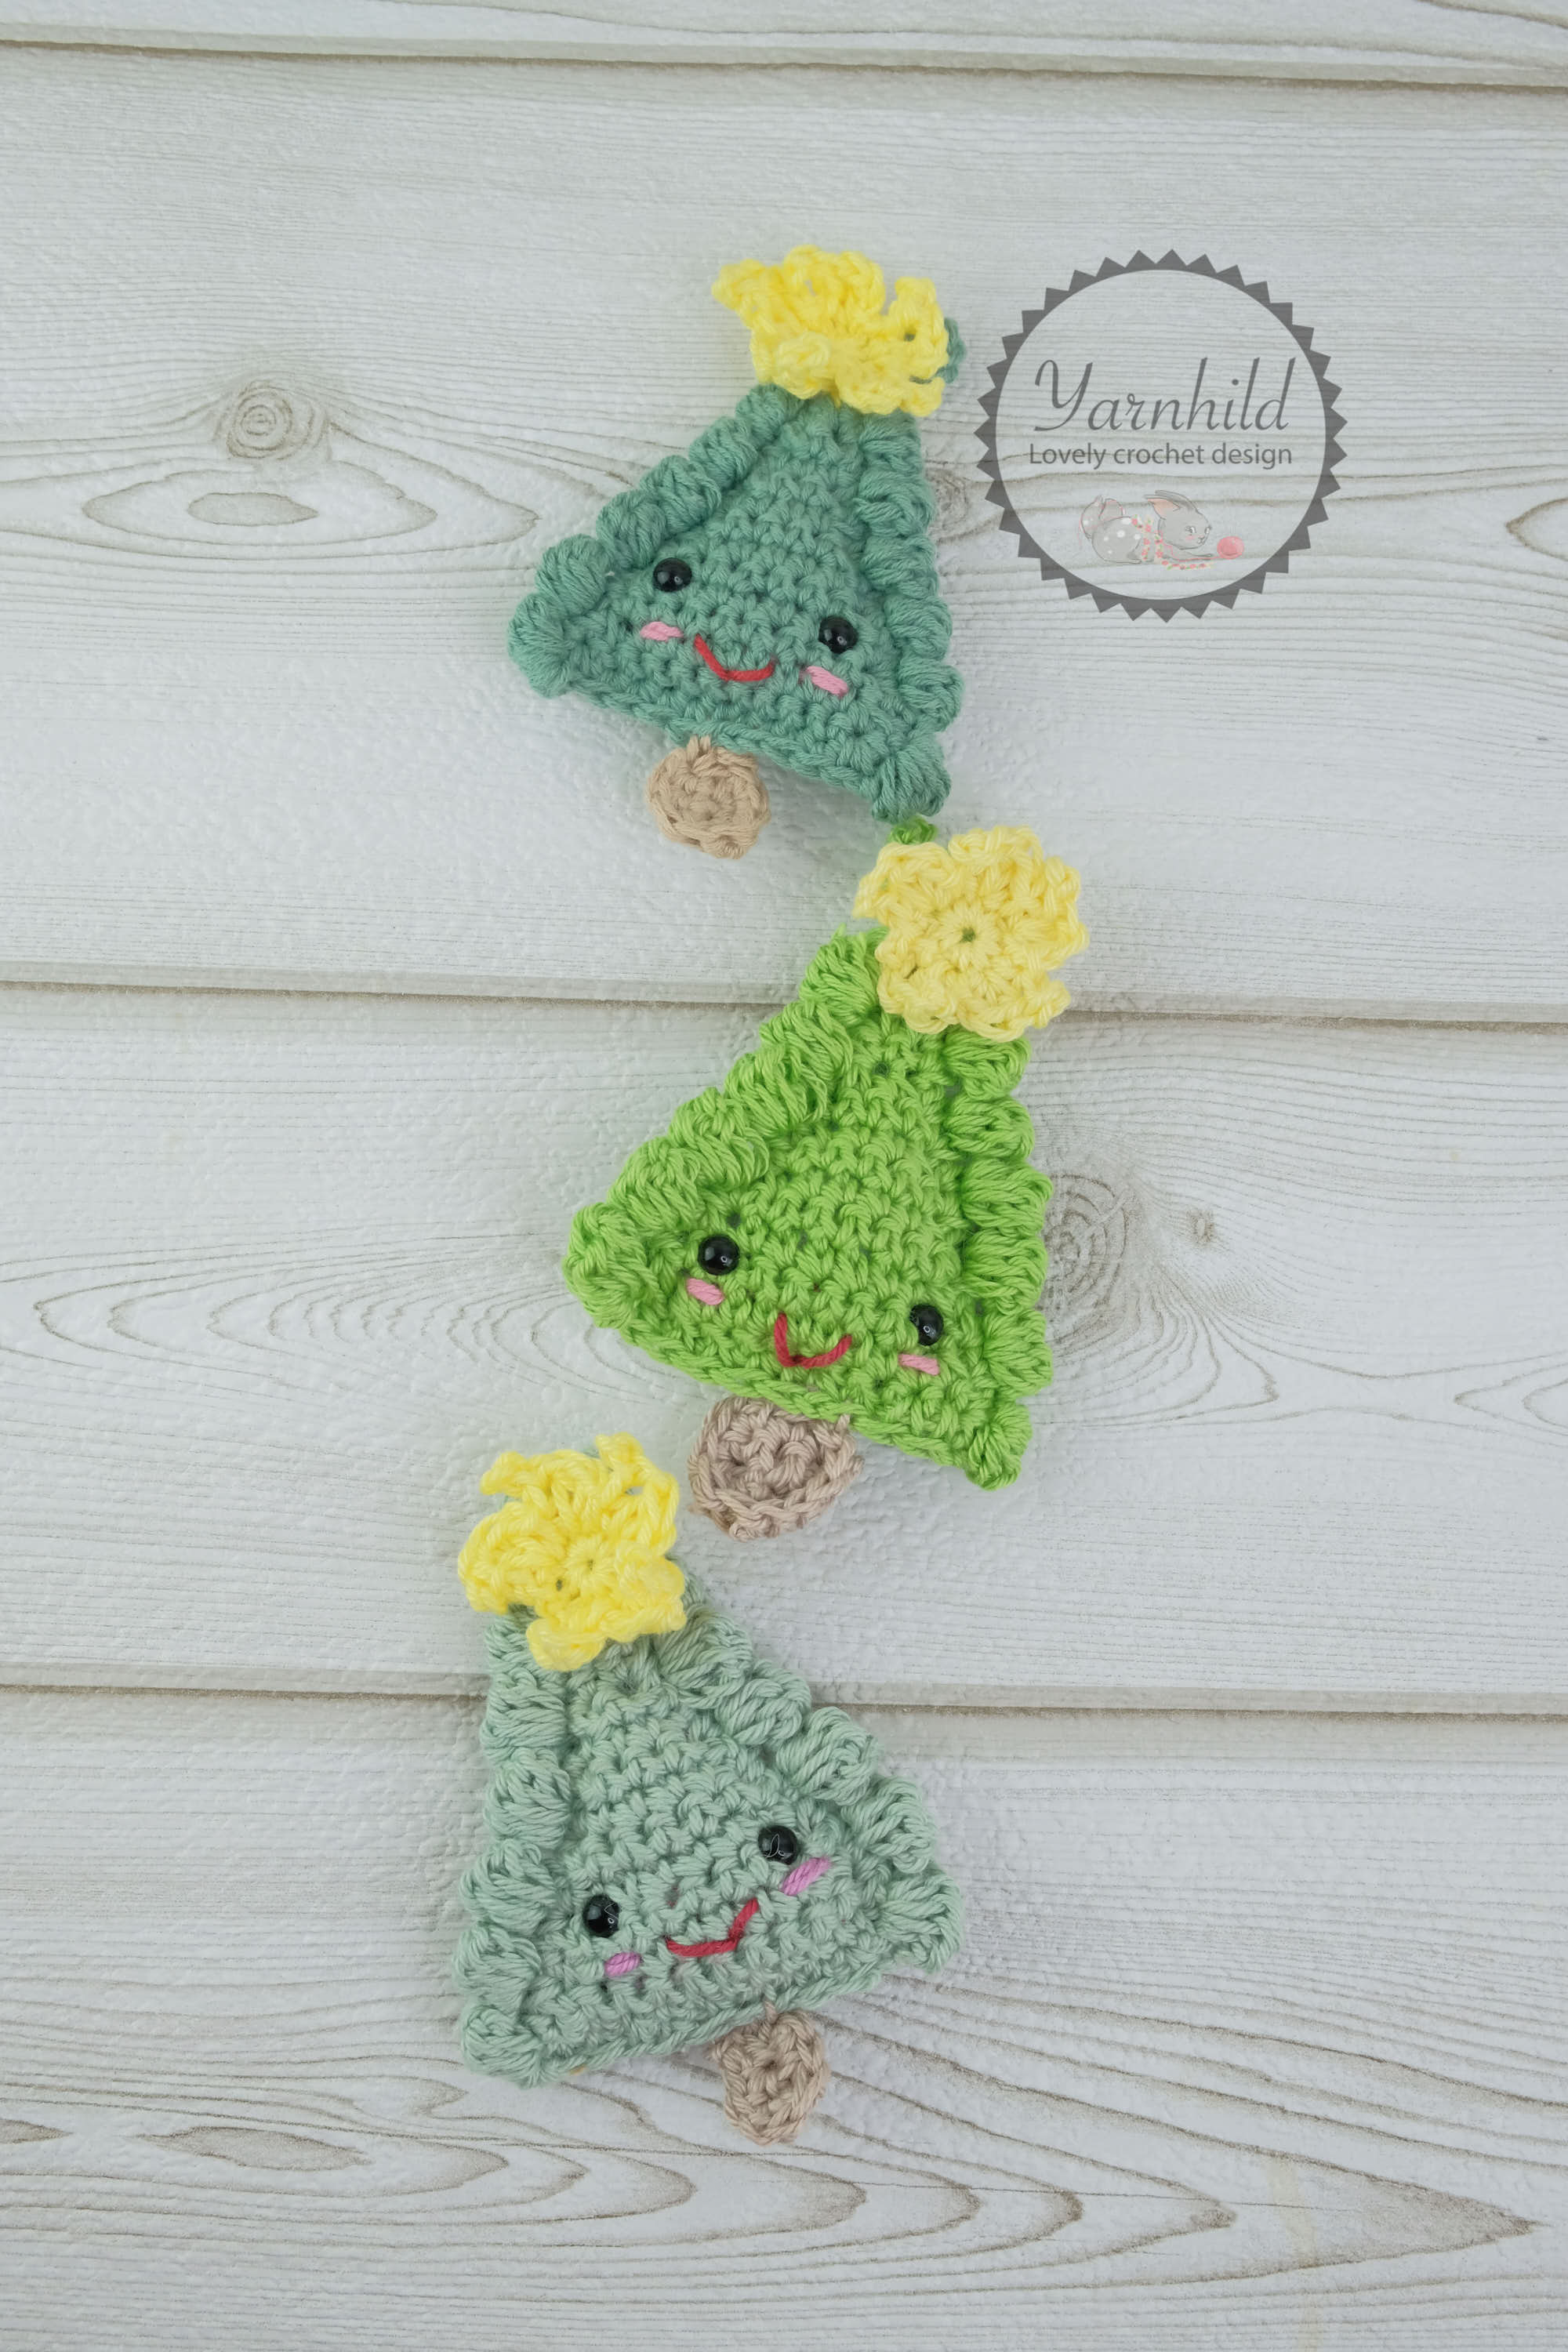
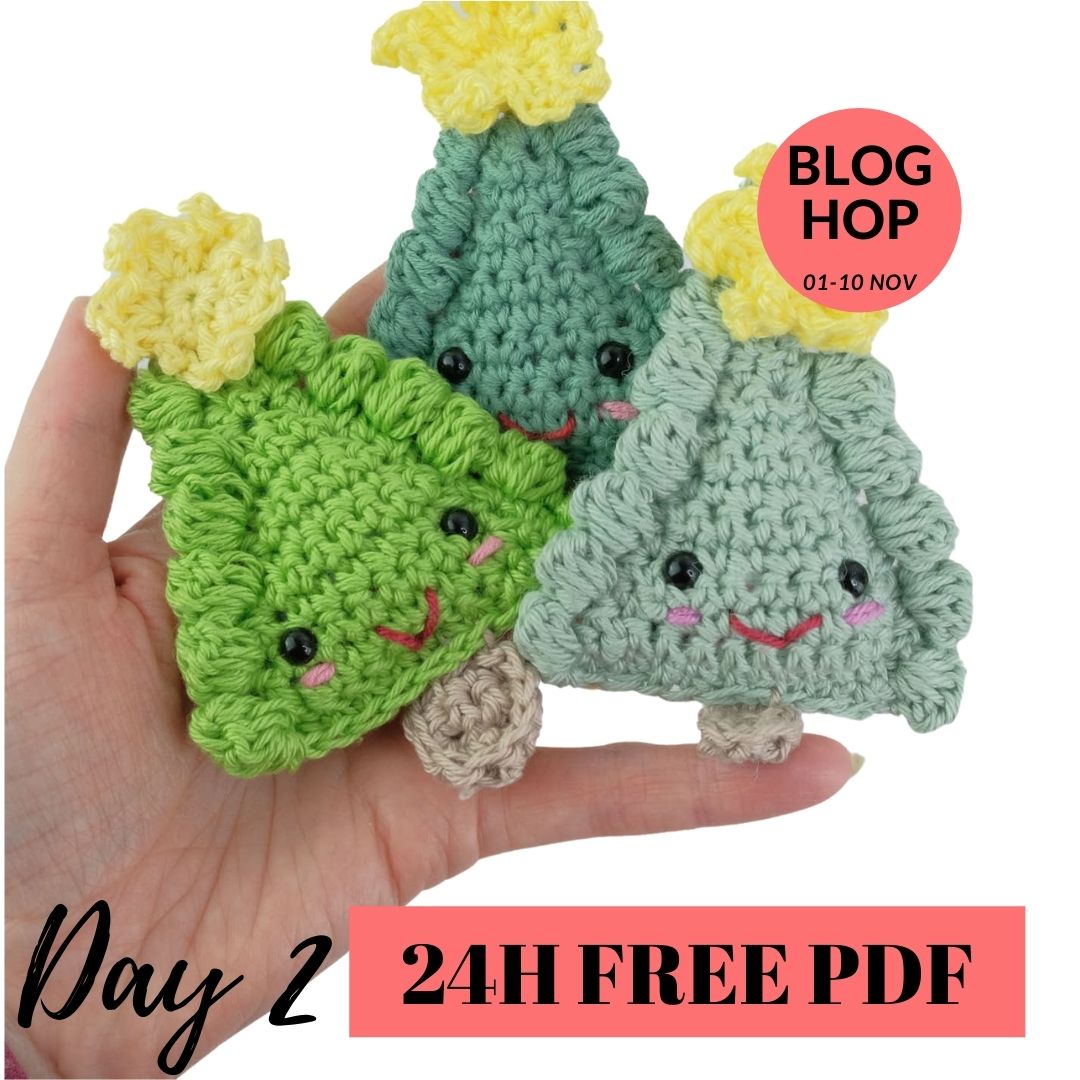
Fiber friends! I am happy to bring you the third ornament pattern to the blog, a crochet Christmas tree!
The idea for the crochet Christmas tree was actually born last year, I was thinking of making a ragdoll styled crochet tree with bobble stitches. So I made one with bobbles only. However, I wasn’t happy with the outcome so I put it away.
Then I picked up the project again a couple of weeks ago and redesigned the ornament tree. This time I was happy with the outcome and I am so excited to share it with you today!
As you know, I love quick and easy projects, and this is no exception. These cute Christmas trees are quick to make and I think I made one in less than 30 minutes! They are a small, quick and fun project and I hope you’ll love it as much as I do!
Materials
I am using a 2.5 mm crochet hook and cotton yarn for this project. I am using a German yarn called Schahenmayr and if you want to check out this yarn, you can click on the link below. They have put together 20 skeins for 59$. One skein only costs 2.95$ and that’s even cheaper than here in Germany! I really recommend this yarn, it’s the best amigurumi yarn that I’ve tried!
Markets
I have made several for a Christmas market, for my son’s school this year. If you are crocheting for markets, you are very welcome to use my design! However, I do ask that you give me credit for it.
Video tutorial
For those of you who are more visual, I have made a video tutorial! If you don’t know how to make the bobble stitch, you can go and check it out. Please subscribe to my channel and help me grow! By the way, did you know that there is a little bell next to the subscribe button? If you hit that, you’ll get notified every time I upload a new video!
Norwegian and German translations
This time I have translated the pattern in Norwegian and German. I’d love to translate every pattern, but unfortunately, that’s not always possible. But I will do it if I find the time and energy! You can purchase the translations in my shop, Etsy or Ravelry.
Print-friendly pdf
You can find the written pattern in my Etsy shop!
When you purchase something from my shop, you are supporting my small business. Thank you!
Other Christmas crochet patterns in the ornament series
I’ve also released other quick ornament patterns over the last weeks. Check out these posts as well!
Crochet Christmas lamb ornaments
Newsletter
Make sure to subscribe to our newsletter so you don’t miss any fiber news!
Crochet Christmas tree
Abbreviations – US terms
- CH– chain
- ST – stitch
- SL ST – slip stitch
- SC – single crochet
- DC – double crochet
- HDC – half double crochet
- MR – magic ring
- Picot stitch – chain 3, sl st in the first chain
- SC DEC – decrease, two single crochet stitches on one stitch
- Rnd – round
- ** – repeat everything within the star
- R – row
Materials
Filling material
Crochet hook 2.5 mm
Safety eyes 6 mm
Scissors
Yarn sports weight. Color green and yellow. Small amounts of brown/beige, pink, red.
Information
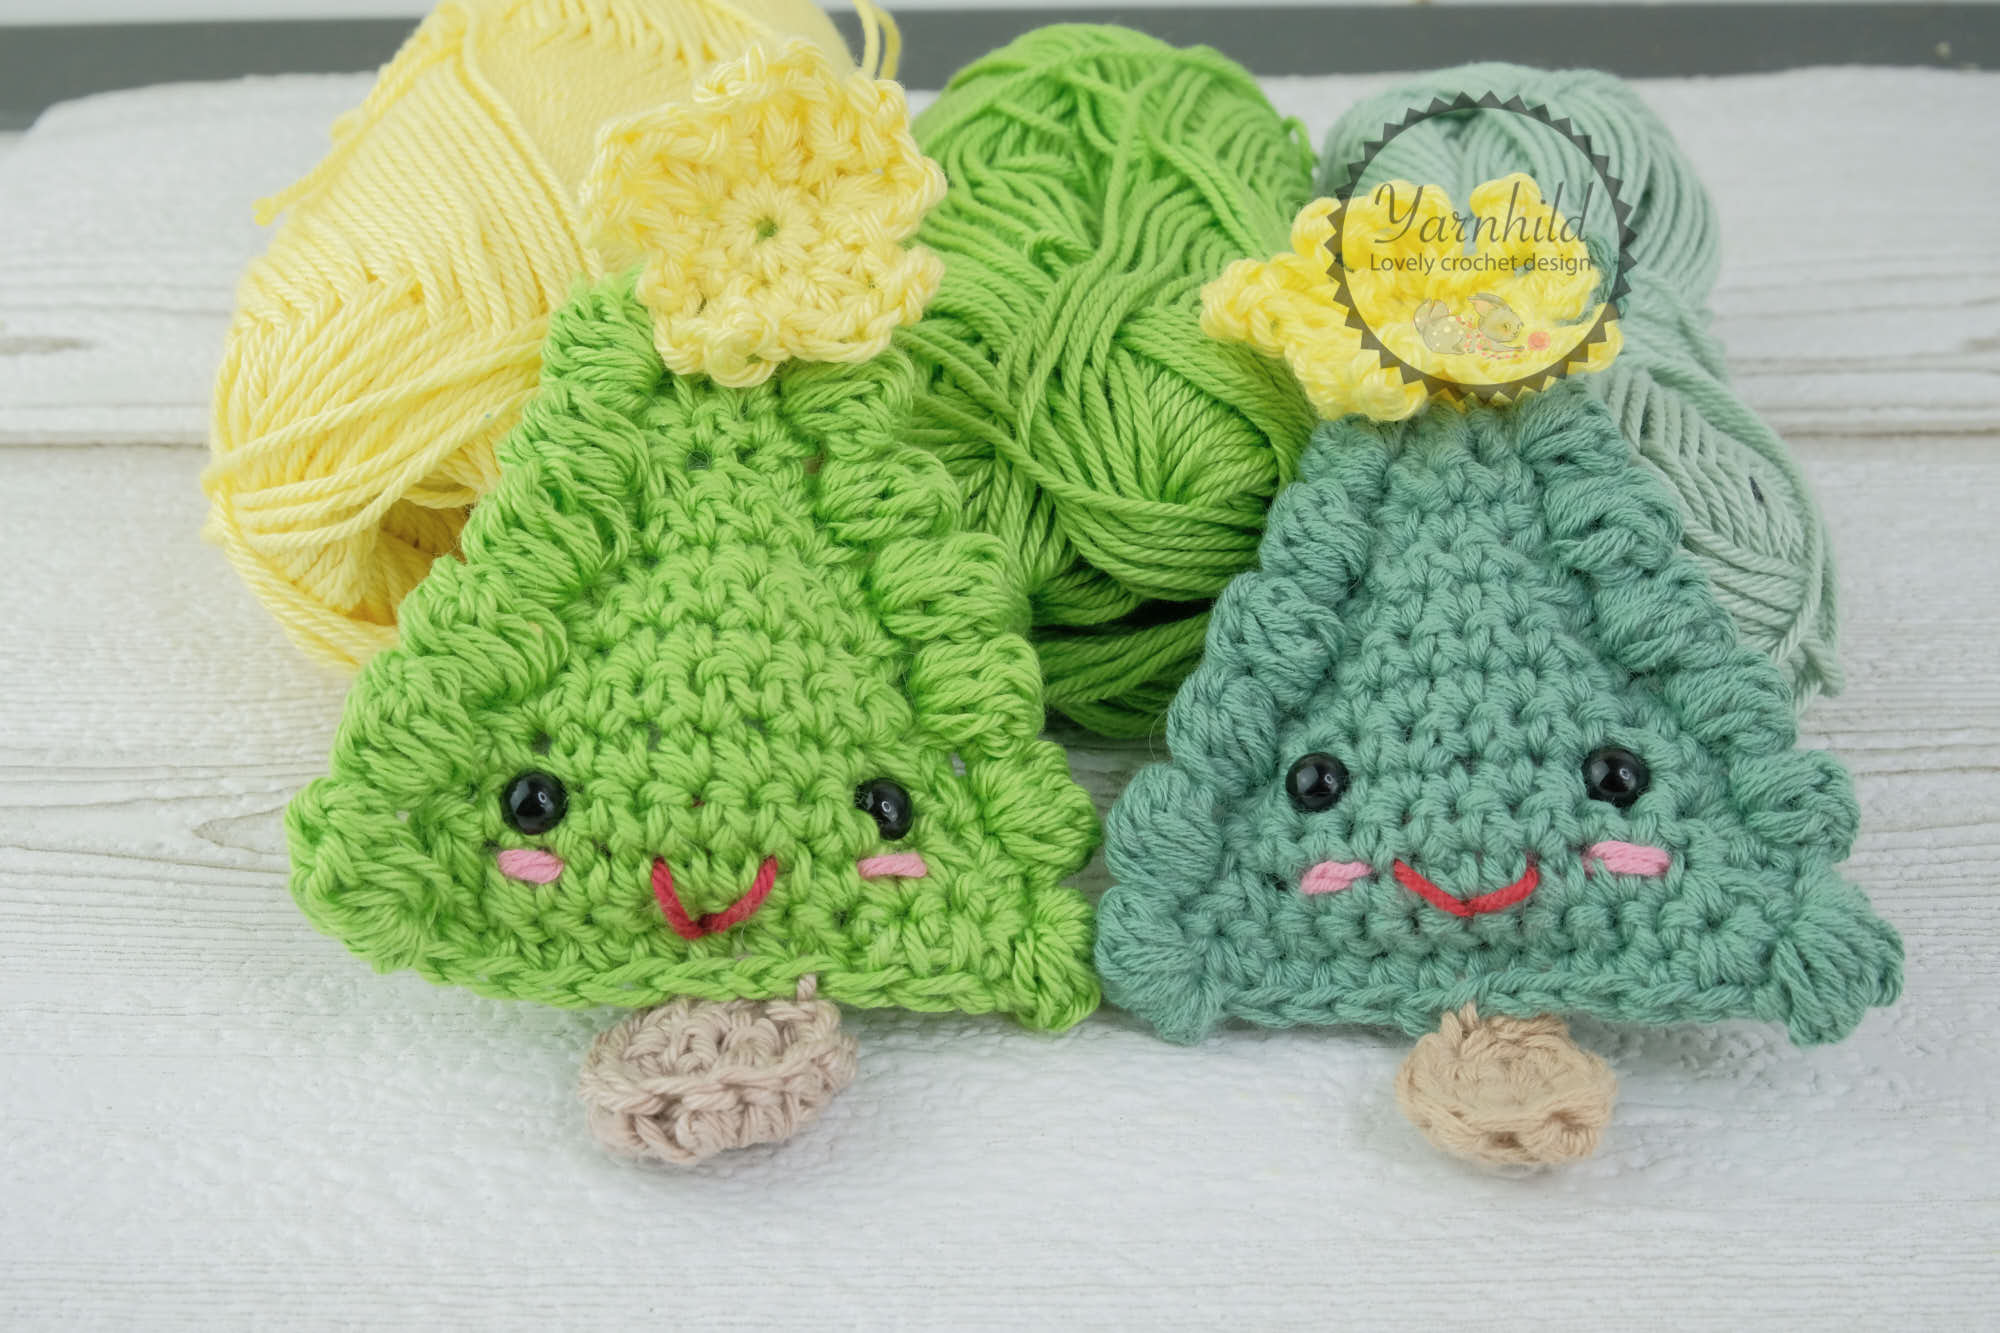
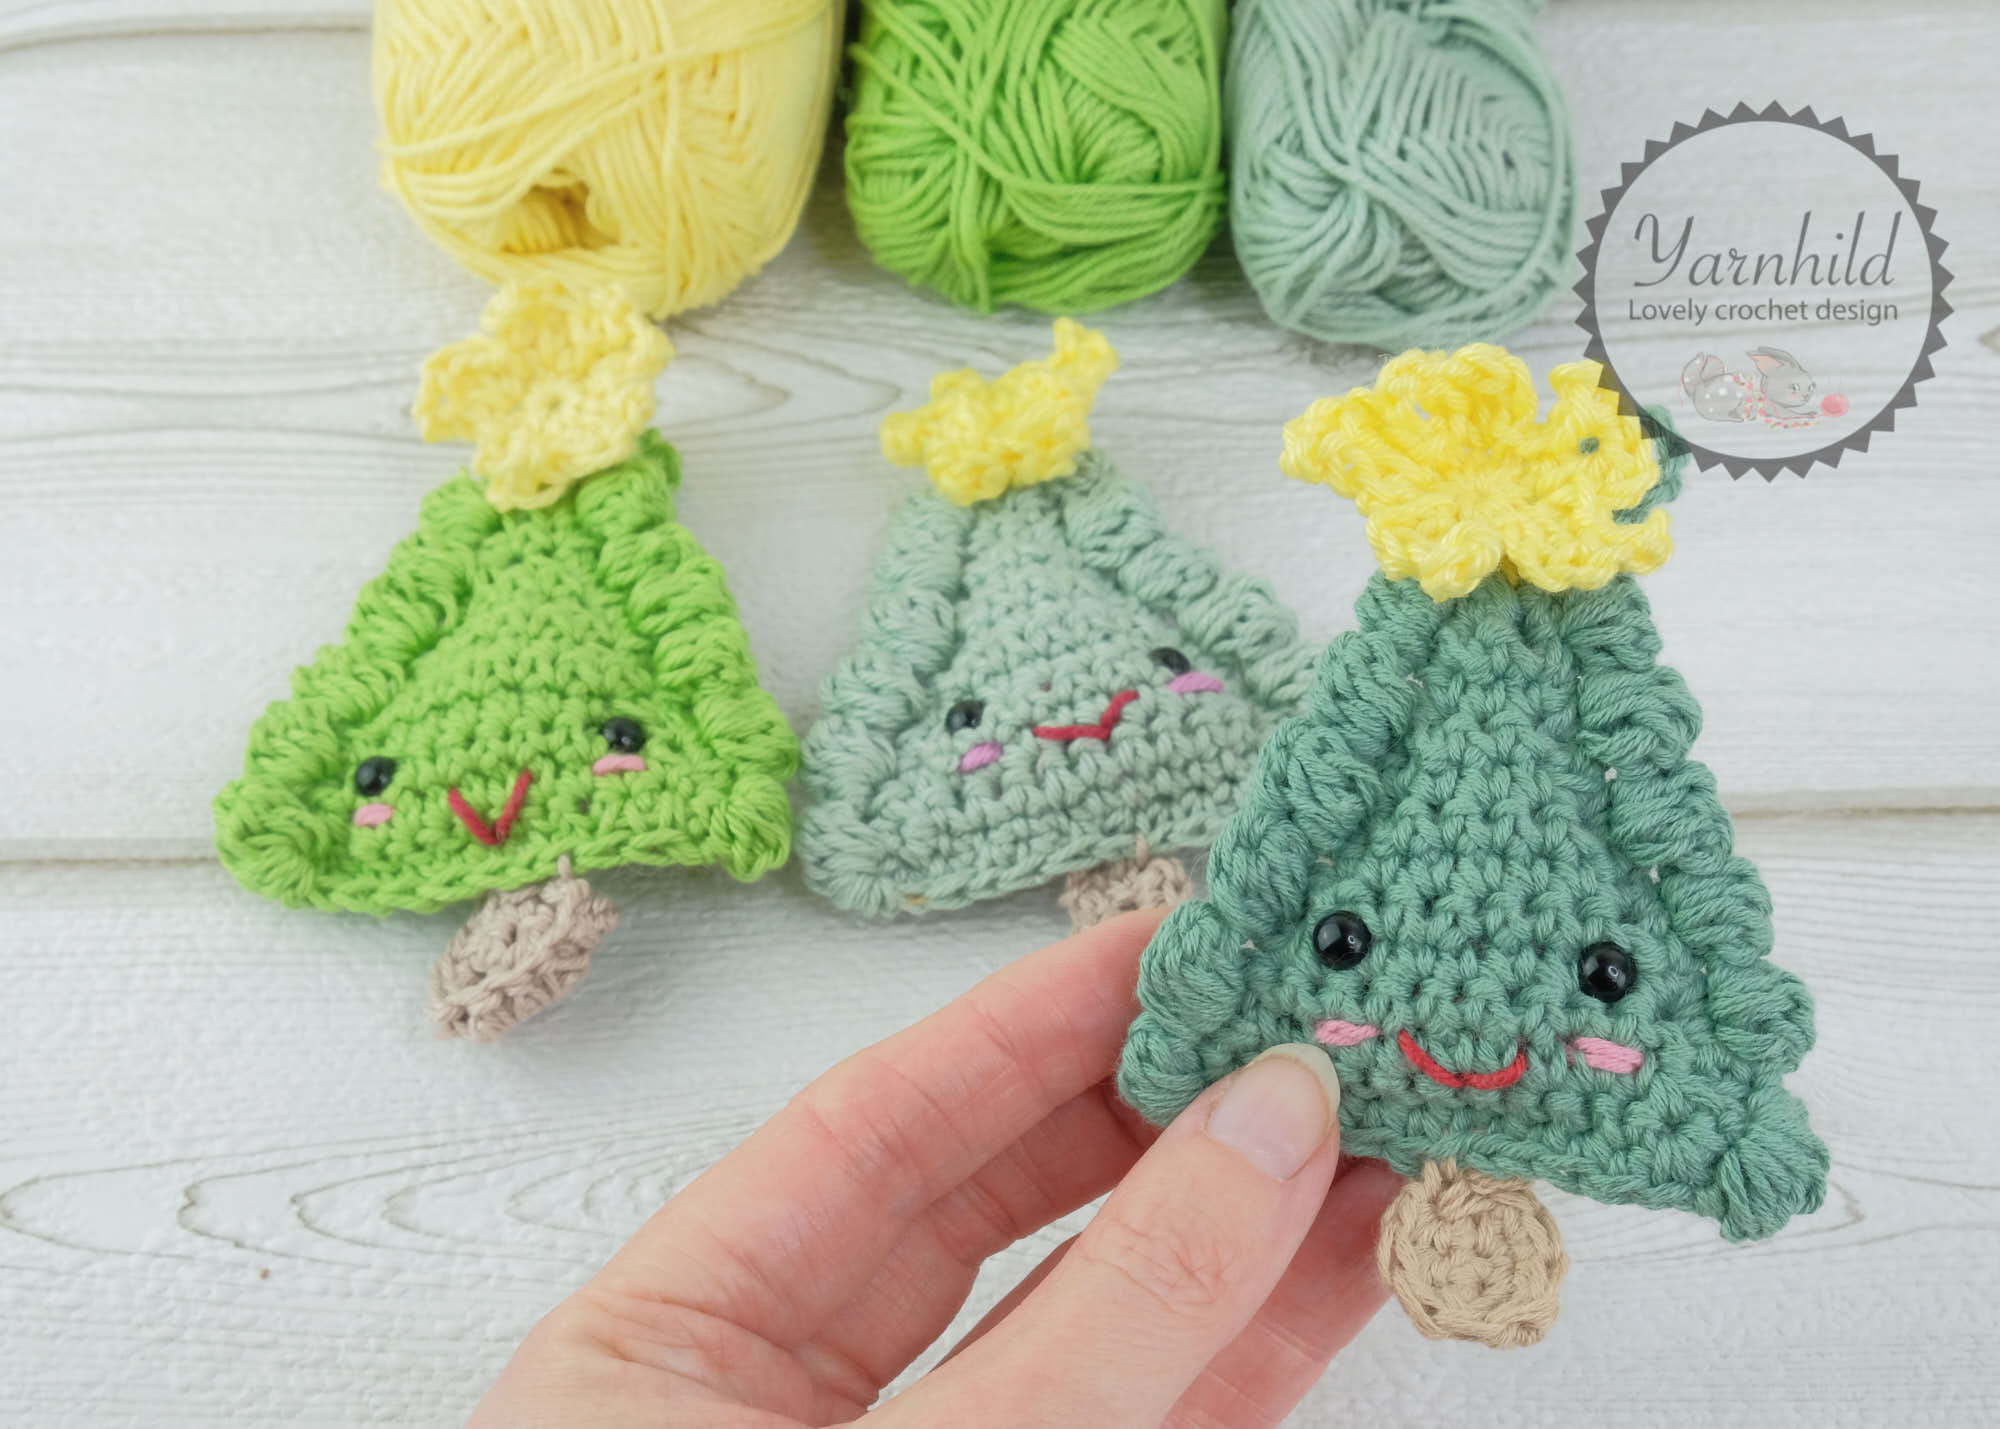
The tree and the tree trunk consist of two panels. They are crocheted separately and then the pieces are placed wrong sides together and crocheted together. I stuffed my tree lightly with some filling material. The star is made in rounds. Skill level: Intermediate
Finished size: 10 cm/ 4”
Extra help section
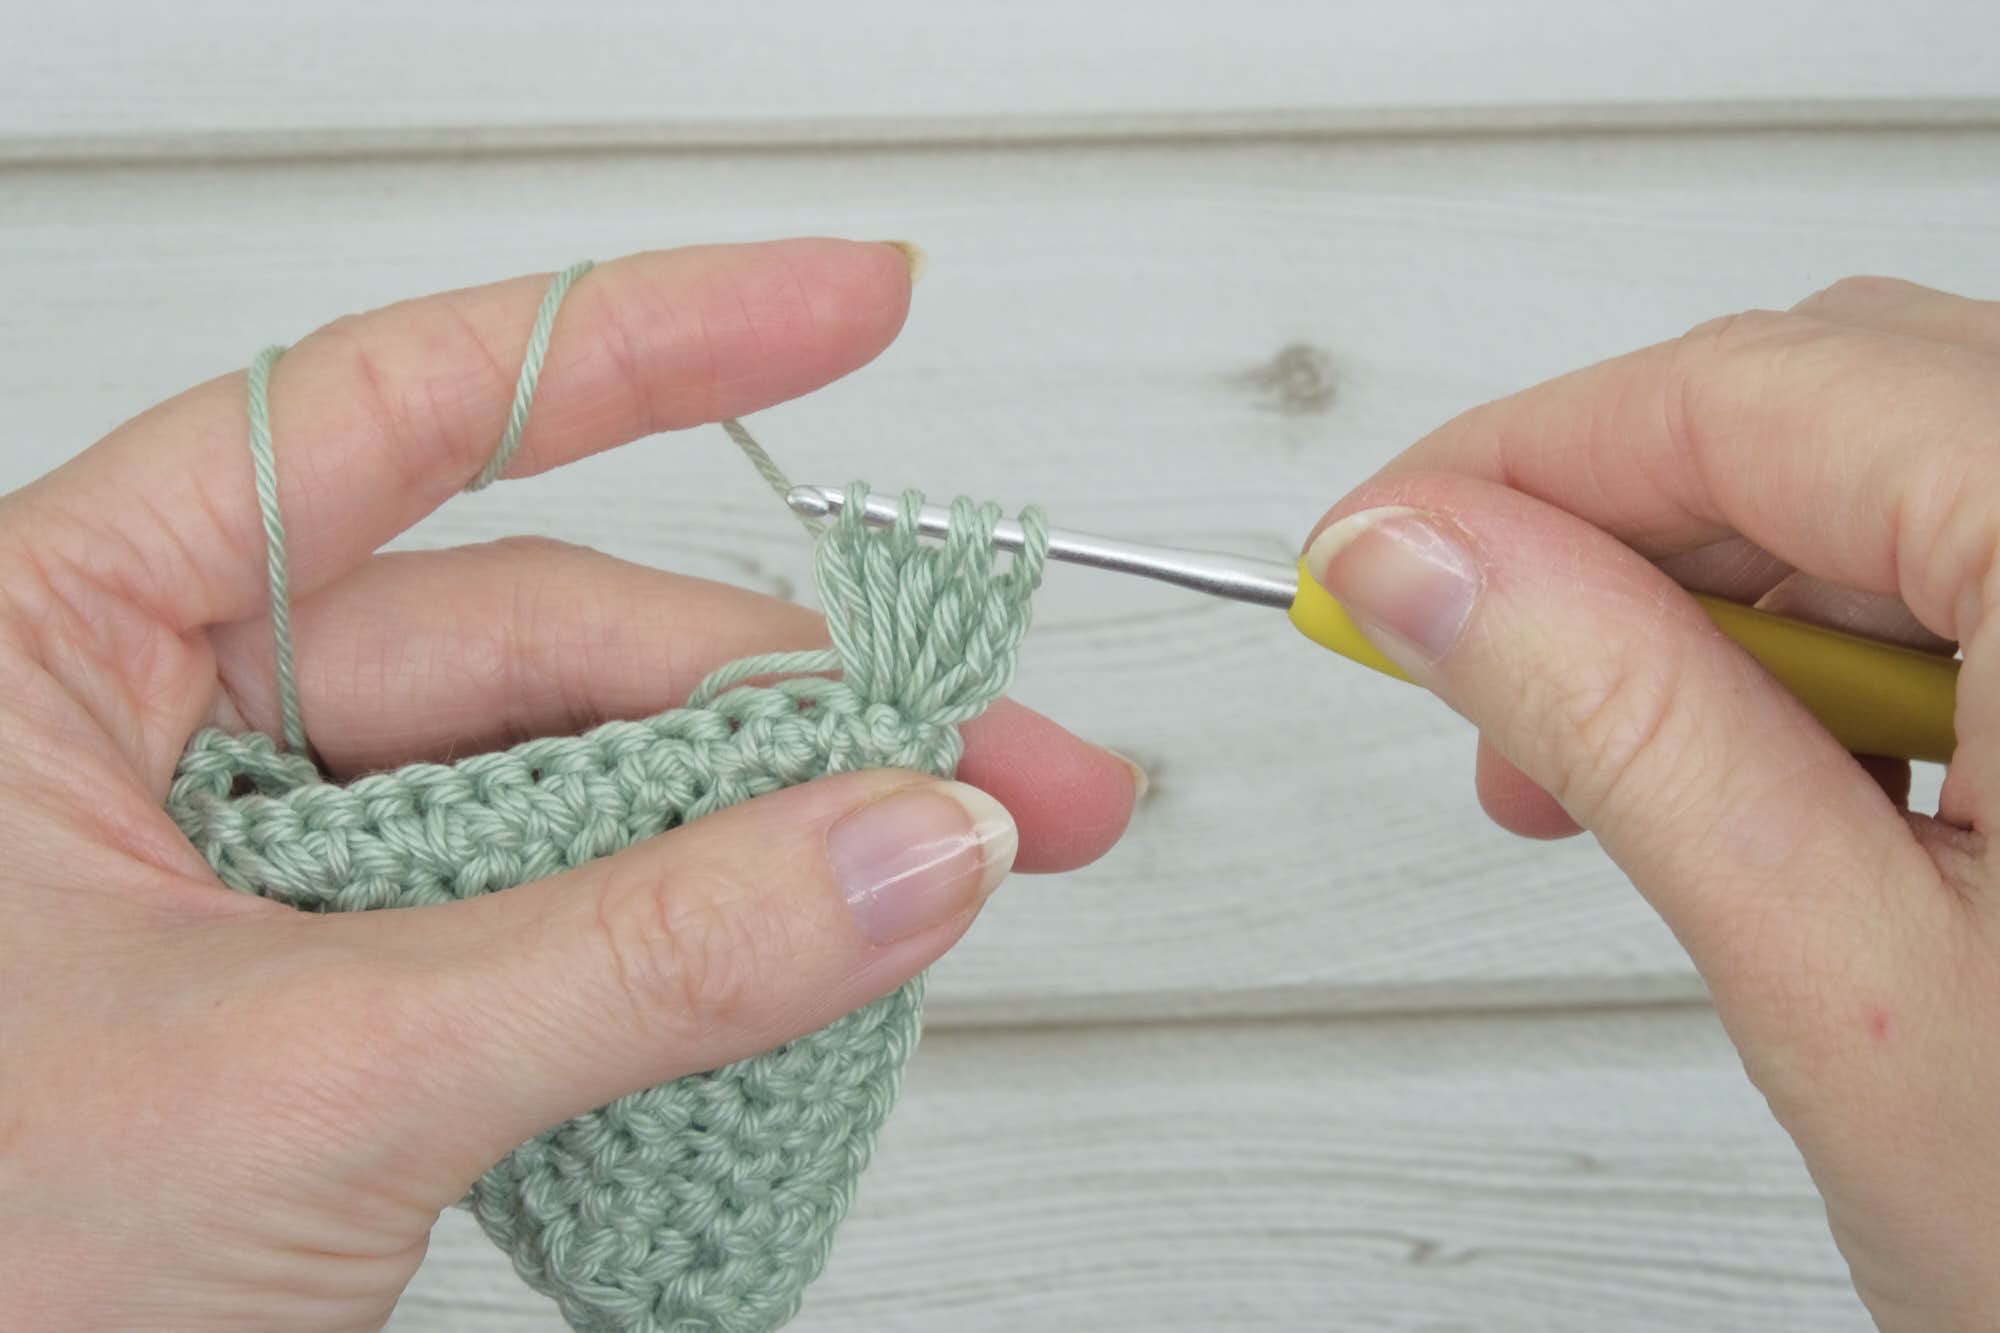
How to make the bobble stitch -bo
Chain 3. Yarn over, insert the hook in the same stitch and pull up a loop, yarn over and pull through 2 loops, repeat for a total of five times, until you have pulled up 5 loops on the hook. Yarn over and pull through all loops. SC in the next stitch. On the first bobble of each row, you will have five loops on the hook, but in the other bobbles, you will have 6 loops, because of the chain from the previous single crochet.
Tree
In green. Make 2 panels
R 1: CH 13, turn, 1 SC in the second CH from the hook and across, CH 1, turn = 12 SC
R 2: SC DEC, 8 SC, SC DEC, CH 1, turn = 10 SC
R 3: 10 SC, CH 1, turn =10 SC
R 4: SC DEC, 6 SC, SC DEC, CH 1, turn = 8 SC
R 5: 8 SC, CH 1, turn = 8 SC
R 6: SC DEC, 4 SC, SC DEC, CH 1, turn = 6 SC
R 7: 6 SC, CH 1, turn = 6 SC
R 8: SC DEC, 2 SC, SC DEC, CH 1, turn = 4 SC
R 9: 4 SC, CH 1, turn = 4 SC
R 10: SC DEC x 2, CH 1, turn = 2 sc
R 11: 2 SC, CH 1, turn = 2 SC
R 12: SC DEC, CH 1, turn = 1 SC
R 13: 1 SC
Fasten off.
Make the other panel. When you have finished the second panel, don’t fasten off. Attach safety eyes on row 4. About 5 SC space apart. Sew on a little mouth with red yarn, and blush with pink yarn.
Lay the panels on each other, wrong sides together and with the tree’s face towards you. CH 1, SC the sides together, place 2 SC in the two corners at the bottom of the tree. SL ST in first SC and fasten off. You should end up with 14 SC on both of the long sides. If you end up with 12, it#s not so bad. Just make sure that the number can be divided by 2. Remember to stuff the tree lightly before closing.
If you want to hang up the tree. When you get to the top. CH 15, SL SL in the first CH, fasten off.
Turn work, crochet from the wrong side so that the bobbles appear on the right side. Start at the corner.
CH 3, 1 BO in the same stitch as the CH 3, 1 SC in next st. Repeat 5 times.
SL ST your way to the other side.
1 SC, 1 BO in next. Repeat 5 times.
Fasten off. You should have 6 bobble stitches on each side. Weave in ends
Tree trunk
Color brown, make 2 panels.
R 1: CH 4, turn, 1 SC in the 2ndCH from the hook and in next 2, CH 1, turn = 3 SC
R 2: 3 SC. Fasten off.
Like with the tree, don’t fasten off the second panel. Lay them on each other and SC them together.
I suggest weaving in the ends before the parts are SC together.
Star
In yellow
Crochet in rounds.
Rnd 1: 10 SC in a MR = 10 SC
Join with a SL ST
Rnd 2: In the same stitch: CH 2, 1 DC, 1 Picot stitch, 1 HDC, SL ST in next ST, *1 HDC, 1 DC, 1 Picot stitch, 1 HDC, SL ST in next* Repeat 3 more times until you have five clusters on each side. SL ST in the first CH, fasten off. Leave a long tail for attaching.
Assembly
Sew the tree trunk at the bottom of the tree. Sew the star to the top of the tree.
Also, don’t forget to share your finished work with me! Find me on Facebook and Instagram @Yarnhild
This pattern will be available from the 2nd of November for 24 hours!


Or get the whole bundle for only 7 USD!
3 Comments on Christmas tree ornament
Comments are closed.