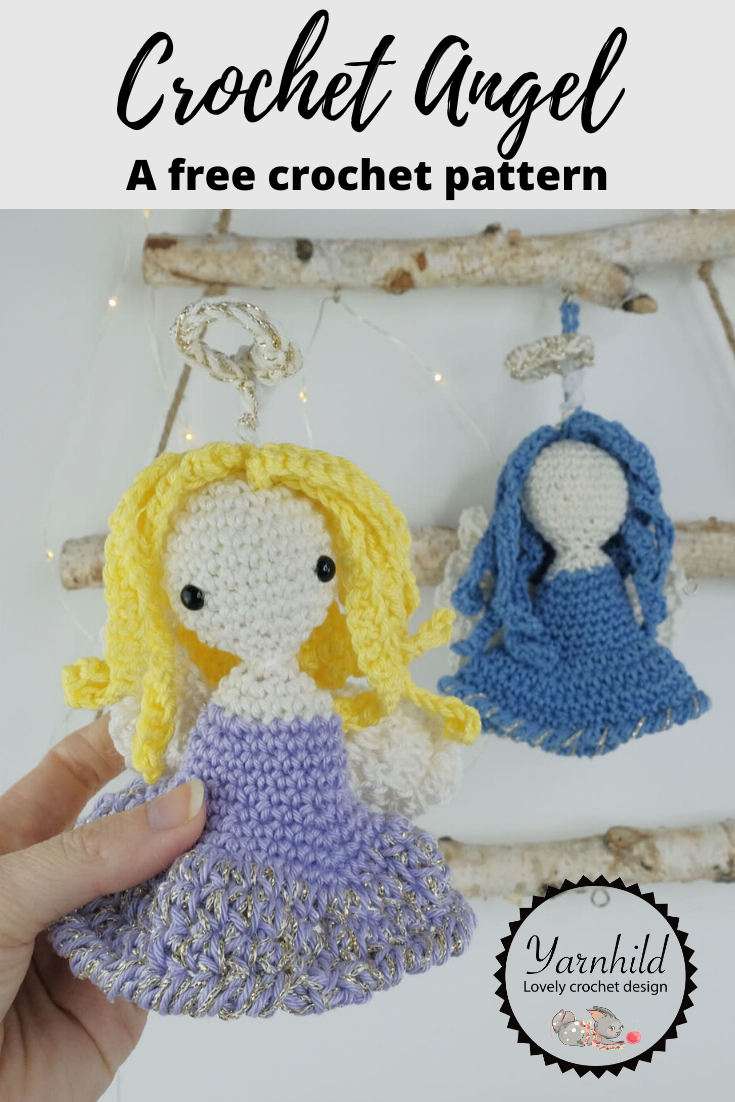
Crochet angel ornament pattern
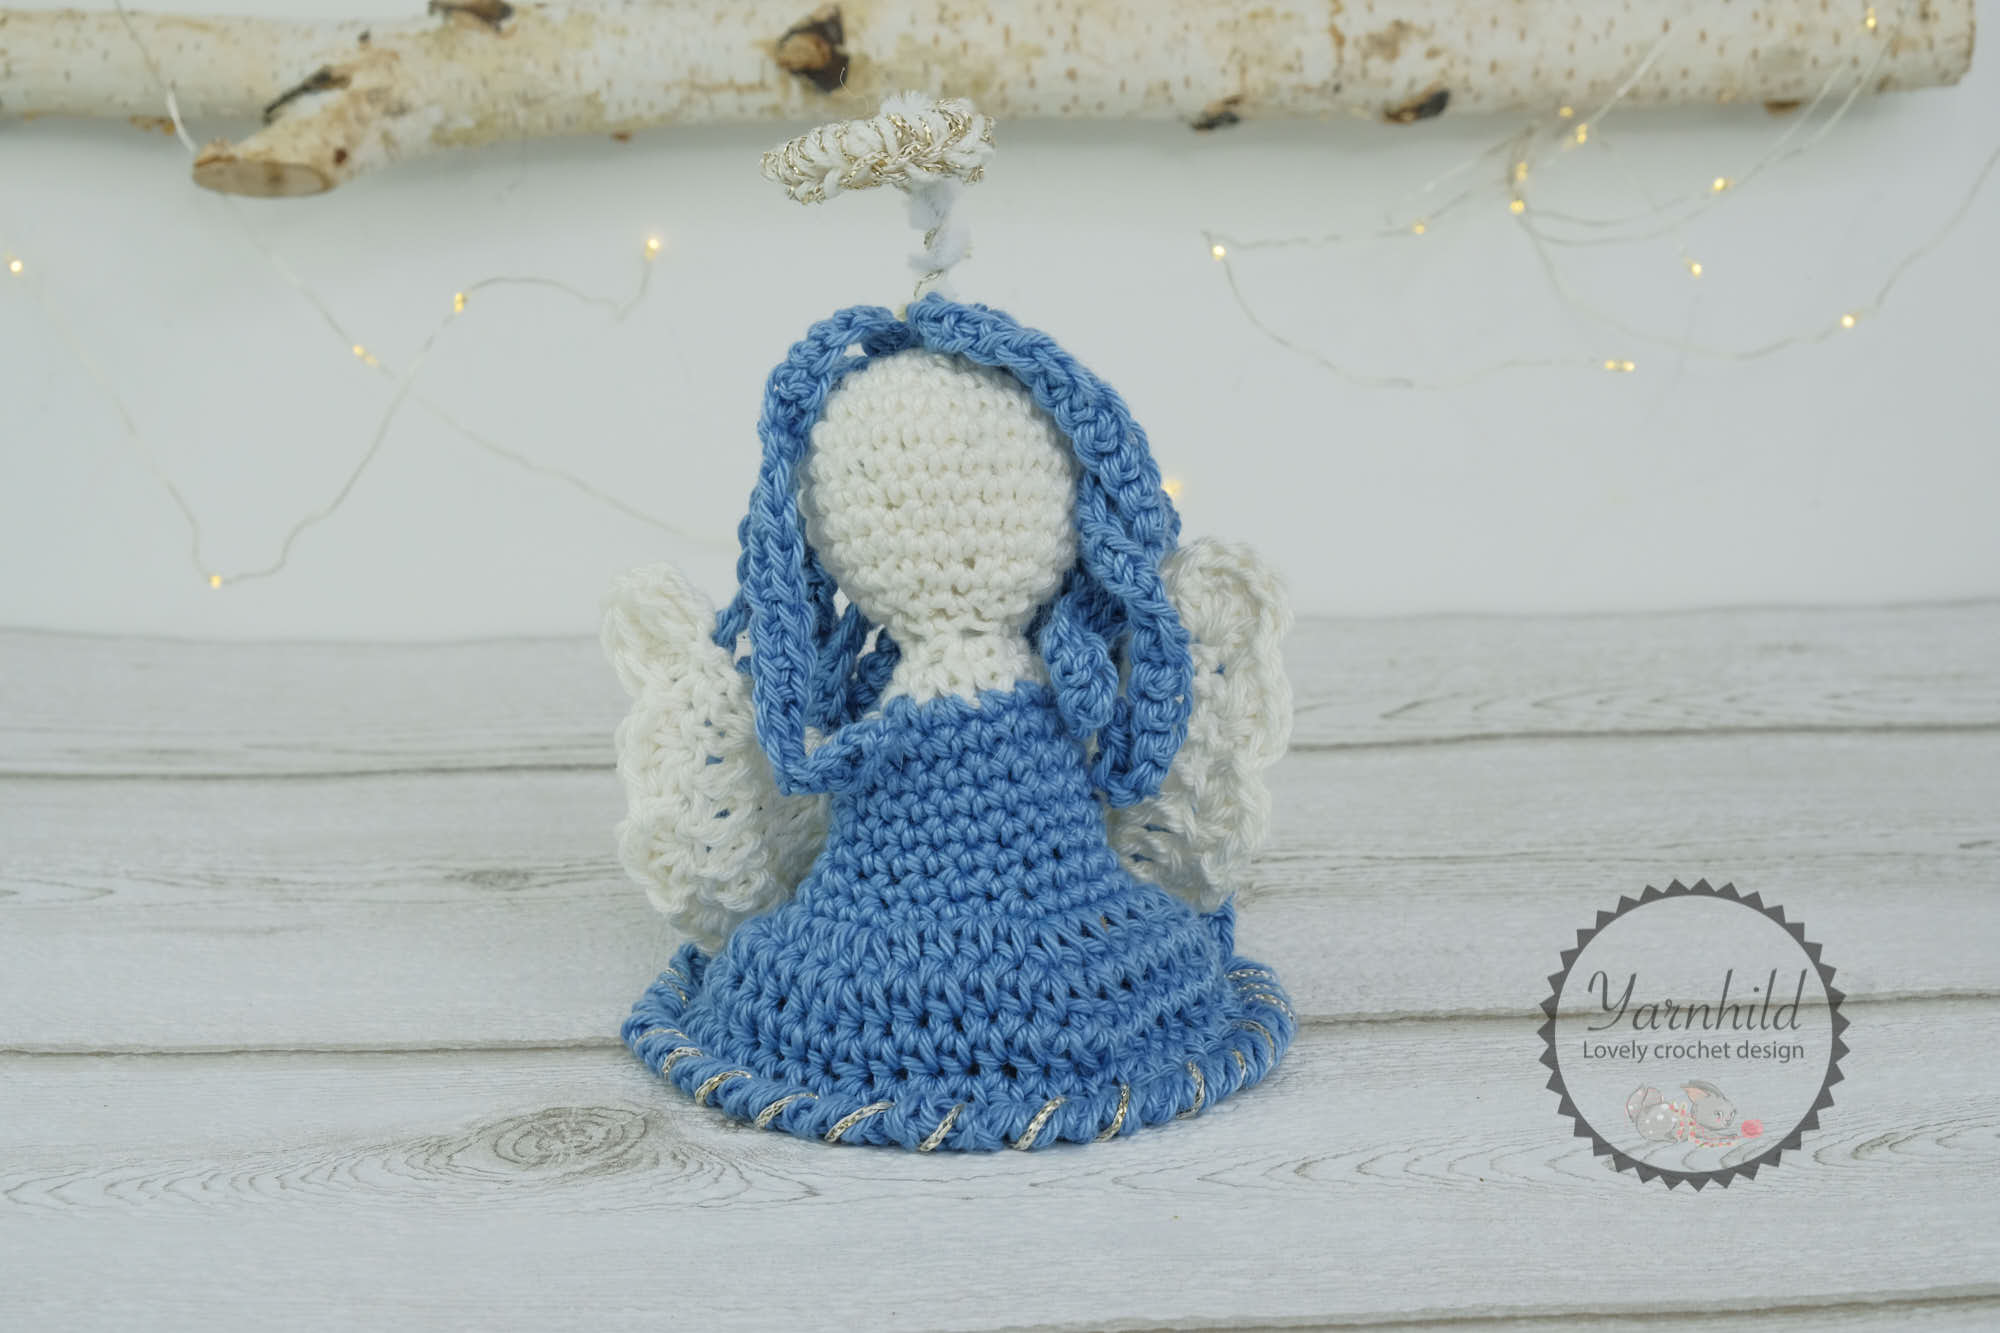
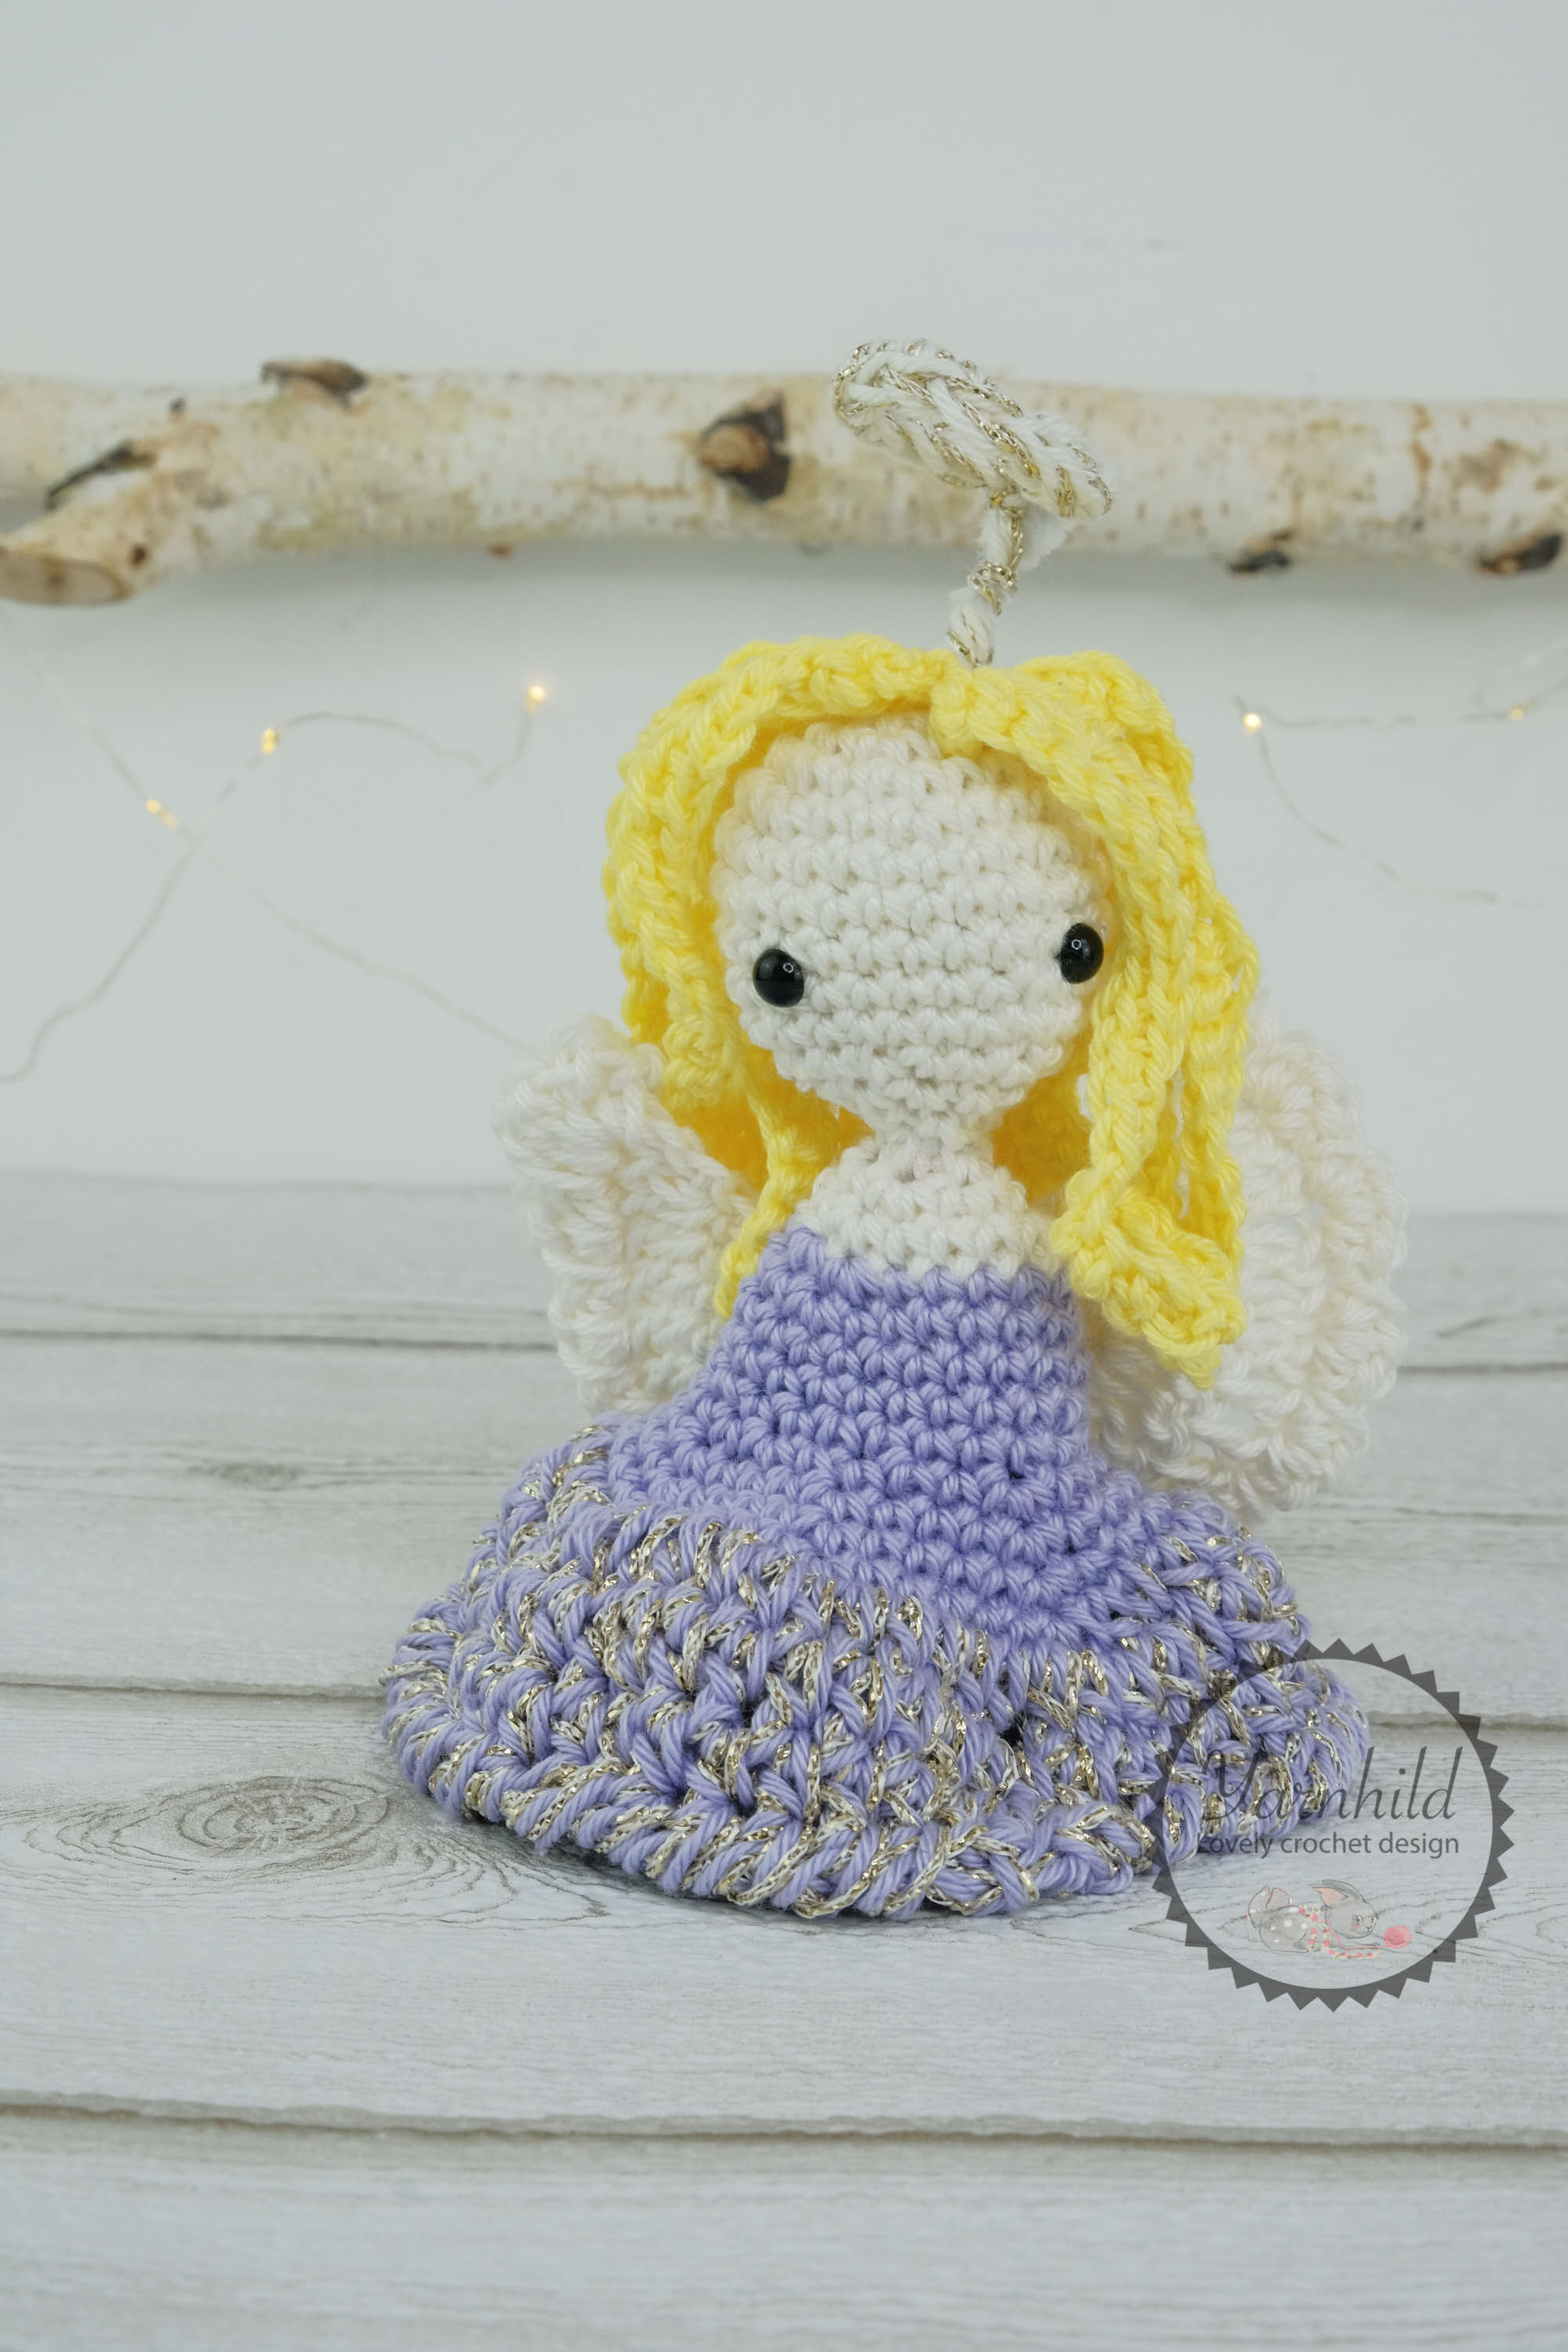
Today I want to share a quick and simple crochet pattern for this ornament angel! Christmas will be here, sooner as you think! So better start those Christmas projects now, when you still have time! This ornament angel will work up in no time! It's about 11 cm/ 4,5 " long and will look amazing on your Christmas tree or as decoration in your living room!
Disclaimer: This blog post contains affiliate links, read more about it here.
Crochet ornaments
I have planned to release more crochet ornament patterns over the next week. But, since I haven't everything figured out yet, so I will release one pattern at a time before I make big promises. However, I am have also whipped up a little cute stocking and I just need to write up the pattern and have it tested.
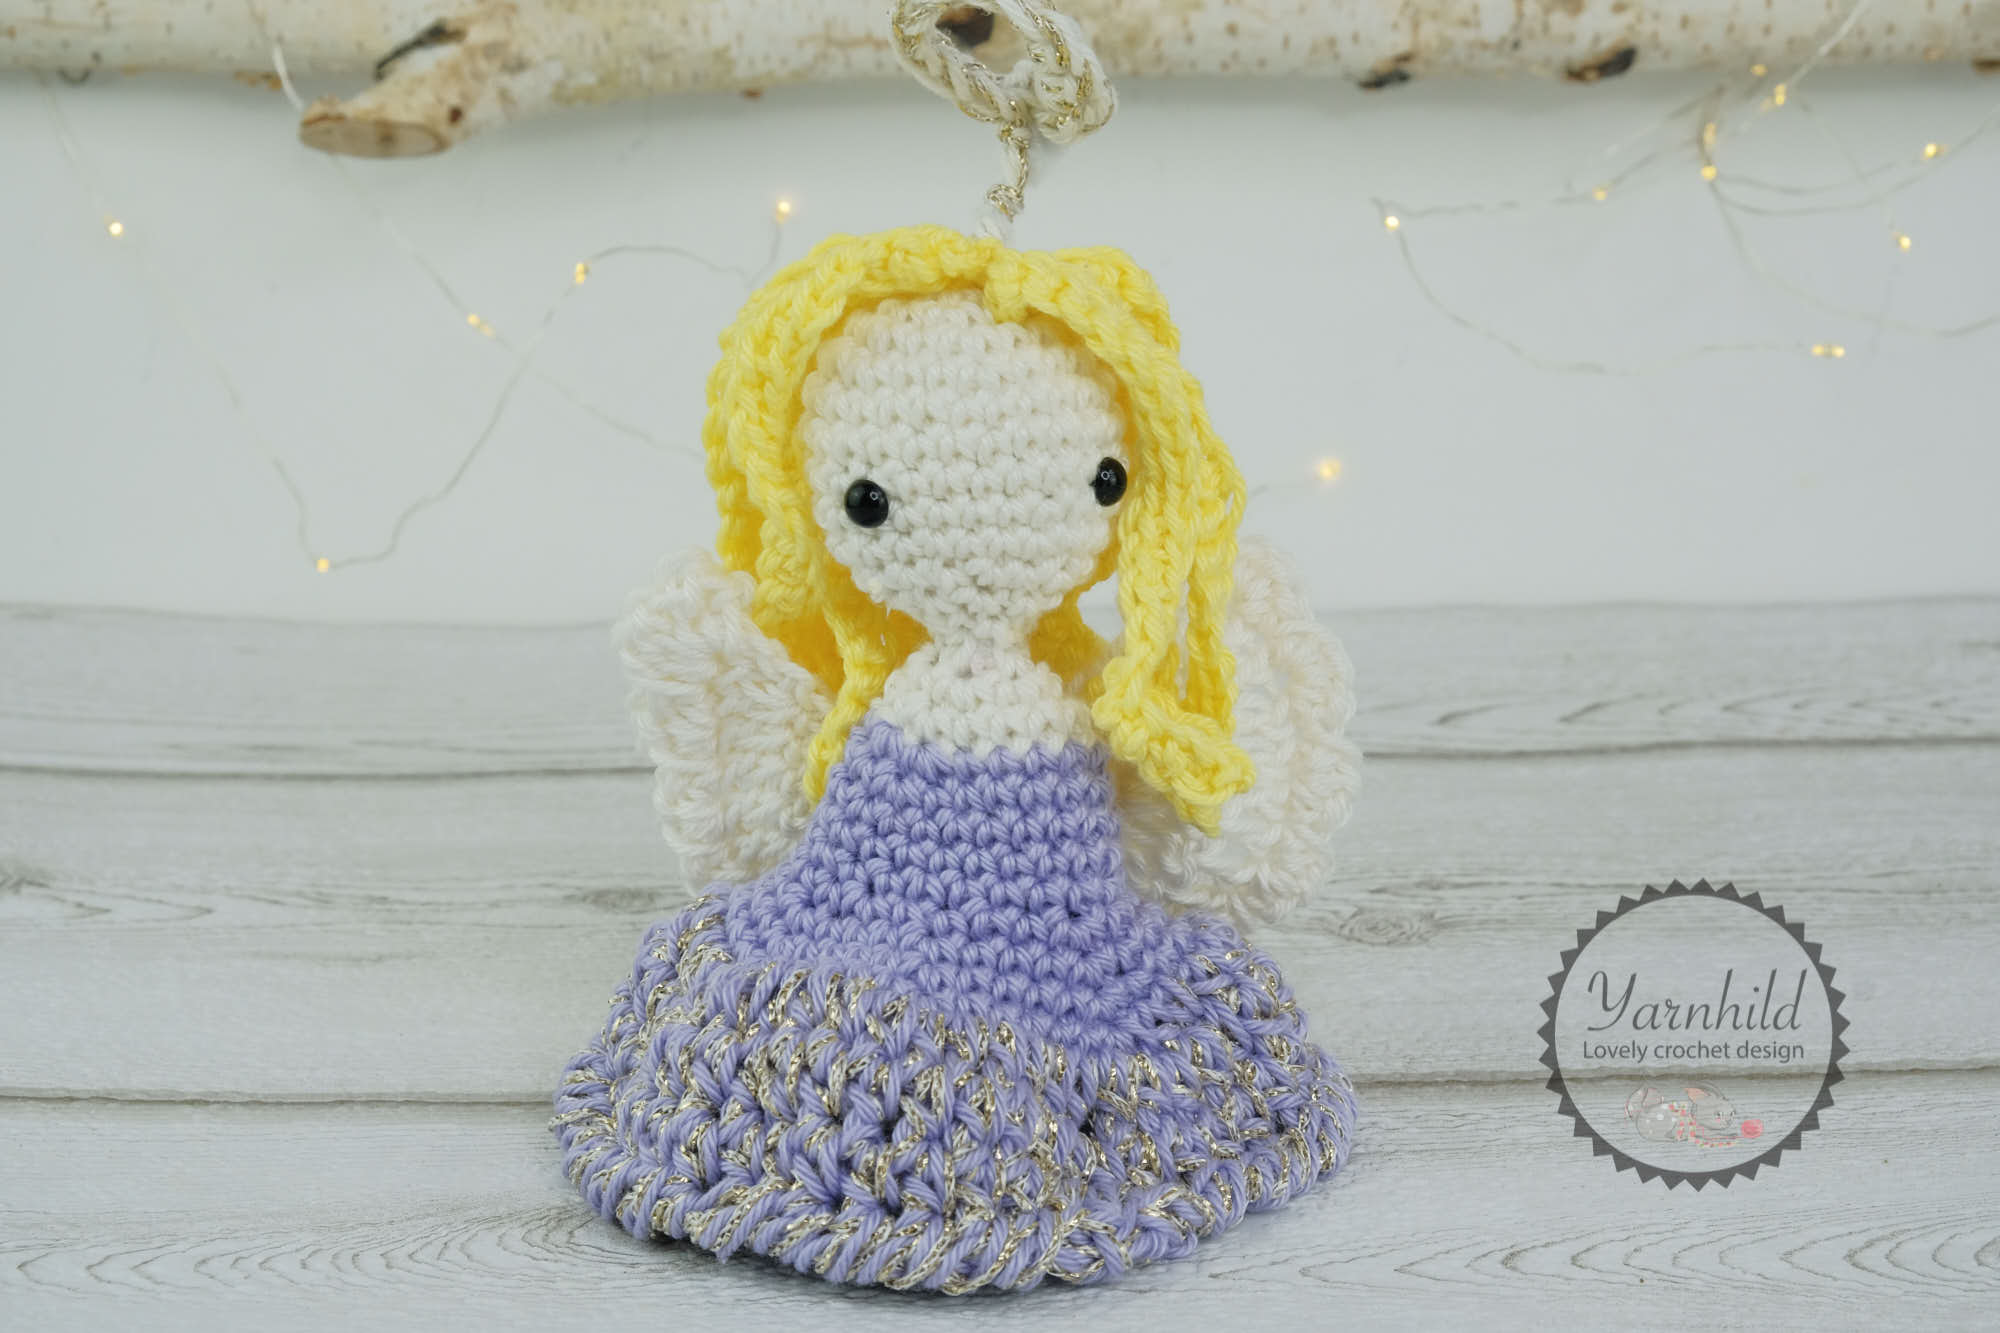
I made two ornament angels, one in blue and one in purple. On the purple one I added glitter around the whole skirt, and on the blue one only on the last round.
The yarn
I've used Catania from Schachenmayr for angel ornament. This is a sports weight yarn, and it's my favorite for amigurumi projects. However, feel free to use whatever yarn you'd like. Some of my testers used worsted weight and they turned out amazing too!
You can
- scroll down to the free version
- add the pattern to your queue on Ravelry
- Save it for later on Pinterest
Pdf pattern
Here you can purchase the pattern on Etsy or in my shop! It this way you can support my work additional. Thank you!
More free Christmas patterns
Also, don’t forget to share your finished ornament Angel with me! Let's connect on Facebook and Instagram @Yarnhild
Angel ornament - a free crochet pattern
A free crochet pattern
This pattern for the ornament Angel is the intellectual property of Yarnhild. The pattern must not be altered, translated, copied or republished without approval. You are welcome to sell the items that you have made from my patterns, but please be sure to give me credit for the pattern that you sell online. For private use only, no commercial use. 2019 – Yarnhild ©
Abbreviations used
- CH– chain
- ST – stitch
- SL ST – slip stitch
- SC – single crochet
- DC – double crochet
- BLO – back loop only
- HDC – half double crochet
- CS – the crab stitch
- MR – magic ring
- INC – Increase (stitch increase, two stitches in one stitch)
- SC2TOG – Decrease (2 single crochet together)
- Rnd – round
- () x – repeat everything within the brackets
Materials
- Crochet hook size 3.0 mm (I use this set Clover Amour Crochet Hooks)
- Yarn Sports weight. I used Schachenmayr, Catania 100 % cotton color blue 00247 and nature 00105. A small amount of thin glitter yarn for the edging of the dress. Pink embroidery thread if you want to stitch a mouth
- Filling material
- Pipe cleaner, ideally a glitter/gold one or a thin craft wire if you have one
- 6 mm safety eyes
- You can also use a sewing needle and cotton to attach halo, hair, and wings.
Information
The ornament head and the body of the angel are made in continuous rounds. Use a stitch marker to keep track of where you are. Head and body are made separately. Only fill the head with filling material. The dress is left open. The hair and wings are made separately. The wings are made in rows. The edge of the dress is made with the crab stitch. Below you can learn how to make the crab stitch. Feel free to use different yarn and hook, but be aware that this will have an impact on the size. You can make an angel with or without a face. If you make it with a face, you need a pair of safety eyes (6 mm). The pattern is written in US terms.
Skill level: Advanced beginner
Finished size: 11 cm/ 4.5 “
How to make the crab stitch
Do not turn your work as normal. Chain 1, insert the hook in the stitch to the right from your chain 1, yarn over and pull up a loop, yarn over and pull through two loops. It’s like normal single crochet but it is being crocheted in reverse. Repeat until the end of the round. SL ST in a stitch on the side and fasten off.
Head and body
Color nature and blue, start with nature
Rnd 1: 6 SC in a mr= 6 SC
Rnd 2: SC INC x 6 = 12 SC
Rnd 3: (1 SC, SC INC) x 6 = 18 SC
Rnd 4: (2 SC, SC INC) x 6 = 24 SC
Rnd 5 – 11: 24 SC (6 rounds) = 24 SC
If you wish to add eyes: Place safety eyes between rounds 6-7. 5 st apart.
Rnd 11: (2 SC, SC2TOG) x 6 = 18 SC
Stuff the head
Rnd 12: (1 SC, SC2TOG) x 6 = 12 SC
Rnd 13: SC2TOG x 6 = 6 SC
Sl st in the first SC, cut the yarn, leave a long tail for fastening.
Dress/body
Rnd 1: 6 SC in a mr= 6 SC
Rnd 2: SC INC x 6= 12 sc
Rnd 3: SC INC, 5 SC, SC INC, 5 SC = 14 SC
Rnd 4: Change color to blue on the last SC pull through of round 5 to get a nice color transition. Continuing in blue:
SC INC x 2, 5 SC, SC INC x 2, 5 SC = 18 SC
Rnd 5: 1 SC, SC INC, 9 SC, SC INC, 6 SC= 20 SC
Rnd 6 - 9: 20 SC (4 rounds)
Rnd 10: SC INC, 4 SC, SC INC, 5 SC, SC INC, 4 SC, SC INC, 3 SC = 24 SC
Rnd 11: (3 SC, SC INC) x 6 = 30 SC
Rnd 12: (4 HDC, HDC INC) x 6 = 36 HDC
Rnd 13: (5 HDC, HDC INC) x 6 = 42 HDC
If you want to have glitter skirt like on the purple angel, attach glitter yarn her and crochet with blue yarn and glitter yarn held together around the dress.
Rnd 14 – 17: 42 HDC (4 rounds)
Rnd 18: Grab some glitter yarn and do a CS with blue yarn and glitter yarn held together around the dress = 42 CS SC
Fasten off, weave in ends.
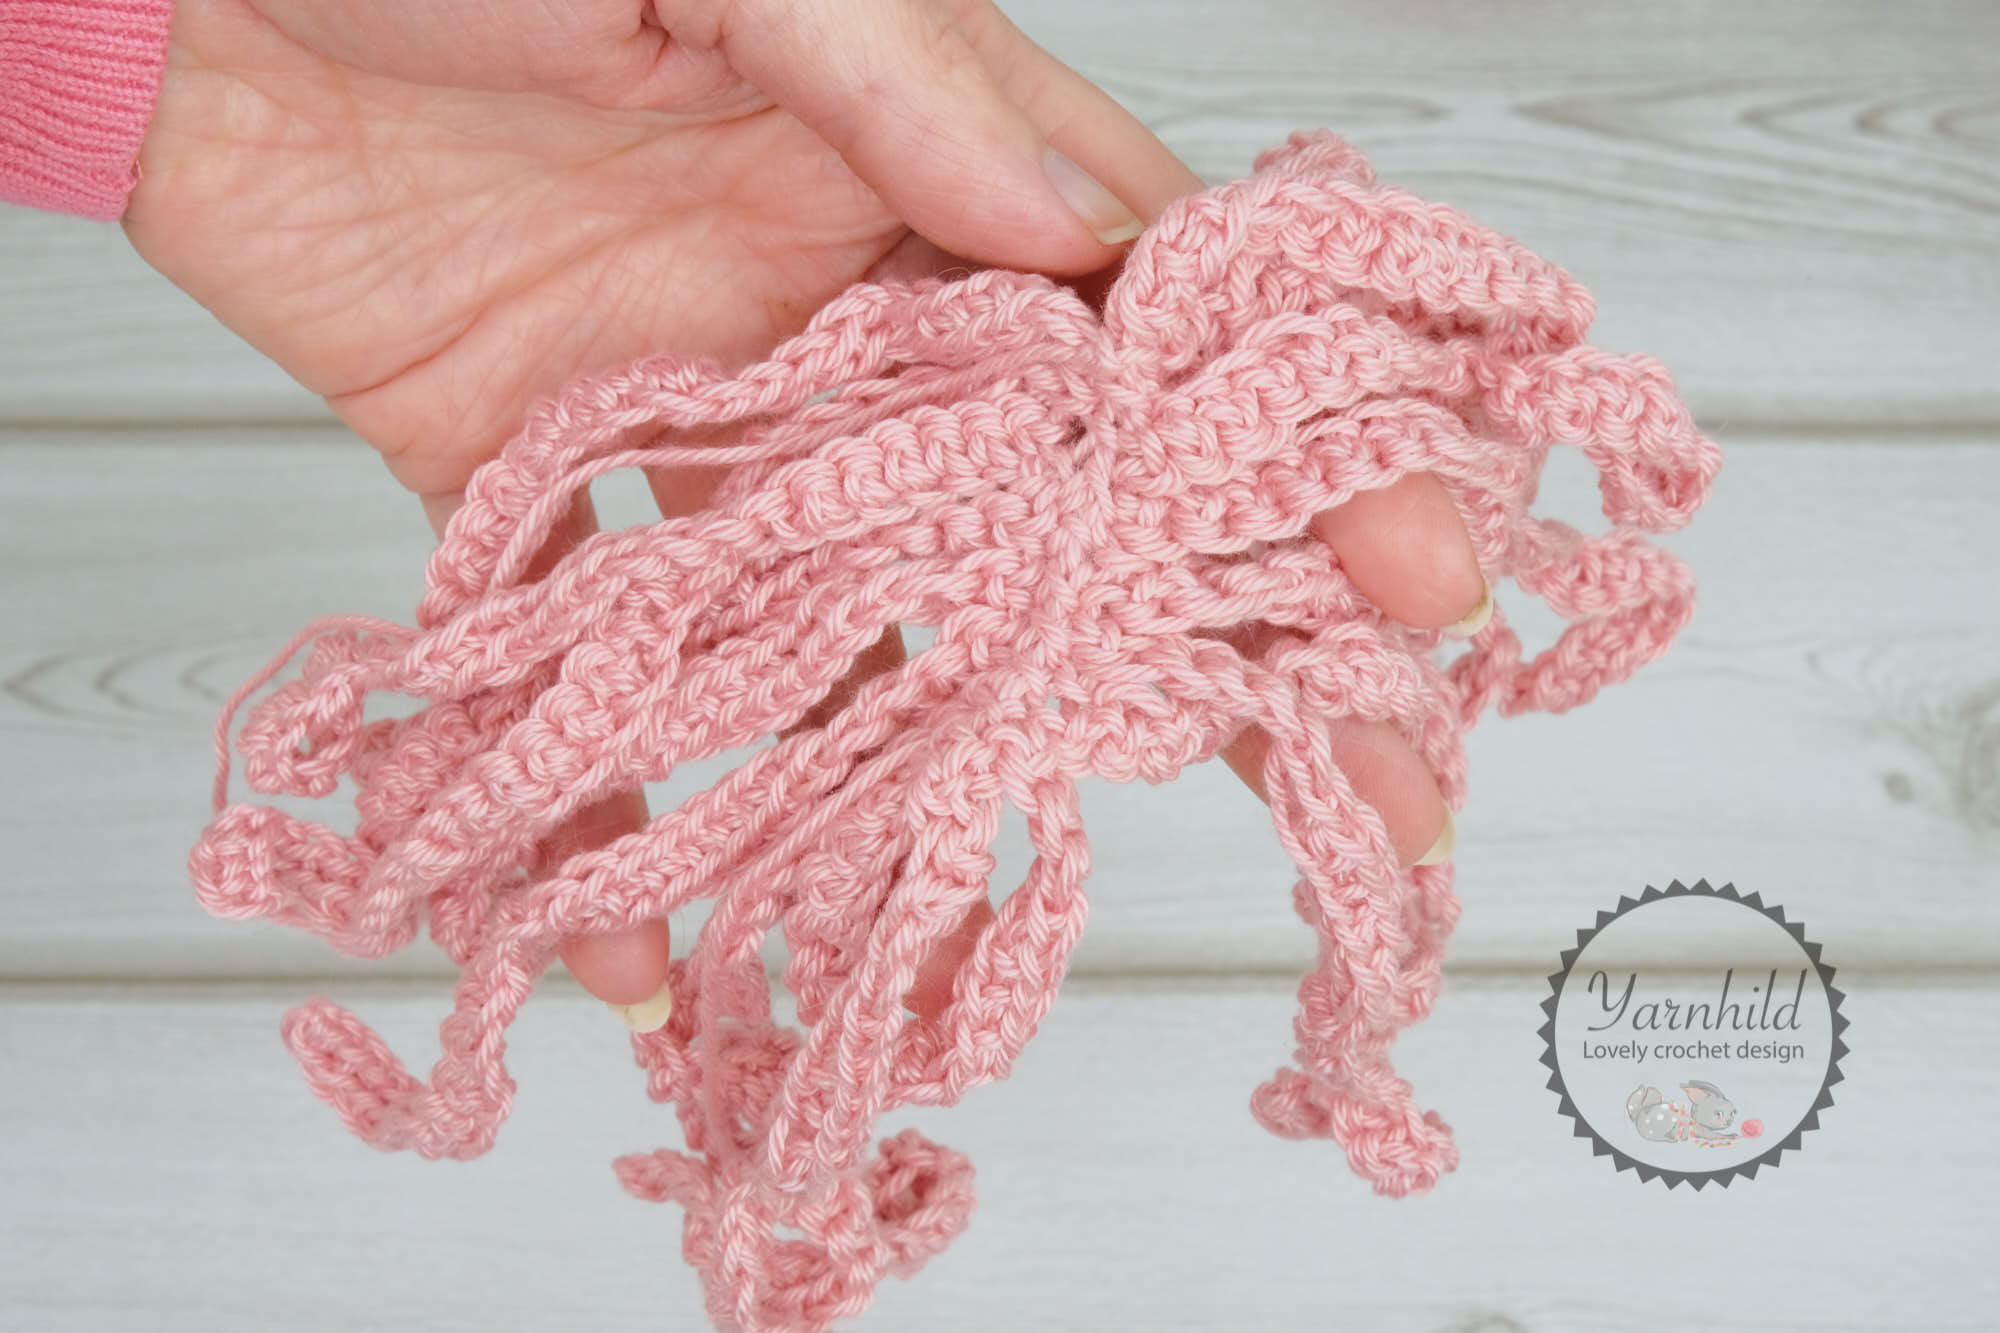
Hair
In blue
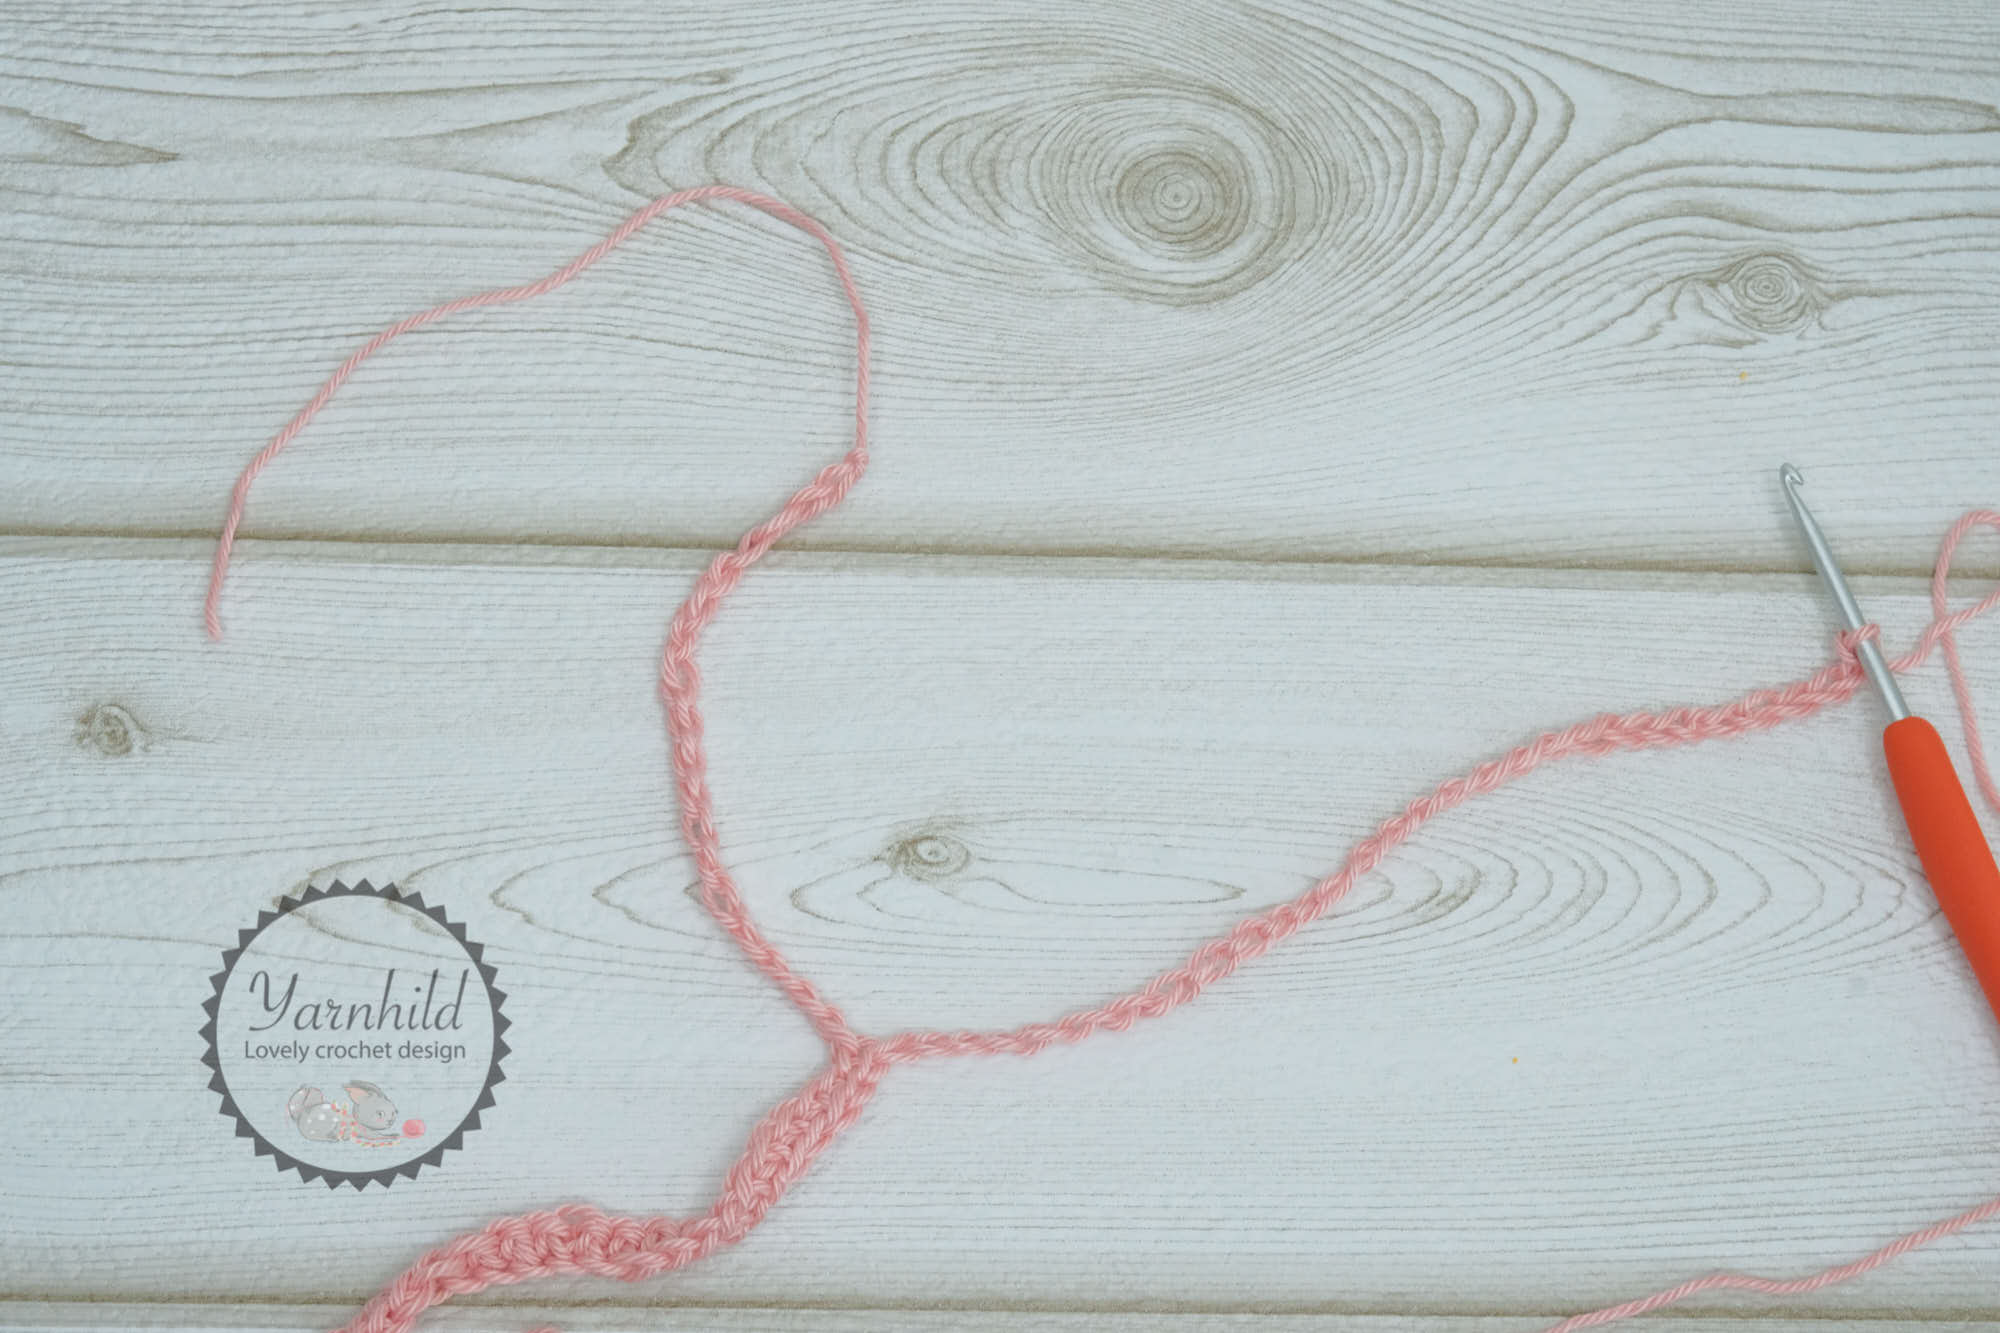
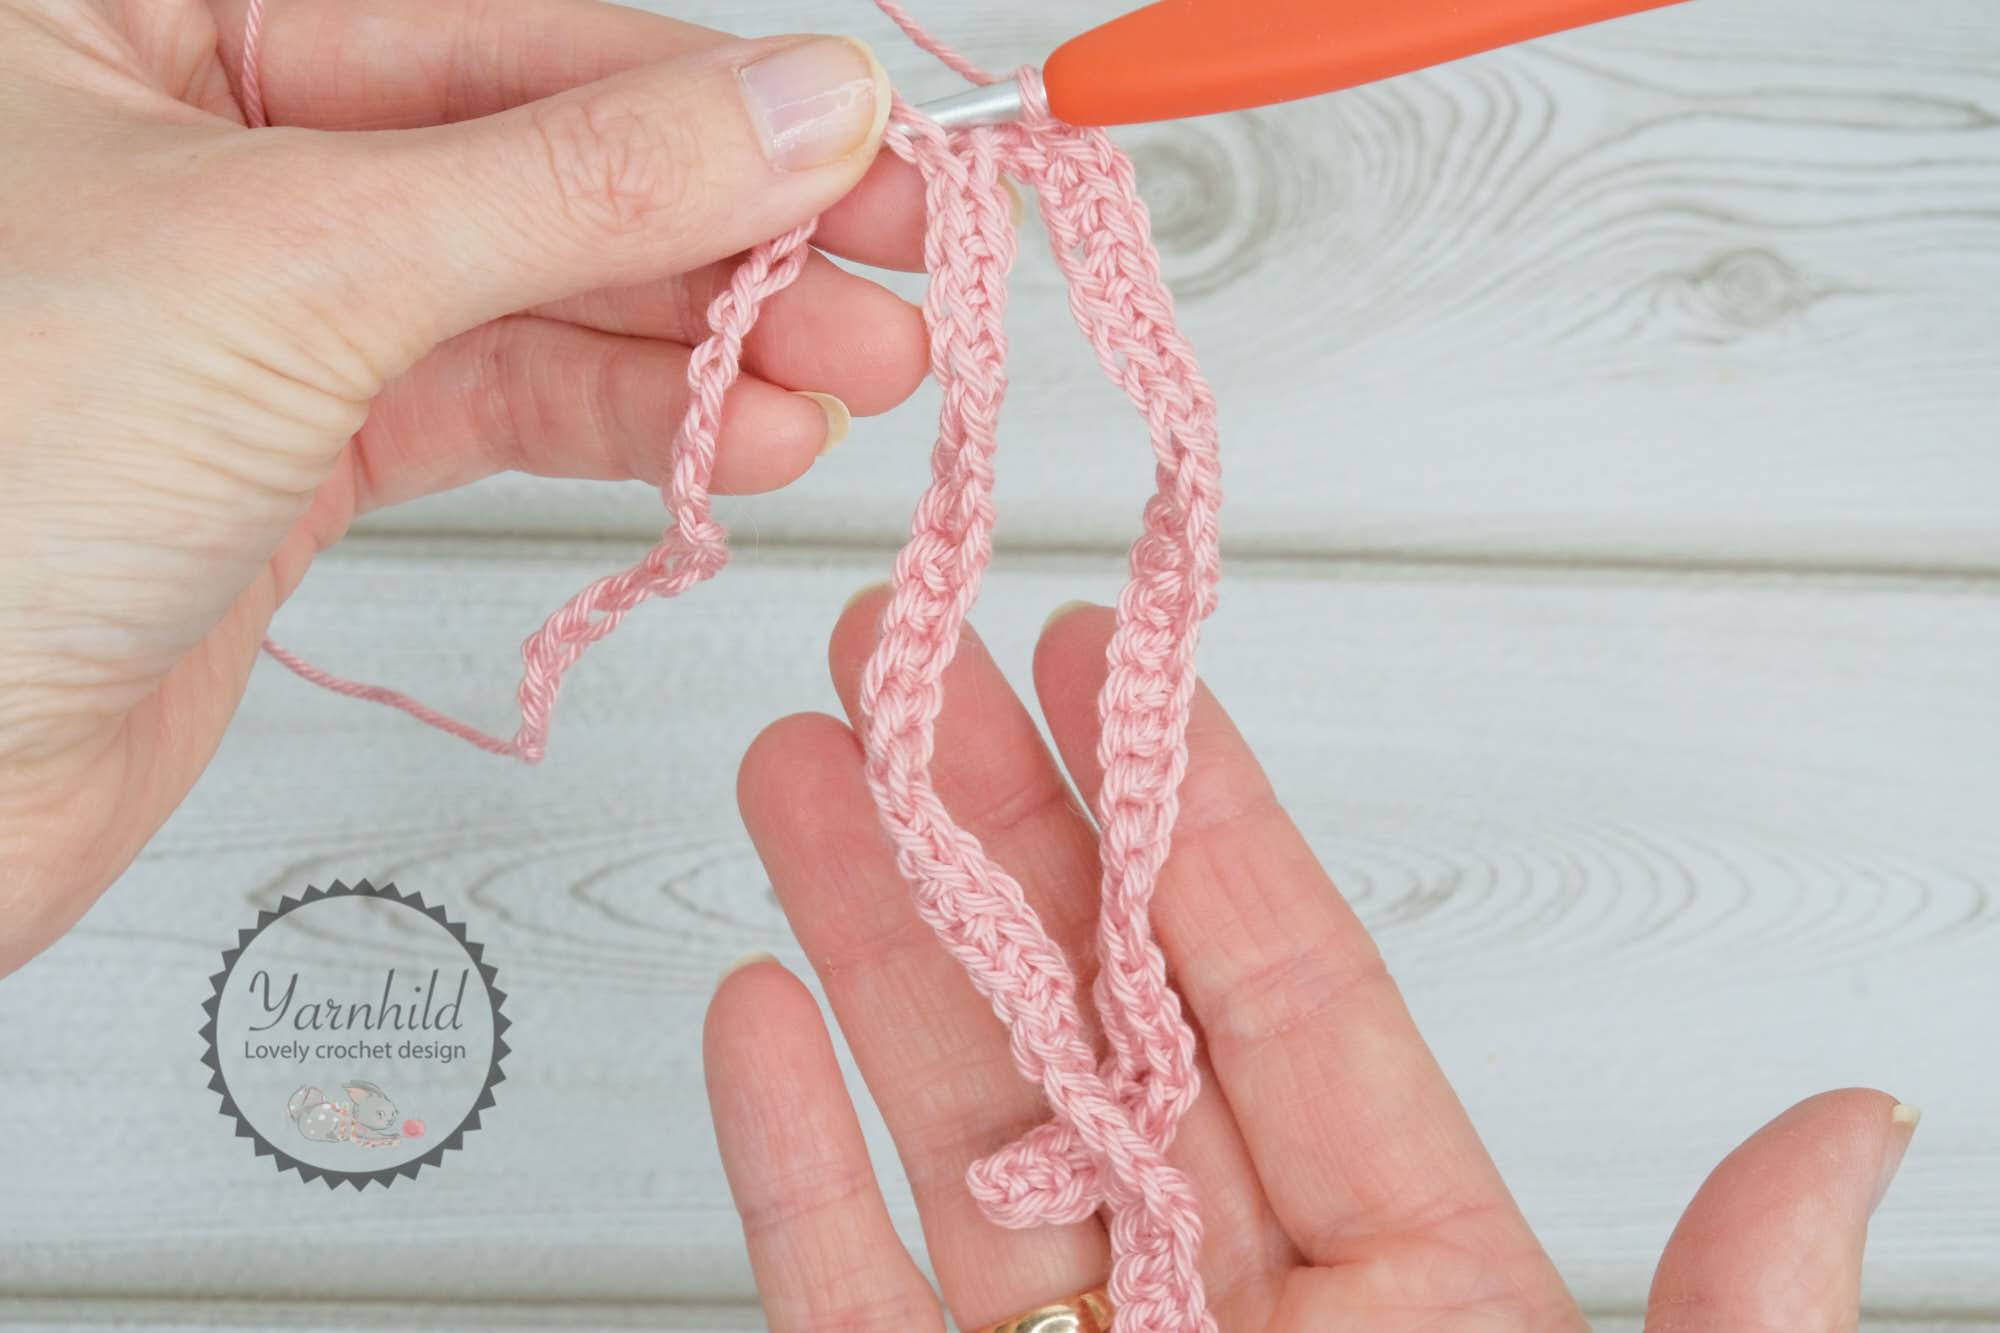
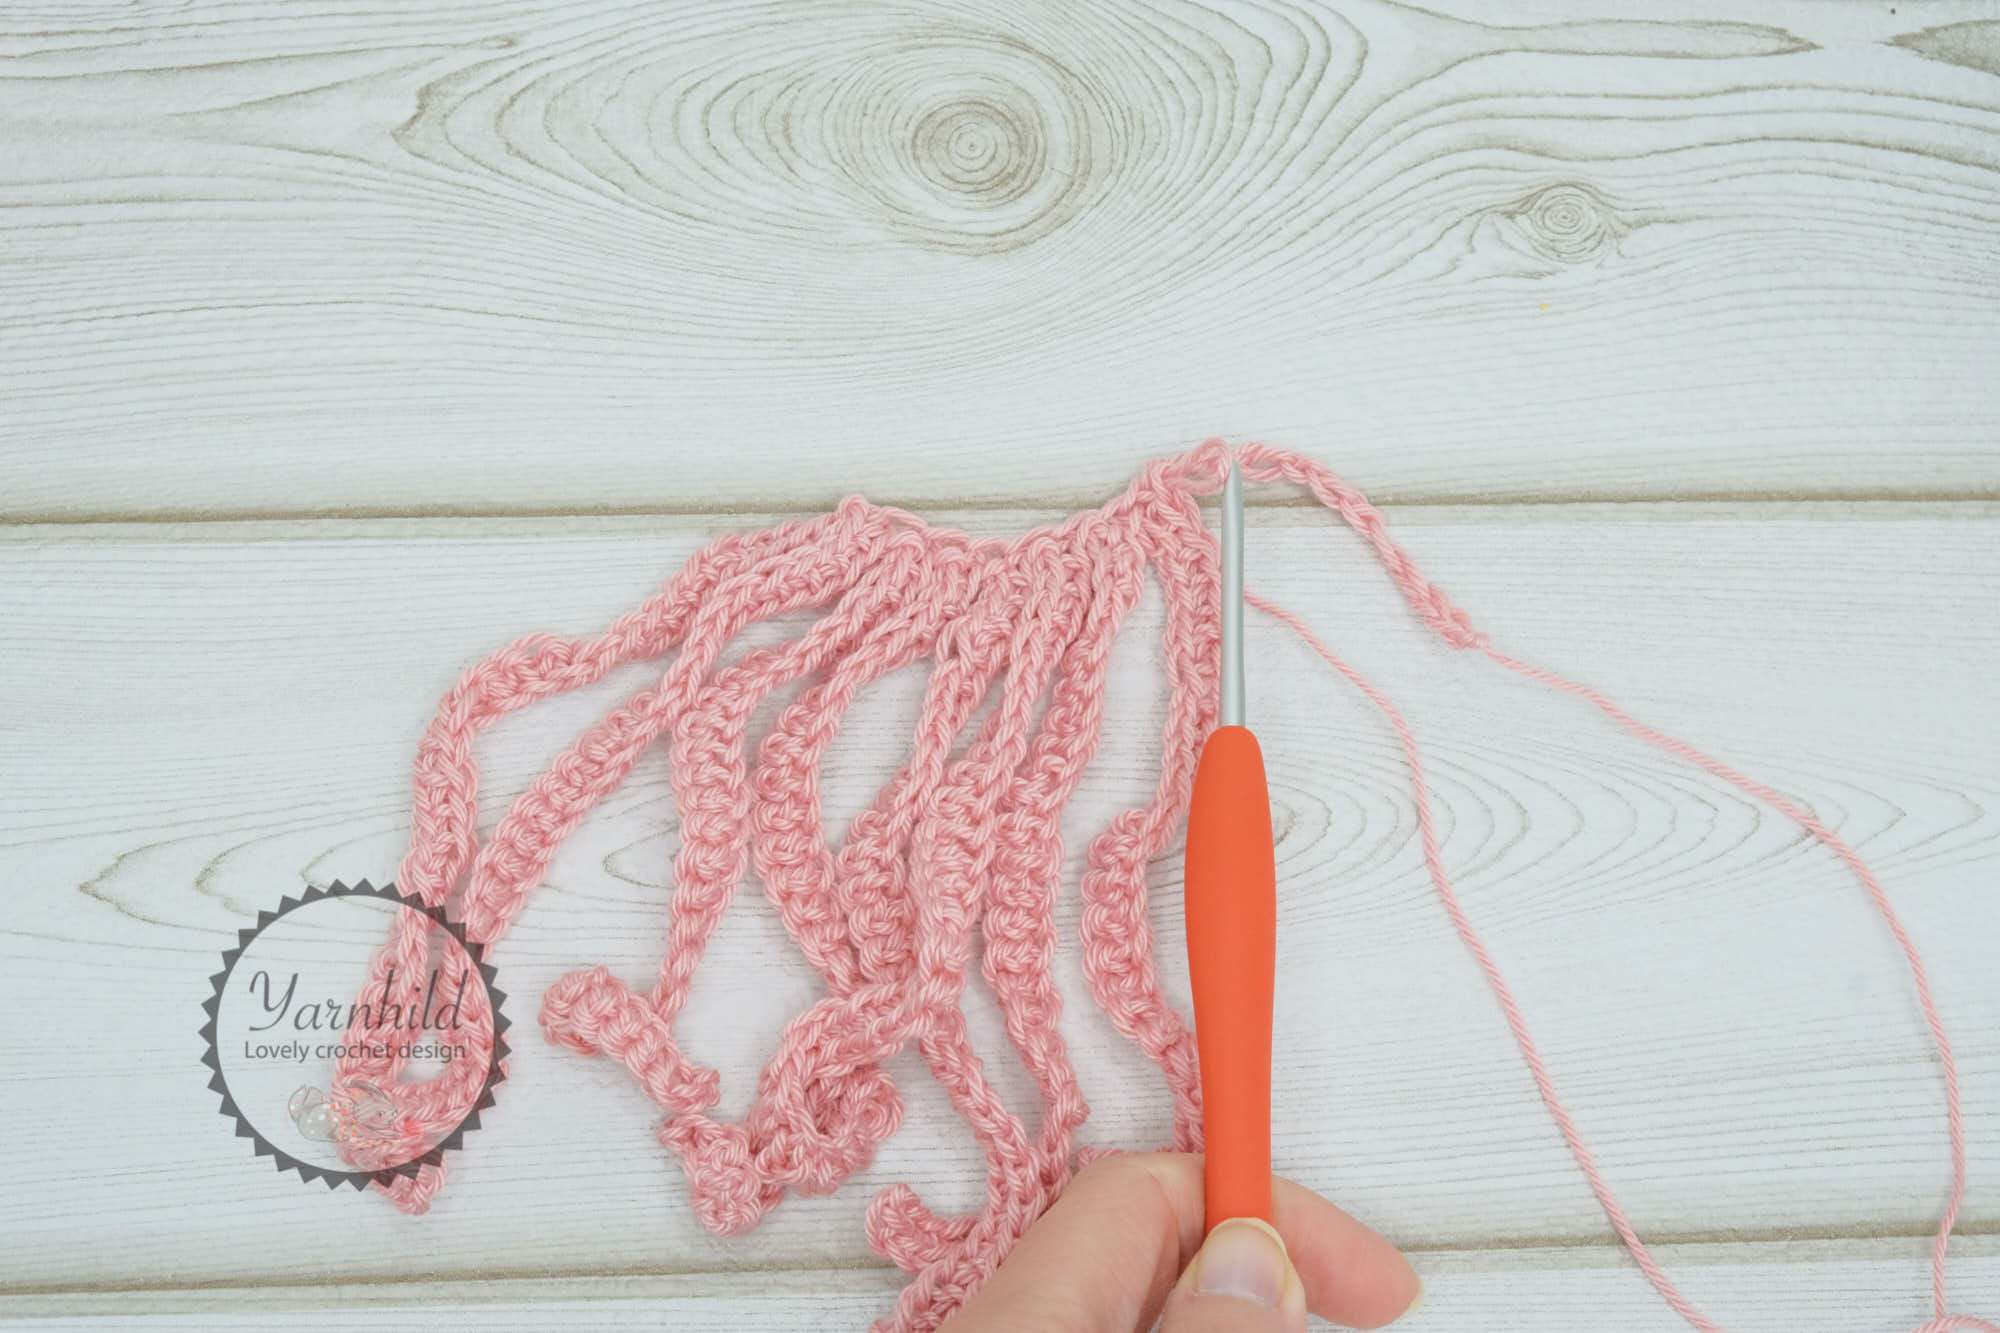
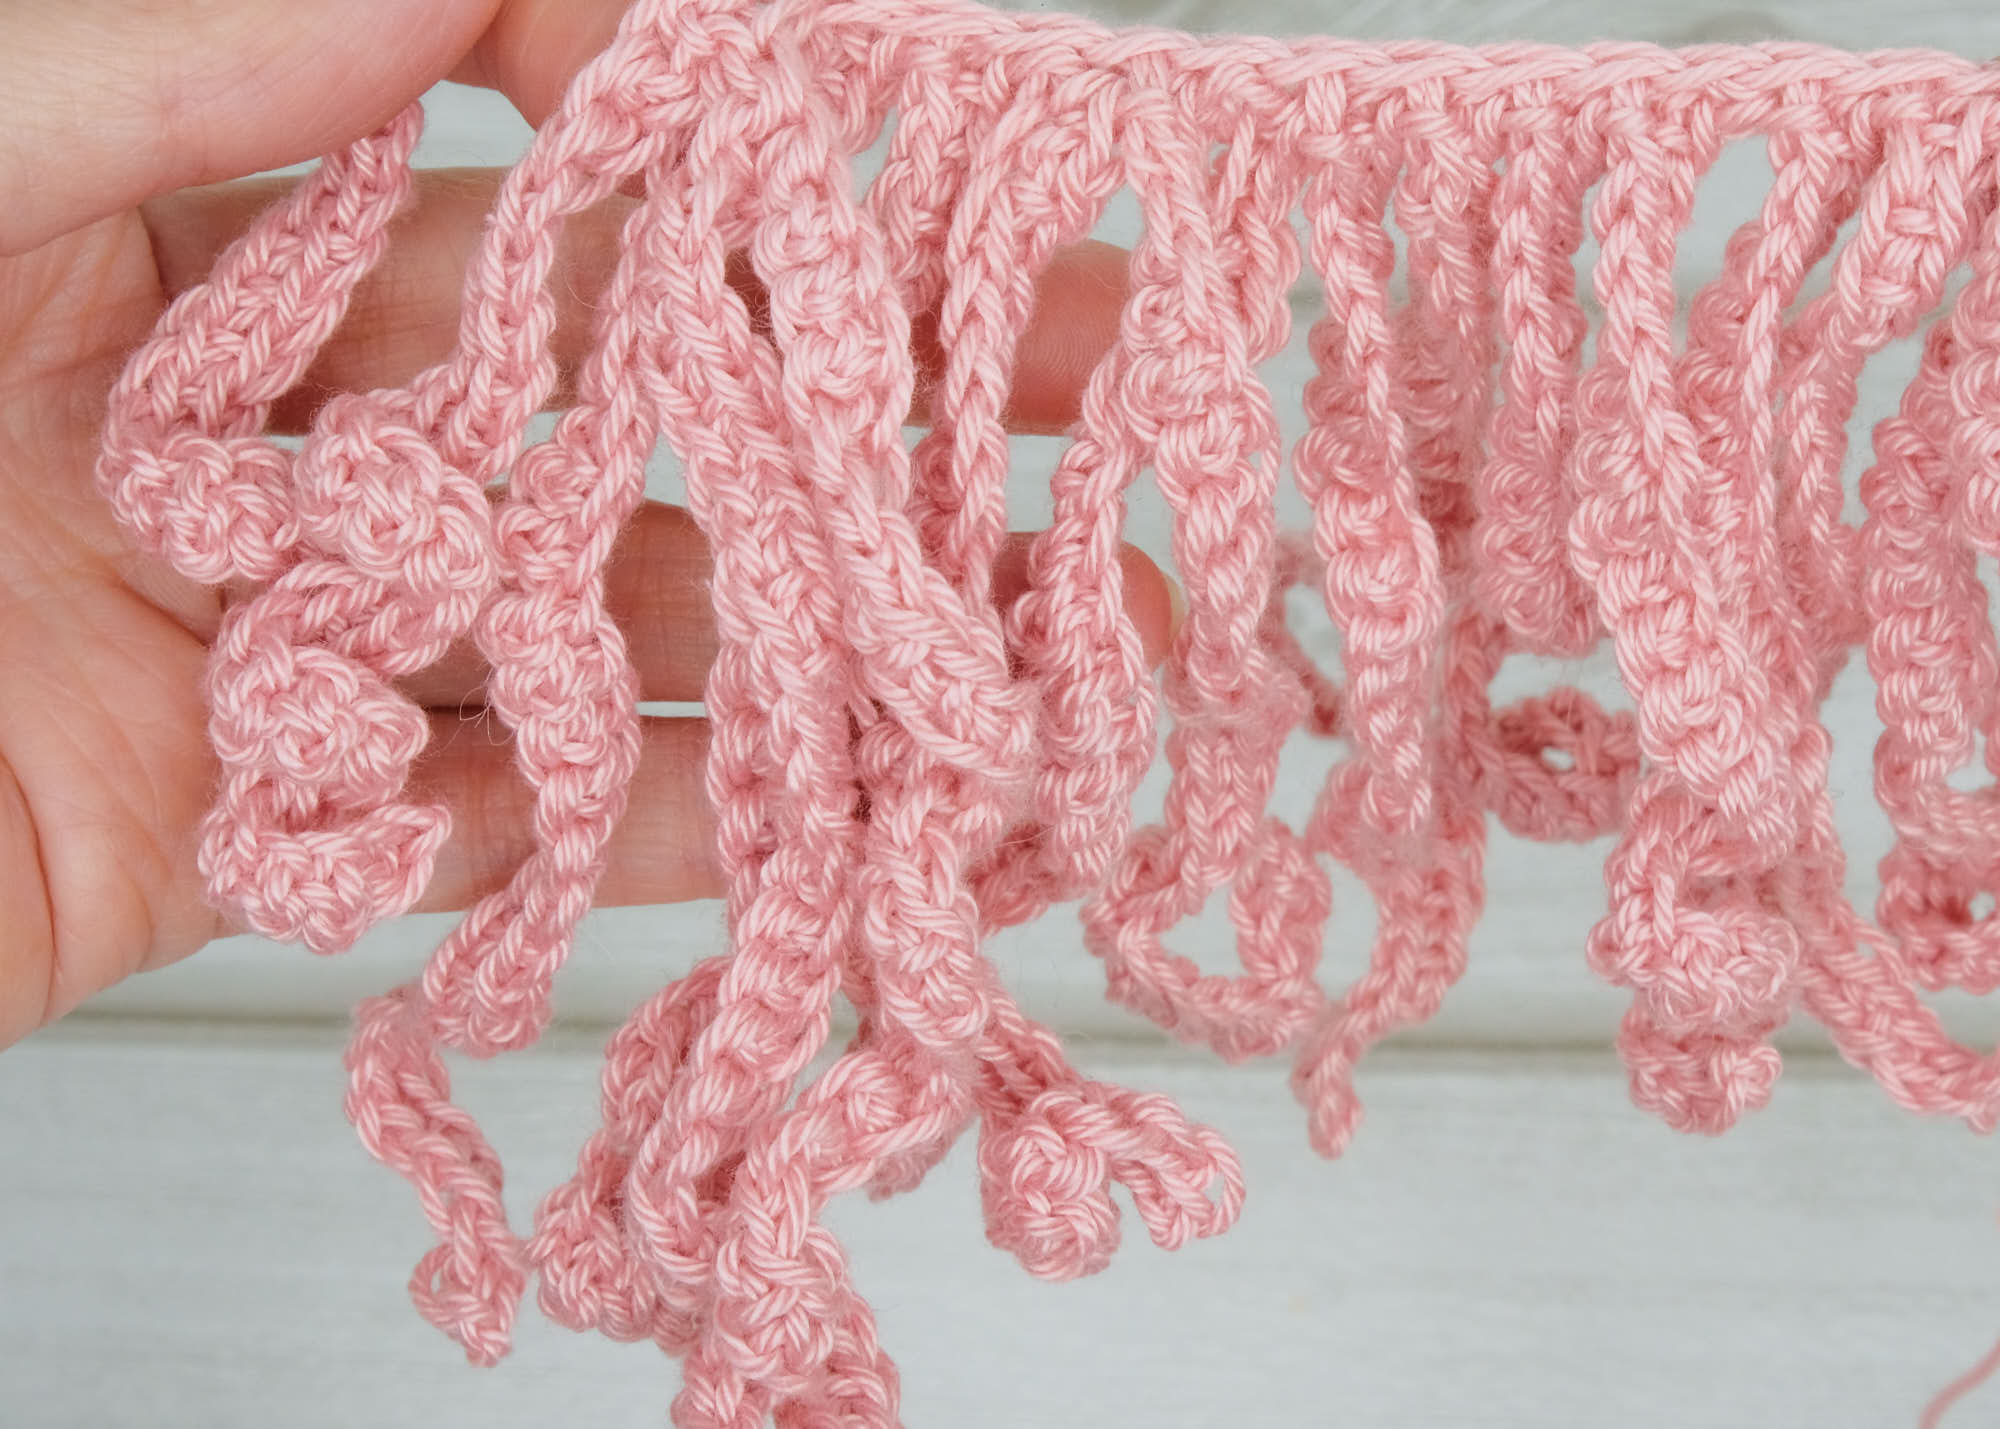
CH 36, turn. 1 SC in the second chain from the hook and in the next 19 chains. This will be the first strand of the hair. Now SL ST in the next CH, CH 21, turn, 1 SC in the second chain from the hook and in the next 20 CH. Repeat the process with all the remaining chains, until you have 15 strands or so of hair. SL ST in the last chain and fasten off to finish. Leave a long strand for sewing. Fold the hair in half, hold it, and sew it with small stitches together.
Wings
The left wing, color nature
Row 1: MR, CH 3 (counts as 1 DC unless otherwise instructed), 5 DC in the ring. Ch 3, turn. Pull ring closed = 6 DC
Row 2: 1 DC in the first DC (same as the 3 chains), (DC INC x 5). Ch3, turn =12 DC
Row 3: 1 DC in the first DC (same as the 3 chains) 1 DC in next 10, 3 DC in last DC, Ch 3, turn= 15 DC
Row 4: 4 DC in the first DC (same as the 3 chains), skip the next stitch, (SL ST in next ST, 3 HDC in next) x 6, SL ST in next in top of CH 3 from the previous row. Fasten off and cut the yarn, leave a long tail for attaching. = 6 clusters of 3 HDC, 1 cluster of 5 DC. The top of the wings is the DC clusters.
The right wing, color nature
Row 1: MR, ch 3 (counts as 1 DC), 5 DC in the ring. CH 3, turn. Pull ring closed = 6 DC
Row 2: 1 DC in the first DC (same as the 3 chains), DC INC x 5. Ch 3, turn =12 DC
Row 3: 2 DC in the first DC (same as the 3 chains) 1 DC in next 10, Ch 2 (counts as 1 HDC), turn= 15 DC
Row 4: 2 HDC in the first HDC (same as the 2 chains), (SL ST in next ST, 3 HDC in next) x 5, SL ST in next, skip the next ST, 5 DC in next, SL ST in top of CH 3 from the previous row. = 6 clusters of 3 HDC, 1 cluster of 5 DC
Fasten off and cut the yarn, leave a long tail for attaching. The top of the wings is the DC clusters.
Halo
Use a pipe cleaner or a craft wire. Form it into the shape of a halo. Wind some glitter thread around it. If you find this difficult you, here is another alternative:
3.0 mm crochet hook
With glitter yarn and nature held together:
CH 12, join to form a ring. 14 SC around the ring, or as many as you can fit. SL ST in the first SC. If you have a pipe cleaner; wind the pipe cleaner around one place at the ring, so it will stand. Alternative you can just sew the halo/ring on the head with a few stitches.
I also sewed the lover parts on the wings together.

Assembly
Sew the head to the body. The increases from round 3 are the shoulders. So, make sure that they are pointing forward and that the head is in alignment with the body. Sew the wings to the body. I recommend using straight pins to find the best position for the wings and the hair.
If you want to hang up your ornament angel:
In blue yarn: Ch 15, sl st in the first ch, fasten off. Fasten the chain on the top of the head.
Thank you for purchasing this pattern! I hope that you liked it! If you have any questions, please write to me: yarnhild@outlook.com
Also, don’t forget to share your finished work with me! Find me on Facebook and Instagram @Yarnhild


One Comment
Comments are closed.