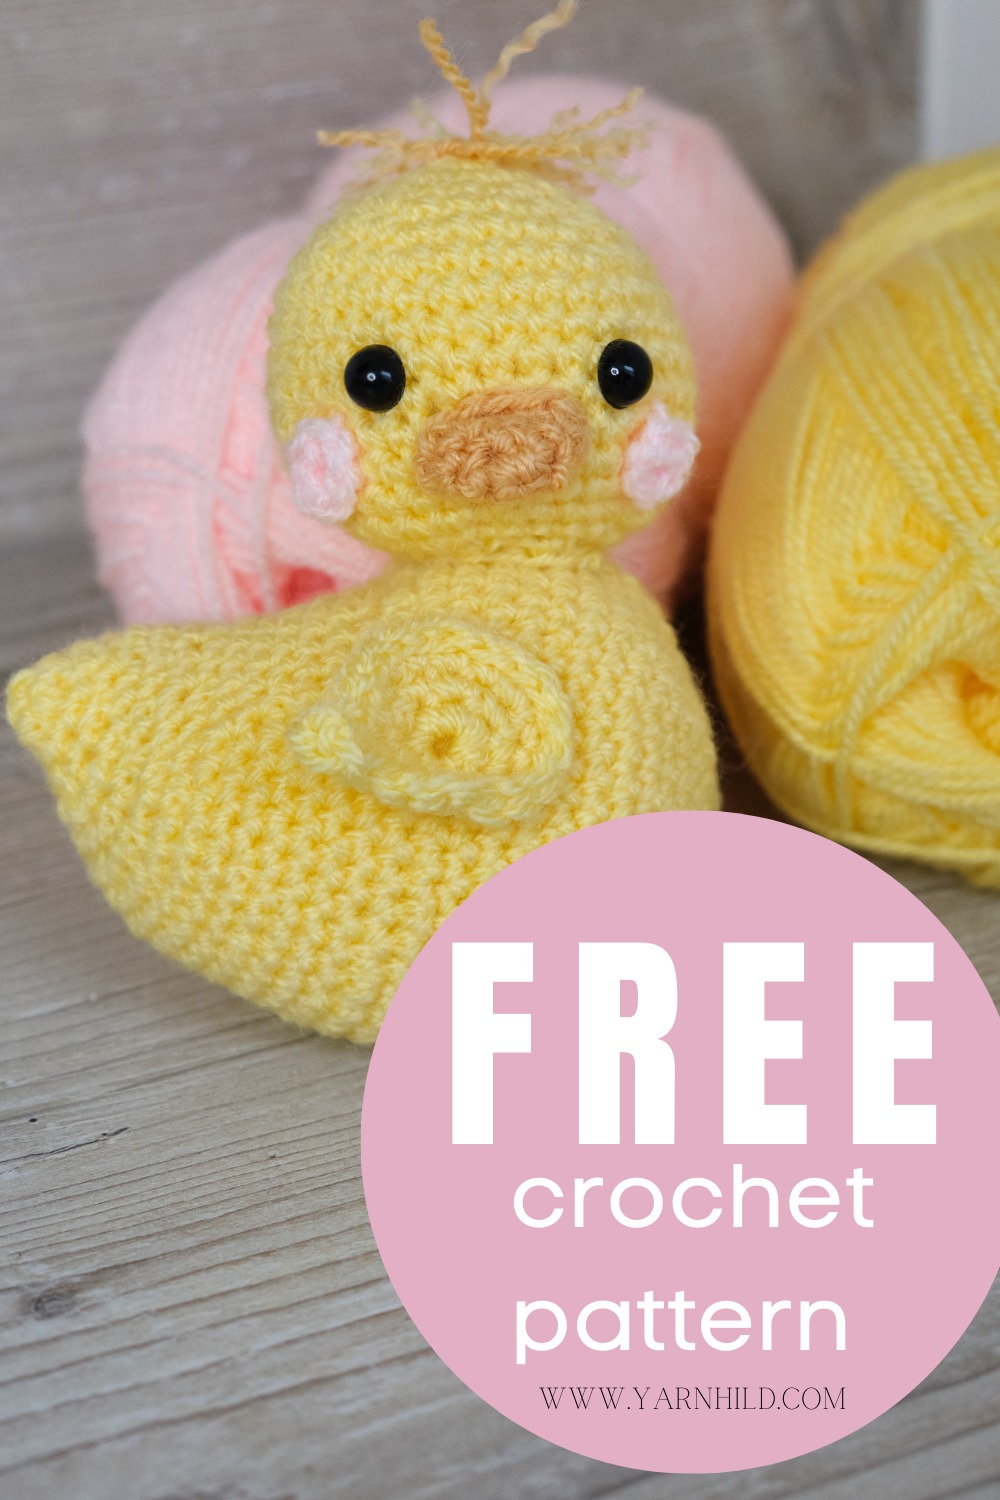
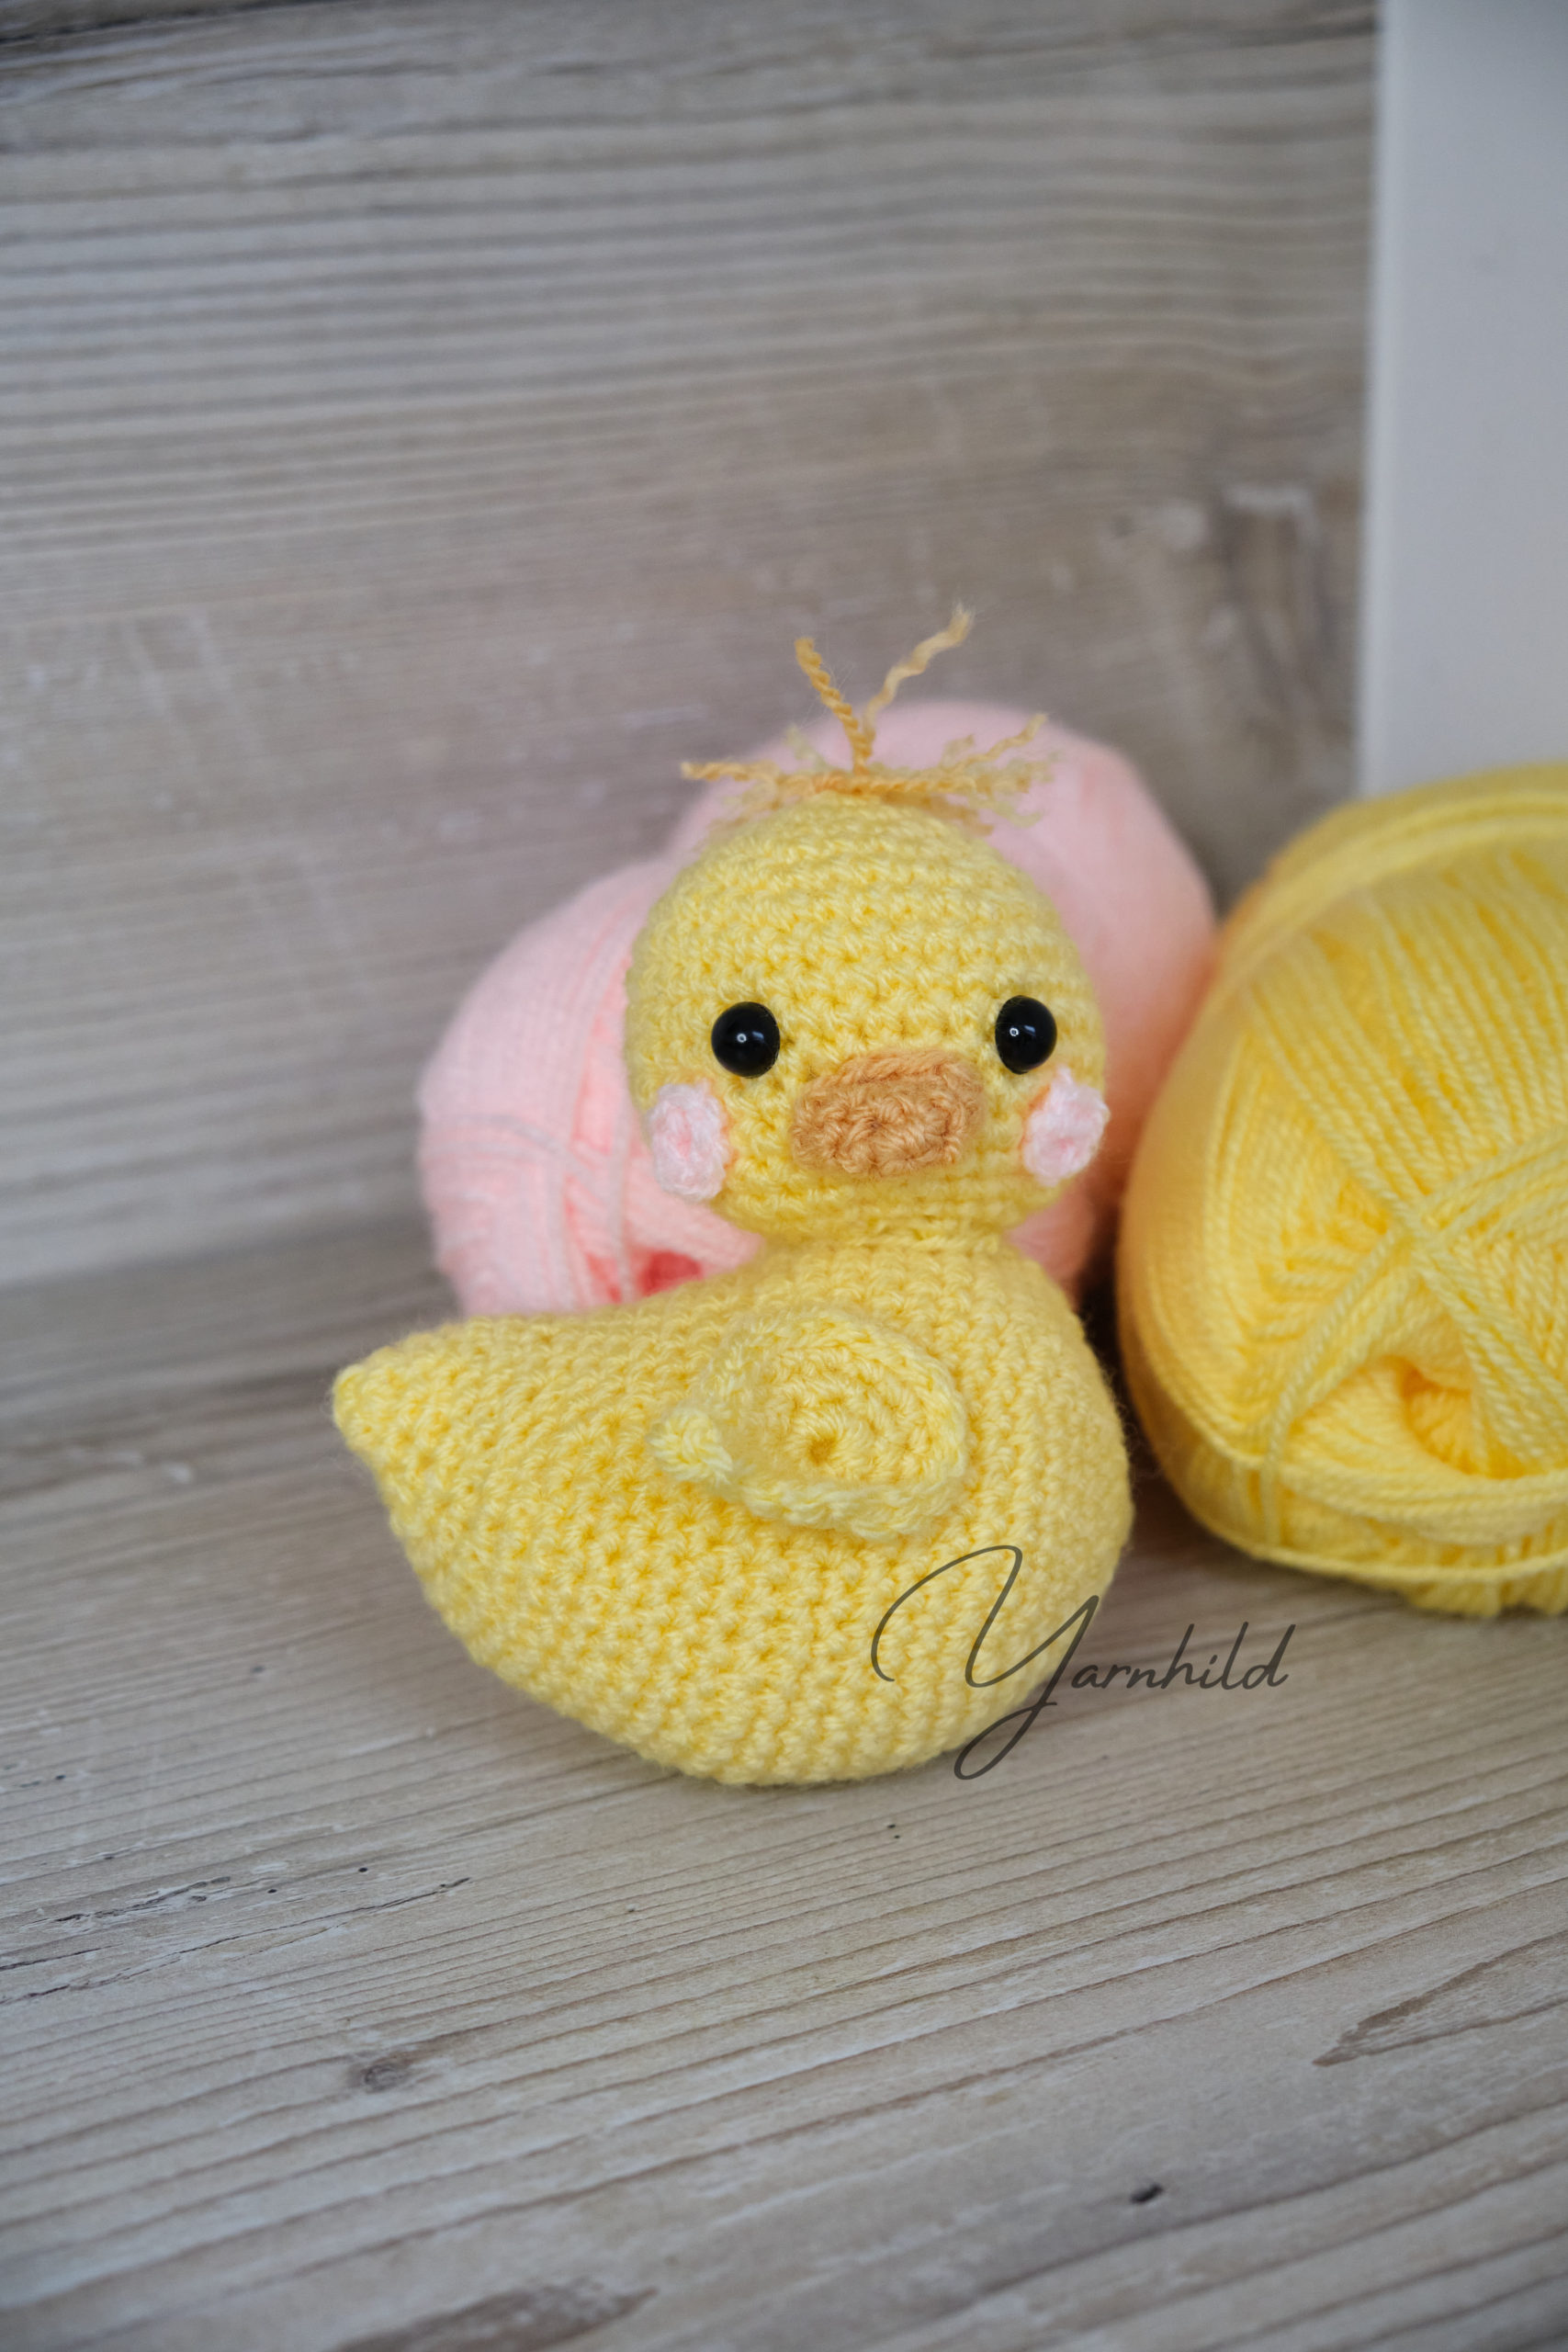
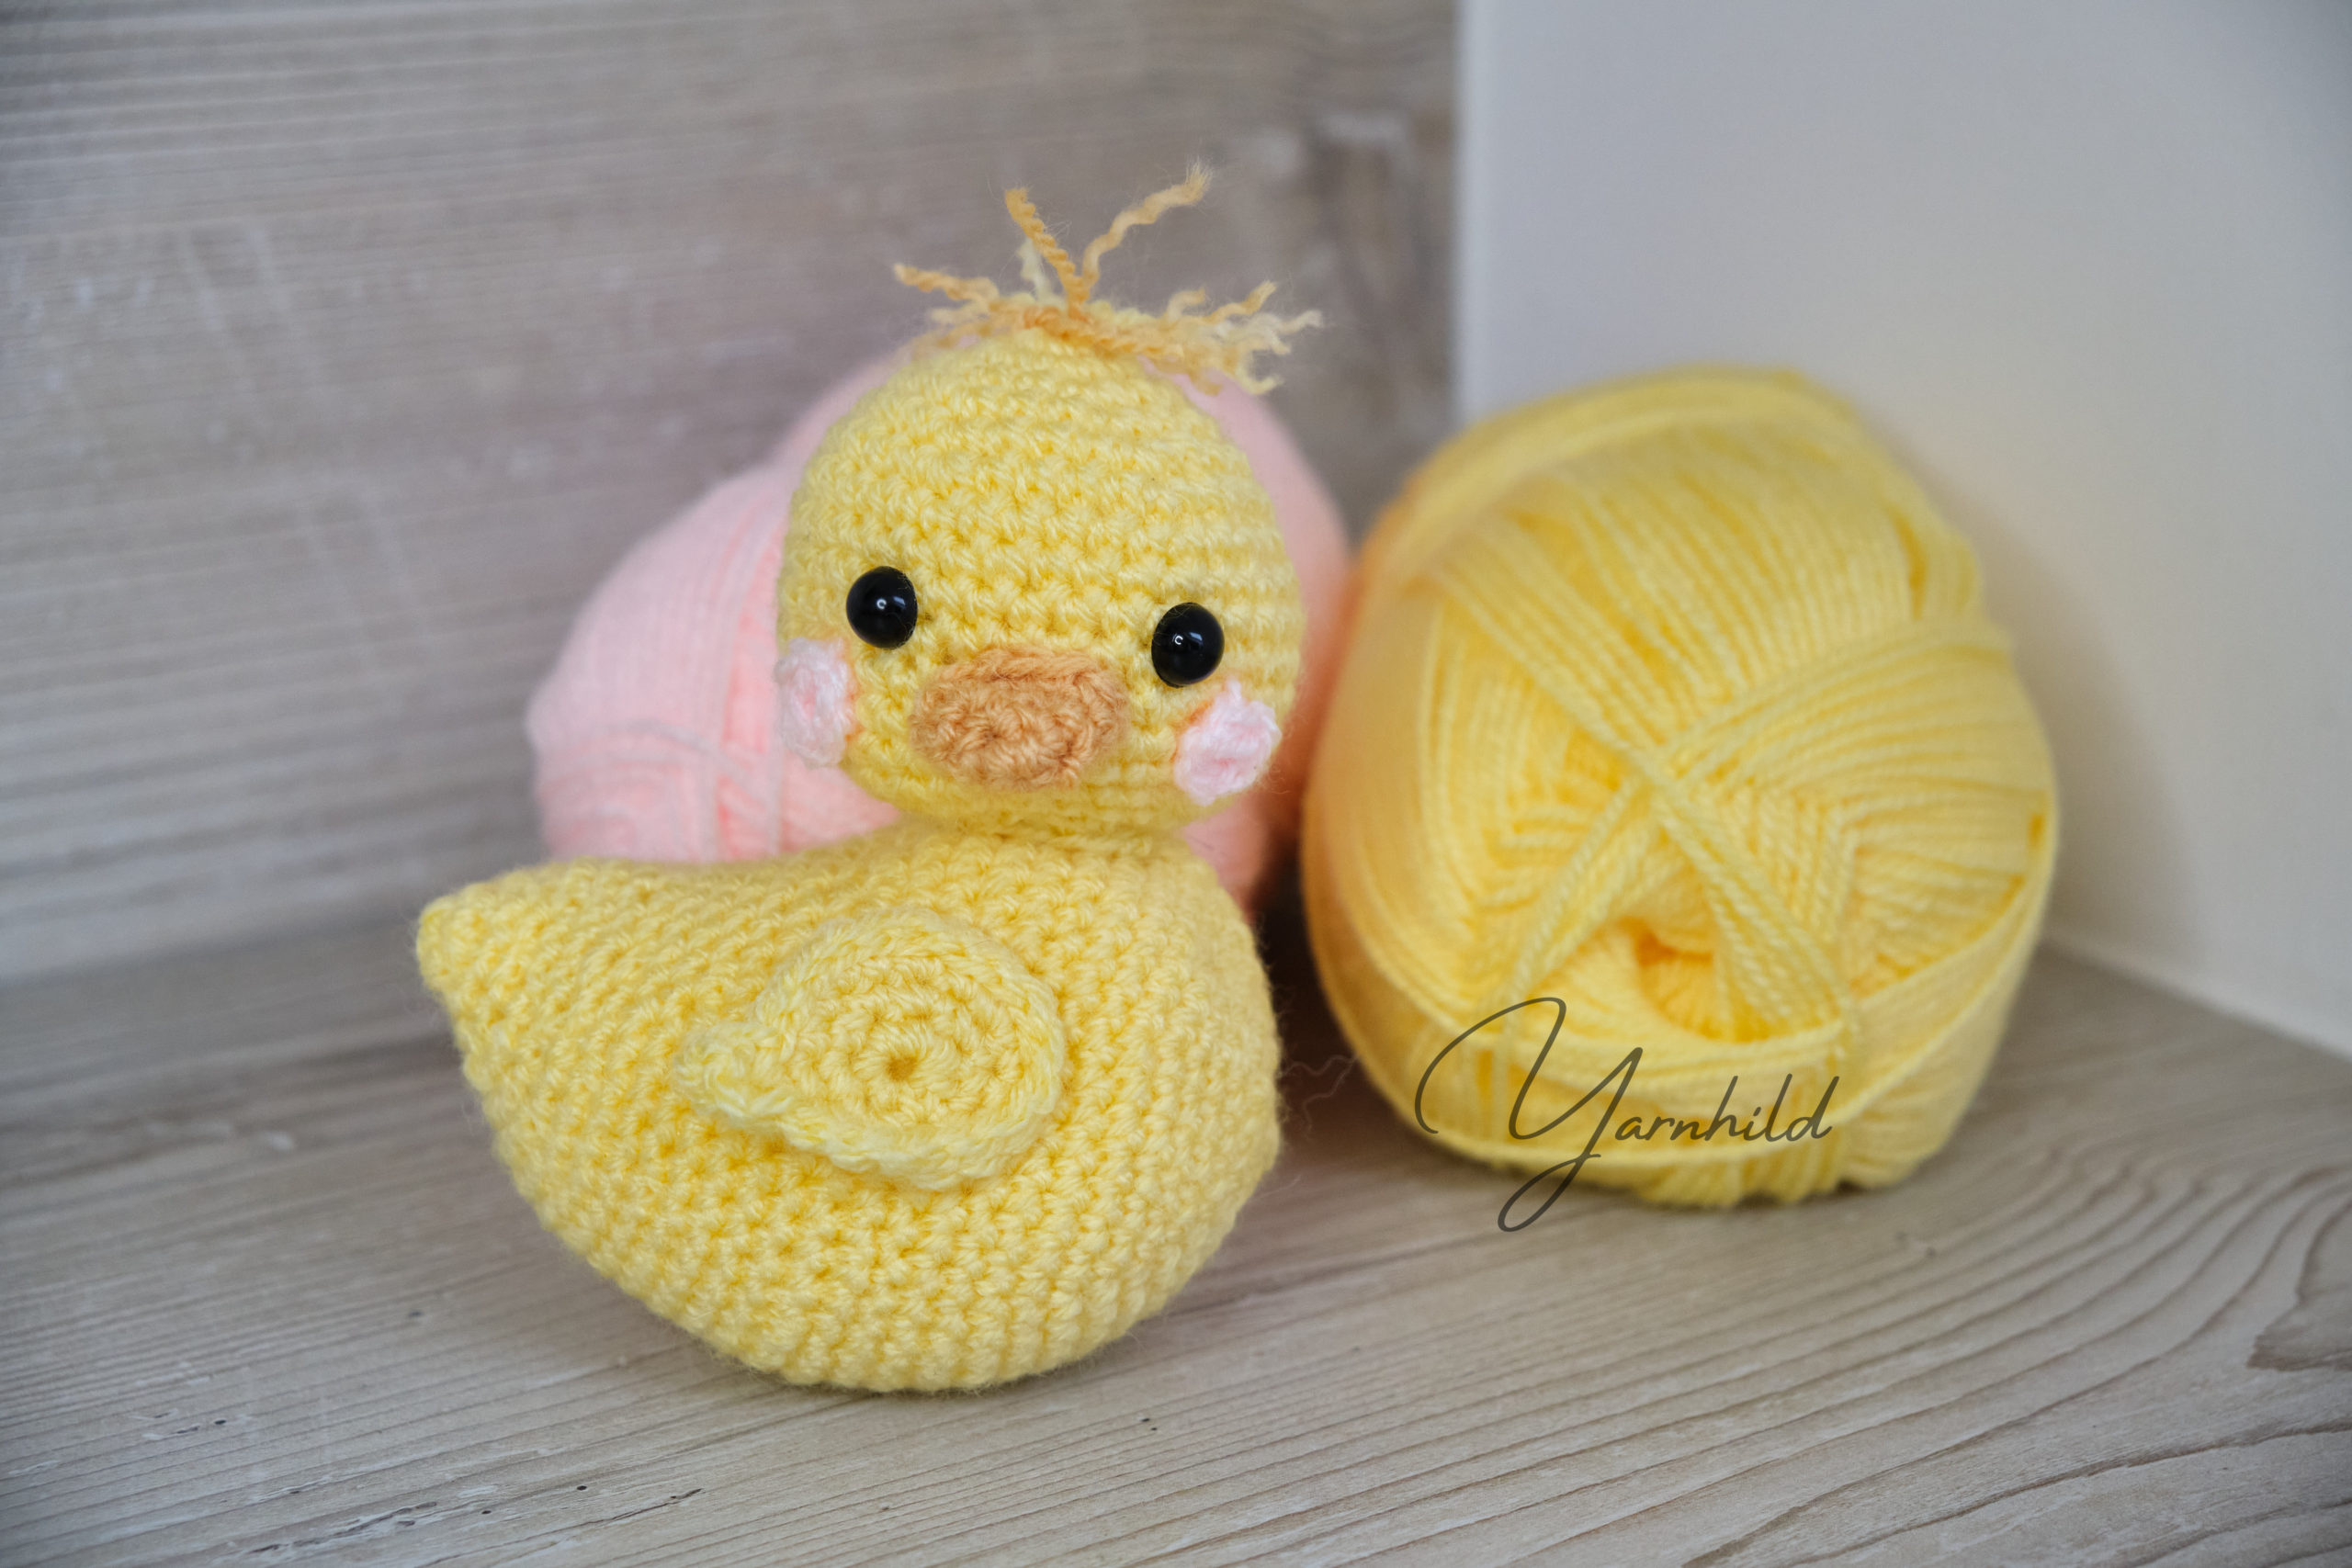
Crochet duck pattern - Eddy the duck
Here is a free crochet pattern for a cute duck! This is a fun and quick crochet pattern that you can make in no time. Because we are adding some shaping into the body, this is a great pattern for those with some experience. If you are a beginner, you can start with this pattern.
Get the ad-free version here!
Diese Anleitung ist auch auf Deutsch verfügbar! Einfach ganz nach unten scrollen, under der Englischen version.
Pin this for later on Pinterest.
I sometimes include affiliate links in my blog posts. That means that I earn a small commission if you purchase a product that I recommend, at no extra costs on your behalf. Thank you for your support!
About the pattern
This pattern is not for complete beginners but requires some experience. The head part of the duck is very easy, however, the body has some shaping. But if you are an advanced beginner looking to grow, you could definitely try this pattern!
There is also a video below explaining how to read patterns.
The head, body, beak, and wings are all made separately and later sewed on. You can use any kind of yarn for this project, but I do recommend a similar one if you want the same size and look.
Tips on making the face
A little tip that I have for you is to not attach the safety eyes on the duck before you know 100% that you want them there. You could also finish the face before attaching the eyes and superglue them on the head. However, I do recommend practice on a different head first so the original one doesn't get ruined.
Materials for the crochet duck
You only a little leftover yarn, some safety eyes, and little filling materials.I used a 3.5 mm crochet hook and my chick is about 13.5 cm.
The Yarn
For the amigurumi duck, I used Paintbox yarn simply Aran. I recently bought many colors of this affordable yarn and it is great working with!
A little side note. Usually, I go with cotton yarn for my amigurumi projects. However, I read somewhere that cotton yarn can be harder on the wrist if you are suffering from wrist problems due to crocheting. So I decided to give this yarn a try, and I could really crochet longer without pain in my wrist!
Never miss a pattern
You can get free crochet pattern alerts directly to your inbox if you want. It is free and you can unsubscribe any time.
Amigurumi duck - a free crochet pattern
Here is the pattern for the duck! Scroll down for the German version.
This pattern is the intellectual property of Yarnhild. The pattern must not be altered, translated, copied, or republished without approval. You are welcome to sell the items that you have made from my patterns, but please be sure to give me credit for the pattern that you sell online. For private use only, no commercial use. 2021 – Yarnhild ©

Crochet duck pattern - Eddy the duck.
The chicken is worked in continuous rounds using a 3.5 mm crochet hook. Use a stitch marker and move it up as you go. The body, the head, the beak, and the wings are made separately.
To make a bigger/smaller chick use different yarn and hook.
Abbreviations – US terms
Ch–chain
R–round
St–stitch
Sc–single crochet
Sc dec–single crochet decrease
Sc inc–single crochet increase,
two single crochet in one
stitch
Mr –Magic ring
Sl st. – Slipstitch
Hdc – Half double crochet
Dc – Double crochet
Materials
- Materials
- - Crochet hook 3.5 mm
- - DK weight yarn
- Colors: yellow and orange.
- Approx. 40 g/1.4 oz of yellow.
- I used Paintbox simply Aran, colors yellow, orange and pink (221 216 252). 100 g= 184 m
- - Tapestry needle
- - 9 or 10 mm safety eyes
- - Stitch marker
- - Stuffing materials
Instructions
Head
In yellow. Worked in continuous rounds and using a 3.5 mm crochet hook.
R1: 6sc in a mr (6 sc)
R2: sc inc x 6 (12 sc)
R3: (1sc, sc inc) x 6 (18 sc)
R4: (2sc, sc inc) x 6 (24 sc)
R5: (3sc, sc inc) x 6 (30 sc)
R6: (4sc, sc inc) x 6 (36 sc)
R7-13: 1sc in each st for 7 rounds (36 sc)
R14: (4sc, sc dec) x 6 (30 sc)
Attach safety eyes between rounds 10 11, 5 stitches apart.
R15: (3sc, sc dec) x 6 (24 sc)
R16: (2sc, sc dec) x 6 (18 sc)
Add stuffing.
Finish off leaving a long tail for sewing.
Beak
In orange.
R1: 4sc in a mr (4 sc)
R2: sc inc x 4 (8 sc)
R3: (1sc, sc inc) 4 (12 sc)
R4. 1sc in each st (12 sc)
Finish off leaving a long tail for sewing.
Cheeks
In pink. Make 2.
6 sc in a mr. Finish off leaving a long tail for sewing.
Body
In yellow
R1: 6sc in a mr (6 sc)
R2: sc inc x 6 (12 sc)
R3: (1sc, sc inc) x 6 (18 sc)
R4: (2sc, sc inc) x 6 (24 sc)
R5: (3sc, sc inc) x 6 (30 sc)
R6: (4sc, sc inc) x 6 (36 sc)
R7: (5sc, sc inc) x 6 (42 sc)
R8: (6sc, sc inc) x 6 (48 sc)
R9-14: 1sc in each st for 6 rounds (48 sc)
R15: (2sc, sc dec) x 6, 24sc (42 sc)
R16: (1sc, sc dec) x 6, 24sc (36 sc)
R17-18: 1sc in each st for 2 rounds (36 sc)
R19: (4sc, sc dec) x 6 (30 sc)
R20-22: 1sc in each st for 3 rounds (30 sc)
Add stuffing.
R23: (3sc, sc dec) x 6 (24 sc)
R24: (2sc, sc inc) x 4 (1sc, sc dec) x 4 (24 sc)
R25: (1sc, sc inc) x 6 (1sc, sc dec) x 4 (26 sc)
R26: 19sc (sc dec) x 2, 3 sc (24 sc)
Add more stuffing if needed.
R27: (2sc, sc dec) x 6 (18 sc)
R28: (1sc, sc dec) x 6 (12 sc)
R29: sc dec x 6 (6 sc)
Finish off and sew the hole closed.
The right wing
Leave a tail at the beginning
R1: 6sc in a mr (6 sc).
R2: sc inc x 6 (12 sc)
R3: (1sc, sc inc) x 6 (18 sc)
Sl st in the next 6 sts. 1 dc in the next 2 sts. Sl st 2 times (sl st down dc stitch) Sl st until the end of the round. Finish off and weave in ends.
The left wing
Leave a tail at the beginning
R1: 6sc in a mr (6 sc).
R2: sc inc x 6 (12 sc)
R3: (1sc, sc inc) x 5 (18 sc)
1 dc in the next 2 sts. Sl st 2 times. (sl st down the dc stitch) St st until the end of the round. Finish off and weave in ends.
Assembly
Sew on the beak just below the eyes (round 11). Pinch it flat and sew it on. Attach the cheeks just below the eyes. Cut a few strands of yarn and make hair.
Attach the head between rounds 10 and 15 (the thicker part of the body). Avoid having the face side on the same side and where the rounds are beginning and ending. Attach it with a knot and split the yarn with your tapestry needle for a more natural result. Sew up and down making sure to go through all the stitches. See pictures.
Sew on the wings on both sides. Make sure to attach them on the right sides.

Häkelanleitung für Enterich Eddy
Informationen über diese Anleitung
Der Enterich wird in Spiralrunden gehäkelt. Nutze einen Maschenmarkierer um die Orientierung nicht zu verlieren. Alle Teile werden separat gehäkelt und später zusammengenäht.
Fertige Größe: Circa 13,5 cm hoch
Niveau: Mittel
Abkürzungen
Lfm – Luftmasche(n)
fM – feste Masche(n)
KM – Kettmasche(n)
M – Masche(n)
hStb – Halbes Stäbchen
Stb – Stäbchen
Abnehmen – 1 M abn (2 Maschen werden zusammengehäkelt)
MR – magischer Ring
*-* – von *-* wiederholen
R -Runde(n)
Materials
- Materialien
- - Häkelnadel 3,5 mm
- - Wolle, Paintbox simply Aran oder ein vergleichbares. 40 g von gelb und Reste von orange und rosa. (Farbenummer 221 216 252). 100 g= 184 m
- - Wollnadel
- - 9mm oder 10 mm Sicherheitsaugen
- - Maschenmarkierer
- - Füllwatte
Instructions
Kopf
In gelb
R1: 6 fM in einen MR = 6 fM
R2: 1 fM zun x 6= 12 fM
R3: (1 fM, 1 fM zun) x 6 = 18 fM
R4: (2 fM, 1 fM zun) x 6 = 24 fM
R5: (3 fM, 1 fM zun) x 6 = 30 fM
R6: (4 fM, 1 fM zun) x 6 = 36 fM
R7- 13: 1 fM in jede M (7 Runden) = 36 fM
Rnd 14: (4 fM, 1 fM abn) x 6 = 30 fM
Sicherheitsaugen zwischen Runde 10 und 11 mit einem Abstand von 5 Maschen befestigen.
R15: (3 fM, 1 fM abn) x 6 = 24 fM
R16: (2 fM, 1 fM abn) x 6 = 18 fM
Befülle den Kopf mit Füllwatte.
KM in die erste M und den Faden abschneiden. Lass einen langen Faden übrig zur Befestigung.
Bäckchen
In rosa.
6 fM in ein MR. Faden abschneiden. Lass etwa übrig zur Befestigung.
Schnabel
In orange.
R1: 4 fM in einen MR = 4 fM
R2: 1 fM zun x 4 = 8 fM
R3: (1 fM, 1 fM zun) x 6 = 12 fM
R4. 1 fM in jede M = 12 fM
KM in die erste M und abschneiden. Lass einen langen Faden übrig zur Befestigung.
Körper
In gelb.
R1: 6 fM in einen MR = 6 fM
R2: 1 fM zun x 6= 12 fM
R3: (1 fM, 1 fM zun) x 6 = 18 fM
R4: (2 fM, 1 fM zun) x 6 = 24 fM
R5: (3 fM, 1 fM zun) x 6 = 30 fM
R6: (4 fM, 1 fM zun) x 6 = 36 fM
R7: (5 fM, 1 fM zun) x 6 = 42 fM
R8: (6 fM, 1 fM zun) x 6 = 48 fM
R9-14: 1 fM in jede M (6 Runden) = 48 fM
R15: (2 fM, 1 fM abn) x 6, 24 fM = 42 fM
R16: (1 fM, 1 fM abn) x 6, 24 fM = 36 fM
R17-18: 1 fM in jede M (2 Runden) = 36 fM
R19: (4 fM, 1 fM abn) x 6 = 30 fM
R20-22: 1 fM in jede M (3 Runden) = 30 fM
Den Körper mit Füllwatte befüllen.
R23: (3 fM, 1 fM abn) x 6 = 24 fM
R24: (2 fM, 1 fM zun) x 4 (1 fM, 1 fM abn) x 4 = 24 fM
R25: (1 fM, 1 fM zun) x 6 (1 fM, 1 fM abn) x 4 = 26 fM
R26: 19 fM, (1 fM abn) x 2, 2 fM = 24 fM
Wenn notwendig, dann mit mehr Füllwatte befüllen.
R27: (2 fM, 1 fM abn) x 6 = 18 fM
R28: (1 fM, 1 fM abn) x 6 = 12 fM
R29: 1 fM abn x 6 = 6 fM
KM in die erste M und beenden. Faden vernähen.
Rechter Flügel
Der Flügel wird mit dem Anfangsfaden angenäht, diesen dafür etwas länger lassen.
R1: 6 fM in einen MR = 6 fM
R2: 1 fM zun x 6= 12 fM
R3: (1 fM, 1 fM zun) x 6 = 18 fM
KM in die nächsten 6 M. 1 Stb in den nächsten 2 M, KM bis zum Ende der Runde. (Oben am Stäbchen angelangt, 2 KM an der Seite vom Stäbchen um keine Höhe zu verlieren). Faden abschneiden und vernähen.
Linker Flügel
Längeren Anfangsfaden wie beim rechten Flügel lassen.
R1: 6 fM in einen MR = 6 fM
R2: 1 fM zun x 6= 12 fM
R3: (1 fM, 1 fM zun) x 6 = 18 fM
1 Stb in den nächsten 2 M. KM bis zum Ende der Runde. Faden abschneiden und vernähen.
Fertigstellung
Den Schnabel unter den Augen befestigen. Drücke den Schnabel flach und nähe ihn an. Die Bäckchen werden unter den Augen befestigt. Ein paar Fädchen von der orangenen und gelben Wolle abschneiden und am Kopf befestigen. Knote sie fest und zerteile mit einer Nadel die Wollfäden um mehr realistische Haare zu bekommen.
Nutze Stecknadeln um den Kopf zu positionieren. Passe auf, dass das Gesicht nicht zur Seite blickt, wo der Rundenanfang/Ende ist. Siehe Fotos. Der Kopf zwischen Runden 10 – 15 befestigen.
Die Flügel an beiden Seiten befestigen.


One Comment
Comments are closed.