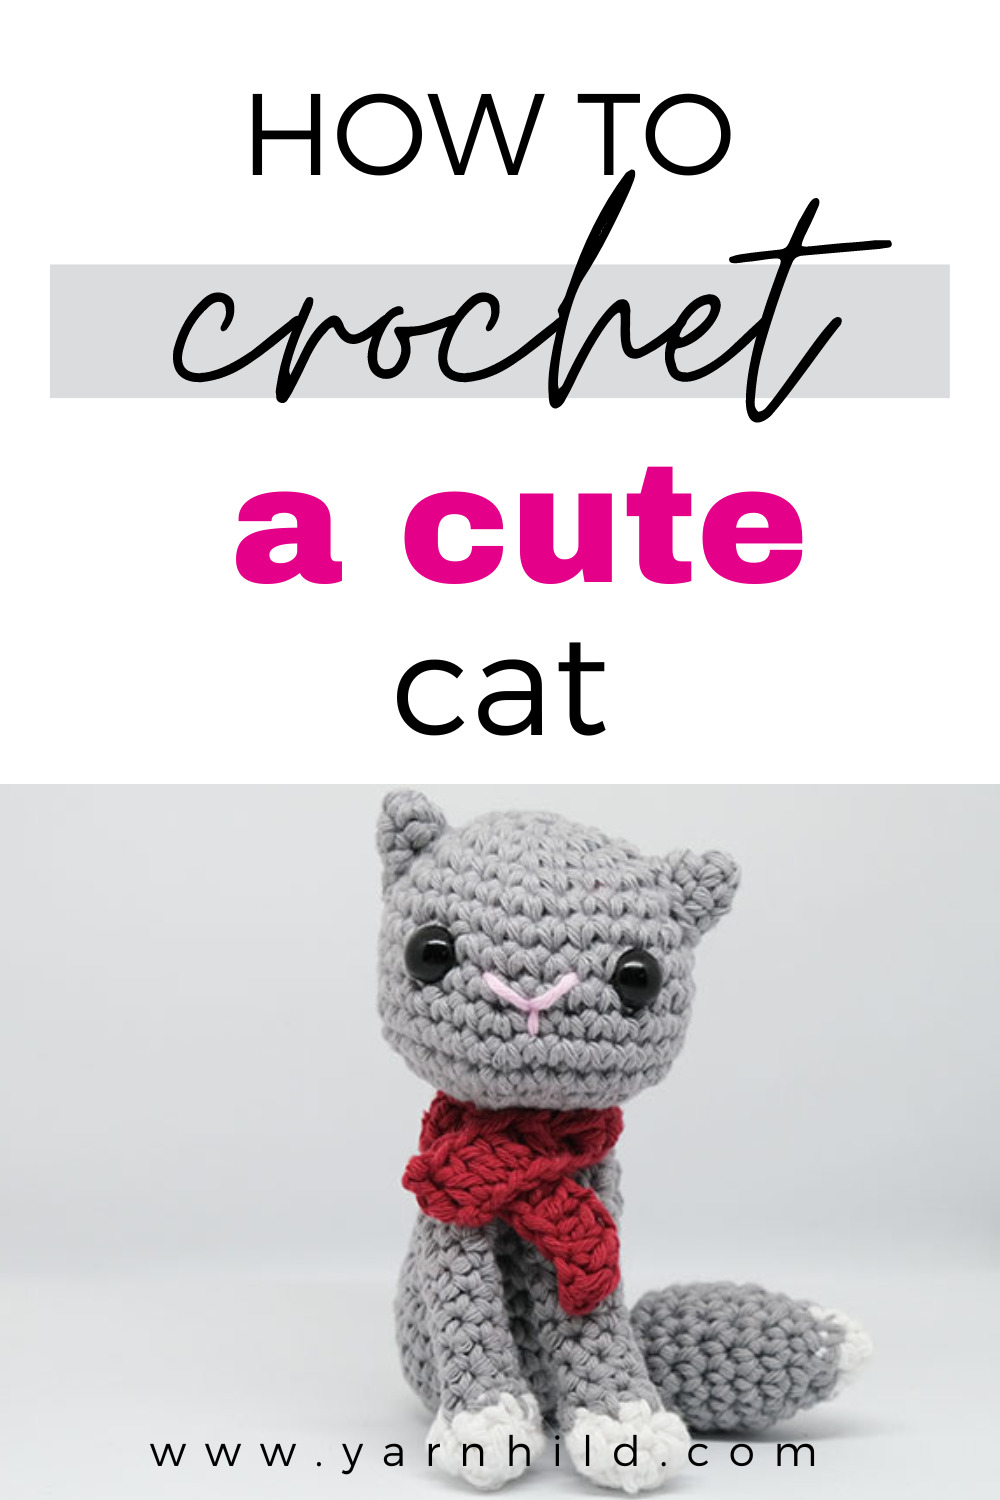
Lilly the crochet cat - Free amigurumi cat pattern
I am so happy to finally introduce my latest crochet amigurumi pattern. This time I made a cat! If you are a fan of crocheting and love cute, cuddly animals, then this pattern is definitely for you. Did I mention that the pattern is free?
Read through my inspiration, design process, or scroll on down for the free pattern. if you want to get the pdf version, you can grab it here. The pattern is in German and English.
Scrolle ganz nach unten für die deutsche Anleitung.
Save it for later on Pinterest.
Loosing my cat, Lilly
Those of you who have been following my blog and social media may remember that I had a cat named Lilly. Sadly, we had to put Lilly to sleep because she was very sick. We tried as best we could for a year to treat her illness with our vet, but in November we had to let her go.
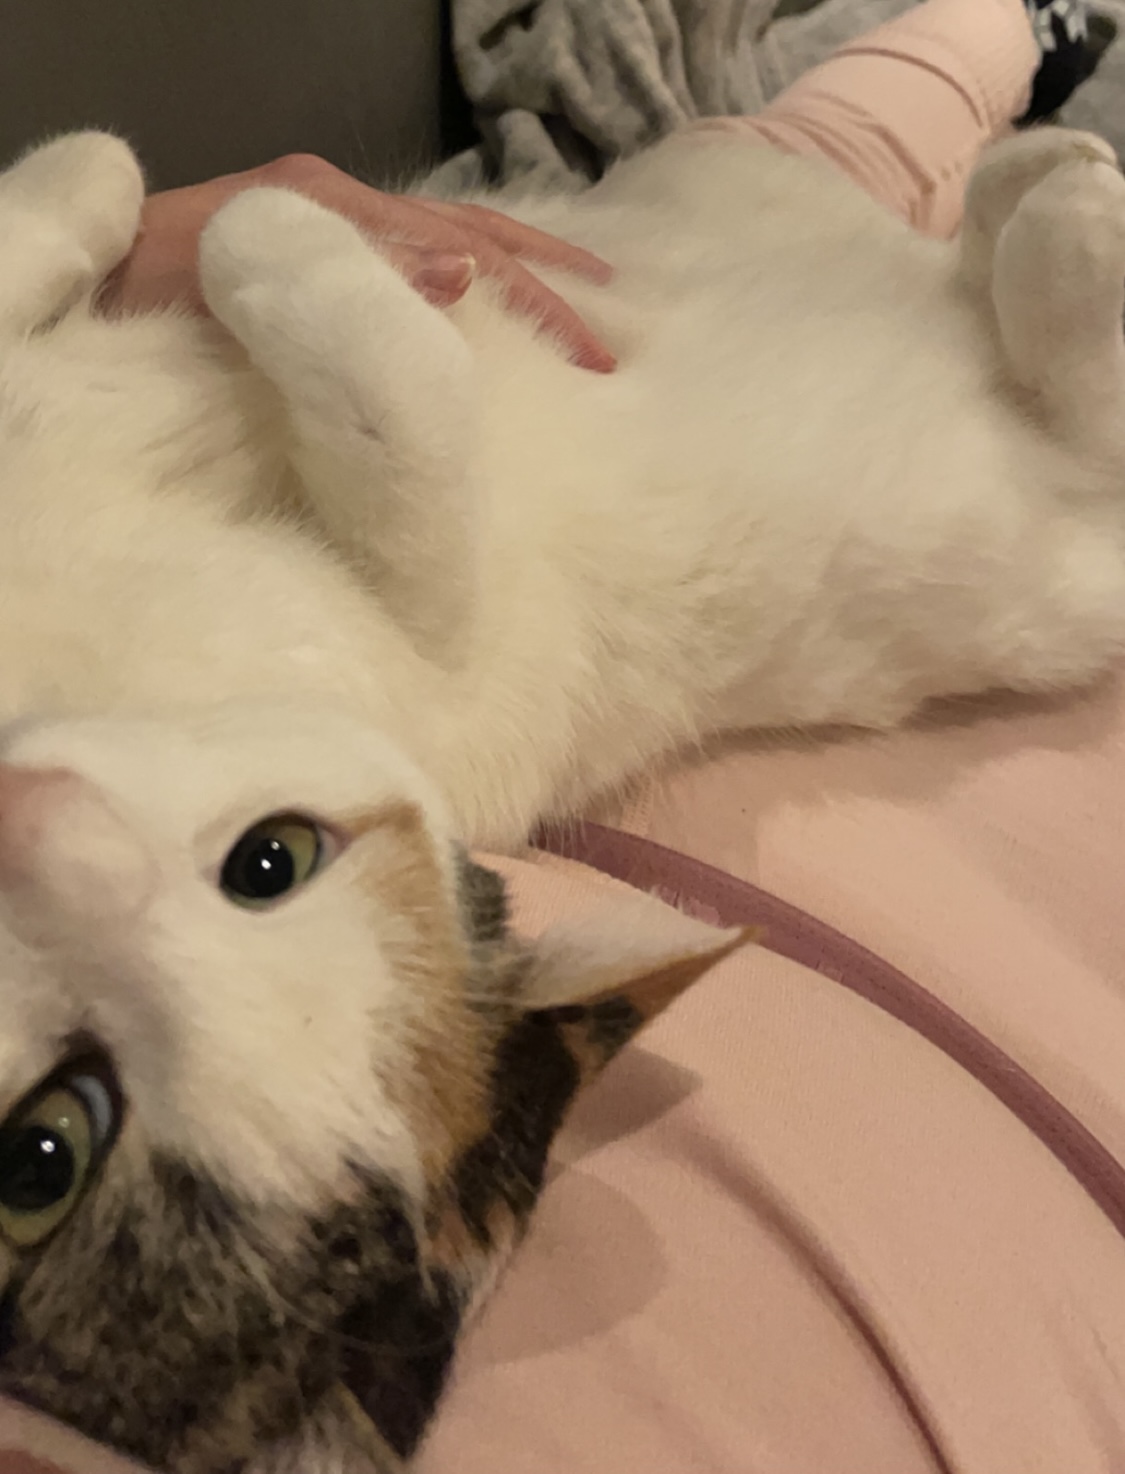
For me, losing my cat was a deeply painful experience. She had been a constant companion for many years, and the thought of life without her was unimaginable. She was a very special cat, so friendly and always happy to cuddle and give us cuddles and comfort.
It is heartbroken to loose a pet. After all, it is a family member. We where very sad and I needed a project to work with to help me work through the grief. So I crochet a cat and named the design Lilly. I am also making one in her colors some day. She was a tricolored cat.
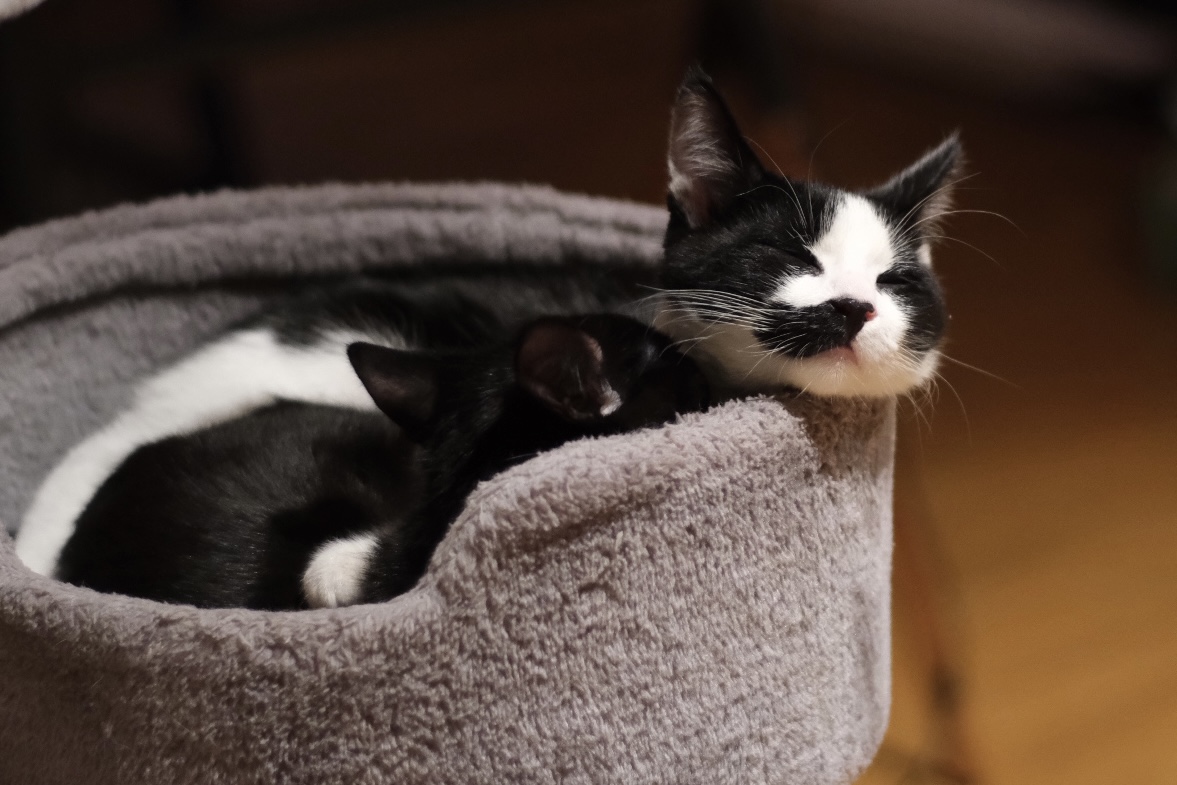
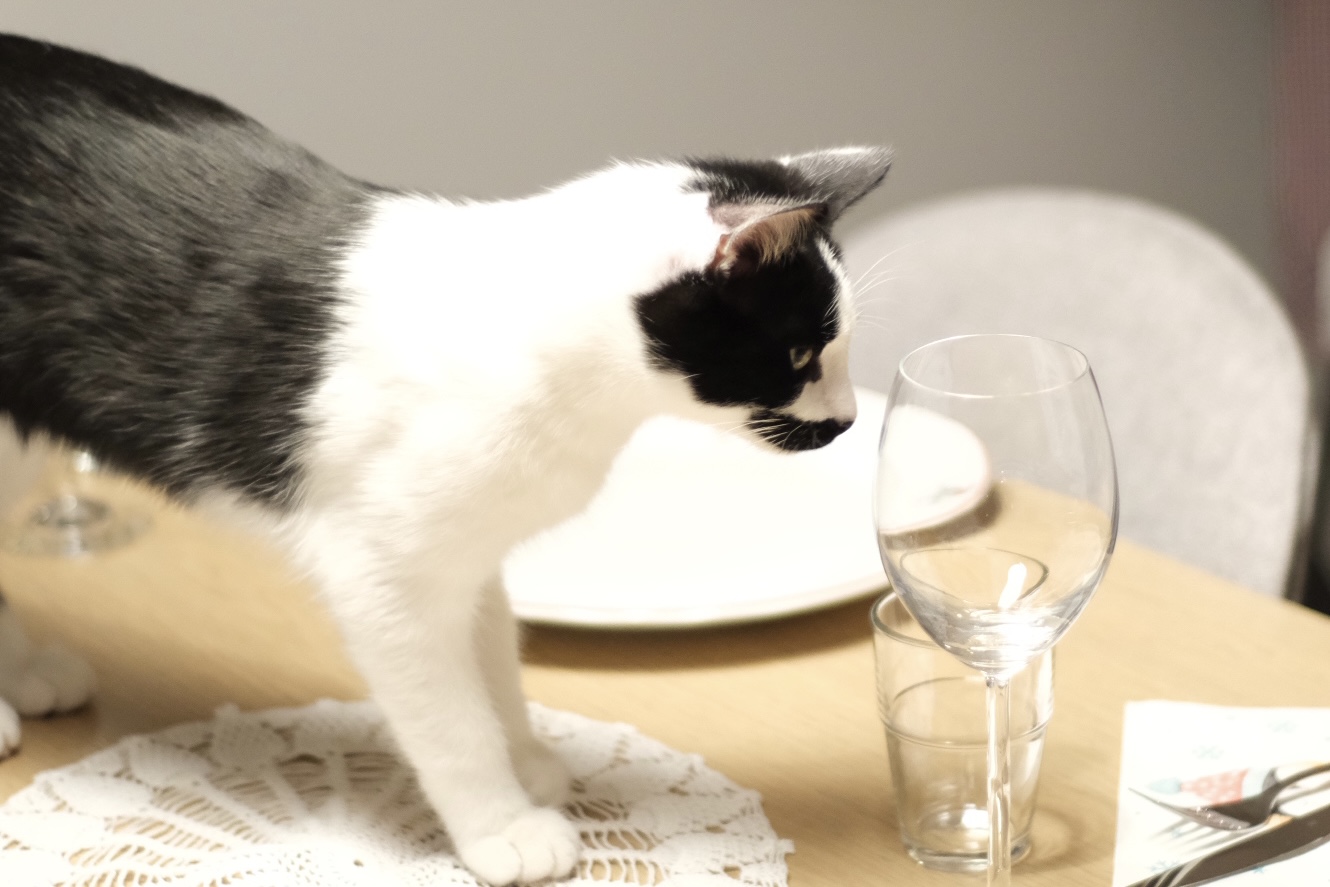
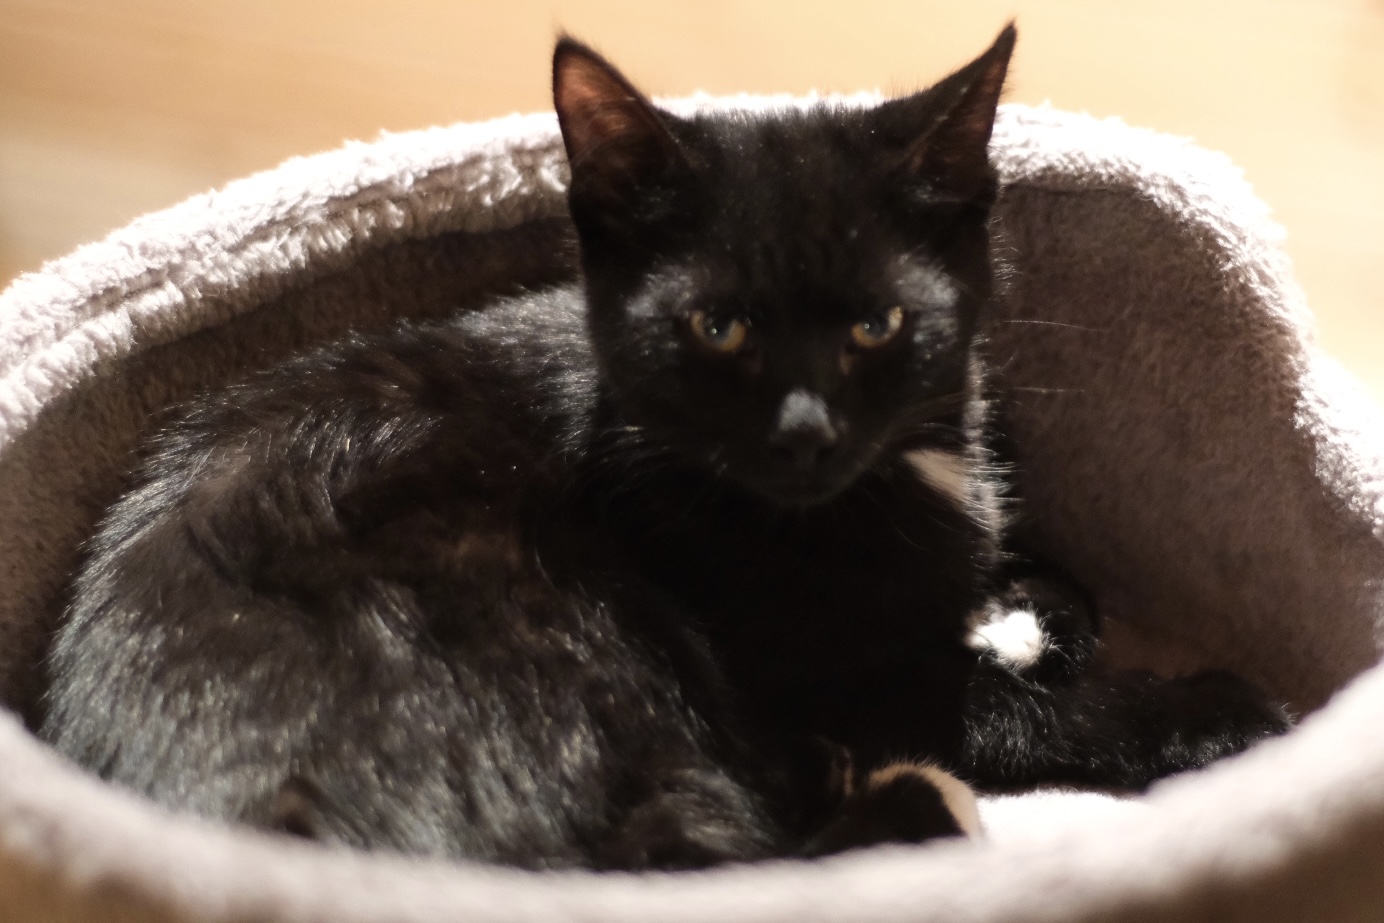
I got 2 new kittens because my life just seemed too empty without a pet. I named these two Bella and Linus. Linus is the black and white one. They are very friendly cats, and for kittens they are so well behaved! Linus loves to get on the table. At the pic in the middle he is inspecting the dinner table I set for Christmas. He knows he is not allowed to:) They love to cuddle up together as you can see in the first picture. However, Bella is so black, you hardly see her.
Amigurumi crochet cat pattern
Now that you have some background info, it is time to talk about the pattern!
The amigurumi cat pattern is suitable for crocheters of all levels, from beginners to experienced crafters. I will also post a video on how to make the crochet cat. Whether you are a seasoned pro or just starting out, you will find this pattern easy to follow and fun to make.
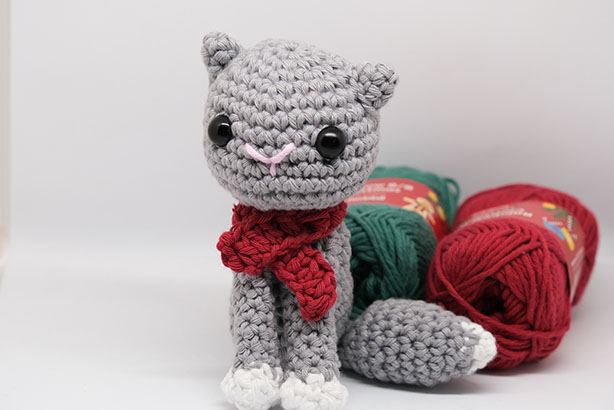
To get started, you will need a few materials: a crochet hook (we recommend using a size E or 3.5mm hook for this project), yarn (any medium weight yarn will work, but we recommend using a soft and cuddly yarn for the best result), scissors, a yarn needle, stuffing, and black embroidery floss (optional, for creating the eyes), or use safety eyes, like I did.
I used this yarn from Hobbii. I got this yarn with my own money, so it is not sponsored. This is a bit thick, but you can use a thinner yarn for if you want to make a smaller crochet cat.
I have designed this pattern to be versatile, so you can easily modify it to create different breeds of cats or even other animals. Just add different colors! The possibilities are endless! I can't wait to see what you come up with. If you want to make color spots, just work with different colors. I am making a modification with the pattern and will post that some other day.
So, grab your crochet hook and some yarn, and let's get started on this adorable amigurumi crochet cat. Happy crocheting!
Looking for more easy amigurumi patterns? Check out these:

Amigurumi cat
Abbreviations – US terms
Ch-chain
Rnd–round
St–stitch
Sl st–slip stitch
Sc–single crochet
R–round
Sc dec–single crochet decrease
Sc inc–single crochet increase, 2 single crochet in one stitch
Dc–double crochet
Mr–magic ring
Hdc–half double crochet
Yo –yarn over
Materials
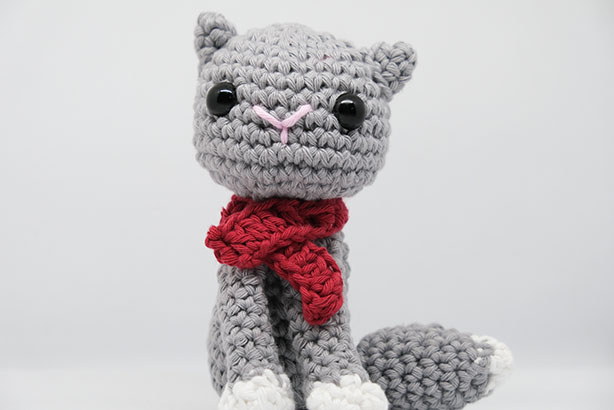
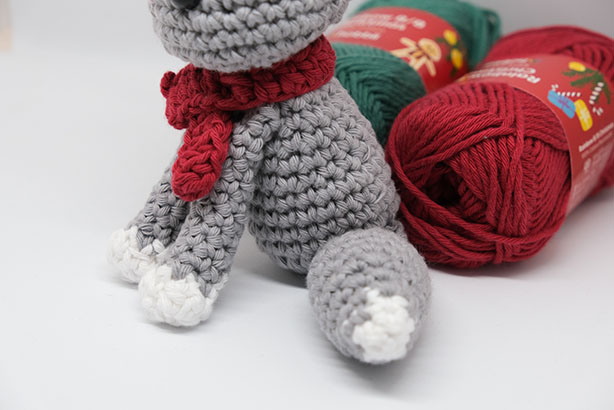
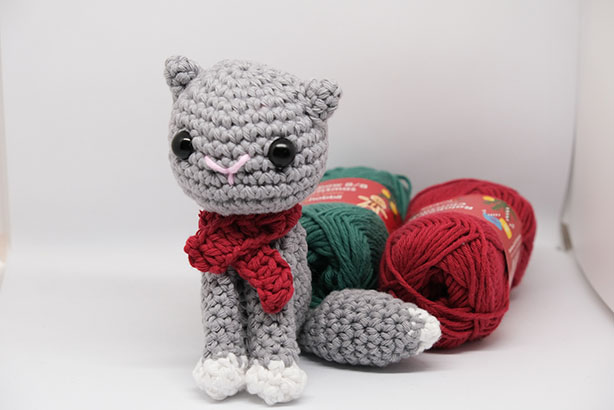
- Yarn: Hobbii 8/8 quality. Grey for the main body. About 40 g needed. White for the paws. About 5 g needed. Red for the scarf. About 5 g needed. Small about of pink for the nose.
- Filling materials
- Crochet hook 3.0 and 3.5 mm
- Scissors and stitch marker
- Safety eyes 10 mm
Instructions
Head
Work in continuous rounds. Use a stitch marker and move it up as you go.
In main color
Rnd 1: 6 sc in a mr = 6 sc
Rnd 2: sc inc x 6 = 12 sc
Rnd 3: (1 sc, sc inc) x 6 = 18 sc
Rnd 4: (2 sc, sc inc) x 6 = 24 sc
Rnd 5: (3 sc, sc inc) x 6 = 30 sc
Rnd 6-8: 1sc in each st
Rnd 9: (4 sc, sc inc) x 6 = 36 sc
Rnd 10-11: 1sc in each st
Rnd 12: (1 sc, sc dec x 12) = 24 sc
Fasten safety eyes between rounds 8-9 with 5 stitches apart. Stuff the head
Rnd 13: sc dec x 12 =12 sc
Rnd 14: 1 sc in each st = 12 sc
Sl st in the first st and fasten off.
Ears
In main color.
Make two.
Rnd 1: 3 sc in a mr.
Rnd 2: sc inc, 1 sc in the next 2 sts = 4 sc
Rnd 3: sc inc, 1 sc in the next 3 sts: 5 sc
Cut the yarn and pull it through. Leave a tail for fastening.
Body
In main color
Rnd 1: 6 sc in a mr = 6 sc
Rnd 2: sc inc x 6 = 12 sc
Rnd 3: (1 sc, sc inc) x 6 = 18 sc
Rnd 4: (2 sc, sc inc) x 6 = 24 sc
Rnd 5-8. 1 sc in each st
Rnd 9: (2 sc, sc dec) x 6 = 18 sc
Rnd 10-13: 1 sc in each st.
Stuff the body.
Rnd 14: (1 sc, sc dec) x 6 = 12 sc
Sl st in the first st and finish off. Leave a tail for sewing.
Scarf
In red.
Ch 28, 1 dc in the 3 ch from the hook and across. Leave a tail for fastening.
Sew on the tail at the back. Make sure the part where the decreases are on the tail, faces the body of the cat. Attach the scarf around the neck. Embroider on a nose with some pink yarn.
Tail
Colors grey and white
Start with white
Rnd 1: 4 sc in a mr =4 sc
Rnd 2: (1 sc, sc inc) x 2 = 6 sc
Change to color grey on the last pull through when finishing the last sc for a nice color change.
Weave in the tail from on round 1
Rnd 3: (1 sc, sc inc) x 3 = 9 sc
Rnd 4: (2 sc, sc inc) x 3 = 12 sc
Rnd 5: (3 sc, sc inc) x 3 = 15 sc
Rnd 6-10: 1 sc in each st.
Rnd 11: sc dec x 3, 1 sc in the next 9 sts = 12 sc
Stuff the tail
Rnd 12: sc dec x 3, 1 sc in the next 6 sts = 9 sc
Rnd 13: sc dec x 3, 1 sc in the next 3 sts = 6 sc
Rnd 14: 1 sc in each st.
Pinch the hole together and close in with sc stitches.
Fasten off. Leave a tail for fastening.
Legs.
Make 2
Start with white. Make a mr.
Rnd 1: (1 sc, 1dc) x 3 = 3 sc, 3 dc. Join with a sl st.
Rnd 2: (1 sc in next, 2 dc in next) x 3= 9 sts
Sl st into the first st and change to grey.
Rnd 3: (1 sc, sc dec) x 3= 6 sc. Continue in continuous rounds. Stuff lightly as you go.
Rnd 4-12: 1 sc in each st
Pinch the hole closed to and sc it together.
Assembly.
Sew the head to the body. Attach the ears on rows 4-6.
Attach the legs just under the head, but make sure the paws are touching the ground.

Die Katze Lilly
Abkürzungen
LM-Luftmasche(n)
Rnd–Runde
M–Masche
KM–Kettmasche
fM–feste Masche
1 M abn. –2 M zusammenhäkeln
1 M zun. –2 Maschen in die gleiche Masche häkeln.
StB–Stäbchen
mR–Magischer Ring
hStb–Halbes Stäbchen
mR. –magischer Ring
Informationen über diese Anleitung
Die Katze wird in Spiralrunden gehäkelt. Nutze einen Maschenmarkierer
um die Orientierung nicht zu verlieren. Alle Teile werden separat gehäkelt.
Die fertige Katze ist circa 10 cm groß
Niveau: Anfänger mit Grundkenntnissen.
Nutze gerne etwa dünneres Garn um Schnurrhaare zu machen. Wenn du eine größere/kleinere Katze häkeln willst nutze einfach eine dickere/dünnere Wolle und passende Häkelnadel dazu.
Materials
- Wolle: Hobbii 8/8 quality. Grau, (40 g) weiß, (5g), rot (5g). Etwas rosa für die Nase.
- Füllwatte.
- Häkelnadel 3.0 mm
- Schere
- Sicherheitsaugen 10 mm
Instructions
Kopf
In Spiralrunden häkeln. In grau.
Rnd 1: 6 fM in einen mR = 6 fM
Rnd 2: 1 fM zun. x 6 = 12 fM
Rnd 3: (1 fM, 1 fM zun.) x 6 = 18 fM
Rnd 4: (2 fM, 1 fM zun.) x 6 = 24 fM
Rnd 5: (3 fM, 1 fM zun.) x 6 = 30 fM
Rnd 6-8: 1fM in jede fM
Rnd 9: (4 fM, 1fM zun.) x 6 = 36 fM
Rnd 10-11: 1fM in jede fM
Rnd 12: (1 fM, 1fM abn. x 12) = 24 fM
Sicherheitsaugen zwischen 8.-9. Rnd befestigen mit 5 fM abstand. Befülle den Kopf mit Füllwatte.
Rnd 13: 1fM abn. x 12 =12 fM
Rnd 14: 1fM in jede fM
KM in die erste fM und den Faden vernähen.
Pfoten
2 Stück häkeln
Mit weiß anfange. Einen magieschen Ring machen. In den Ring arbeiten:
Rnd 1: (1 fM, 1Stb) x 3 = 3 fM, 3 fM. KM in die erste M.
Rnd 2: (1 fM in die erste, 2 Stb in die nächste) x 3= 9 M
KM in die erste M und zur grau wechseln.
Rnd 3: (1 fM, 1 M abn.) x 3= 6 fM.
In Spiralrunden weiterhäkeln. Befülle leicht mit Füllwatte während du häkelst.
Rnd 4-12: 1 fM in jede M.
Das Loch mit fM zusammenhäkeln.
Körper
In grau.
Rnd 1: 6 fM in einen mR = 6 fM
Rnd 2: 1 fM zun. x 6 = 12 fM
Rnd 3: (1 fM, 1 fM zun.) x 6 = 18 fM
Rnd 4: (2 fM, 1 fM zun.) x 6 = 24 fM
Rnd 5-8. 1 fM in jede fM
Rnd 9: (2 fM, 1 fM abn.) x 6 = 18 fM
Rnd 10-13: 1 fM in jede fM
Den Körper mit Füllwatte befüllen.
Rnd 14: (1 fM, 1 fM abn) x 6 = 12 fM
KM in die erste fM und den Faden abschneiden. Lasse einen Faden übrig zum Vernähen.
Der Schwanz
In grau und weiß. Mit weiß anfangen
Rnd 1: 4 fM in einen mR =4 fM
Rnd 2: (1 fM, 1 fM zun.) x 2 = 6 fM
Zu grau wechseln. Den Faden von Rnd 1 vernähen.
Rnd 3: (1 fM, 1 fM zun) x 3 = 9 fM
Rnd 4: (2 fM, 1 fM zun) x 3 = 12 fM
Rnd 5: (3 fM, 1 fM zun) x 3 = 15 fM
Rnd 6-10: 1 fM in jede fM
Rnd 11: 1 fM abn. x 3, 1 fM in den nächsten 9 M = 12 fM
Den Schwanz mit Füllwatte befüllen
Rnd 12: 1 fM abn. x 3, 1 fM in die nächsten 6 M = 9 fM
Rnd 13: 1 fM abn. x 3, 1 fM in die nächsten 3 M = 6 fM
Rnd 14: 1 fM in jede M
Das Loch mit fM zusammenhäkeln.
Den Faden befestigen. Lass einen Faden übrig für Befestigung.
Ohren
2 Stück häkeln. In grau
Rnd 1: 3 fM in einen mR = 3 fM
Rnd 2: 1 fM zun., 1 fM in die nächsten 2 M= 4 fM
Rnd 3: 1 fM zun., 1 fM in die nächsten 3 M: 5 fM.
Den Faden abschneiden. Zieh den Faden einfach durch ohne KM. Lass einen Faden übrig für Befestigung.
Schal
In rot.
28 LM anschlagen,1 Stb in die 3 LM von der Nadel und 1 Stb in jede LM. Den Faden befestigen. Lasse einen Faden übrig zum Vernähen.
Zusammennähen
Die Ohren am Kopf befestigen. Die Ohren sollen zwischen Runden 4-6 sein. Den Kopf am Körper befestigen. Die Pfoten sollen unter dem Kopf befestigt sein, aber soll den Boden berühren.
Den Schwanz hinter am Körper befestigen. Die Abnahmen am Schwanz soll am Körper liegen. Den Schal am Hals zwischen Kopf und Körper befestigen. Eine kleine Nase zwischen die Augen sticken.