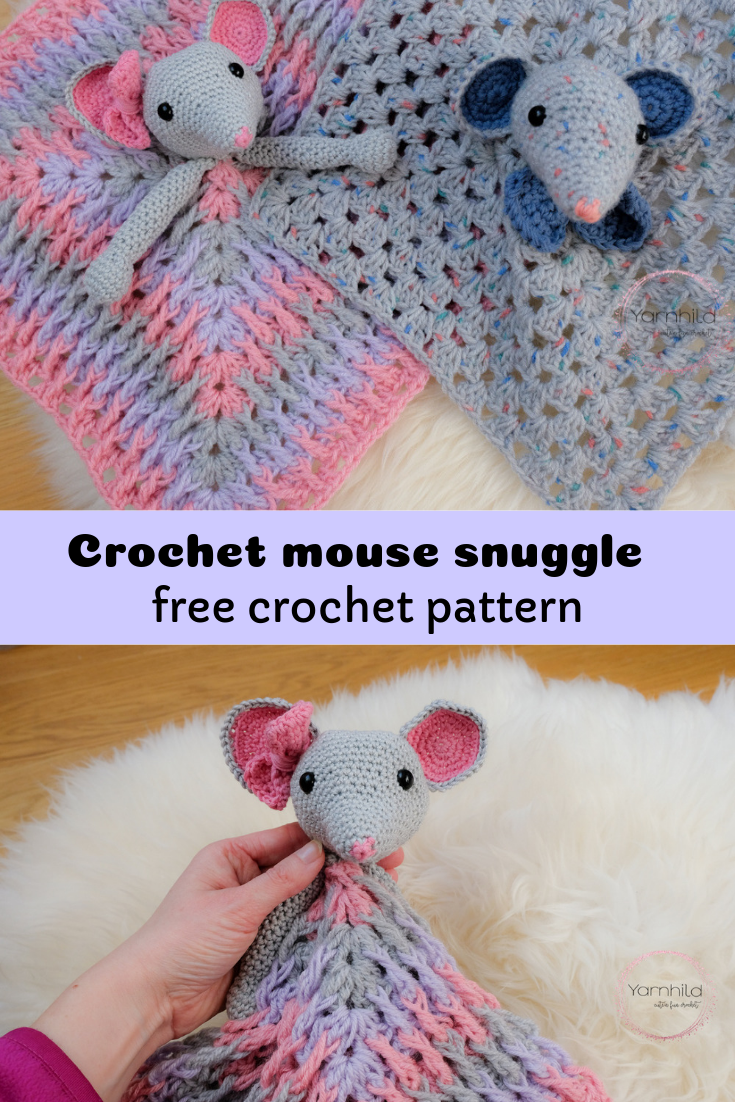
Granny Square baby mouse lovey
This blog post contains affiliate links, read more about it here. The crochet granny square mouse lovey is a beginner friendly pattern for those of you who want to make a cute baby gift. There is nothing more fun than crocheting for babies, am I right? This crochet mouse baby lovey is inspired by my amigurumi patterns, Lisa and Malvin and they are so easy and fun to make!
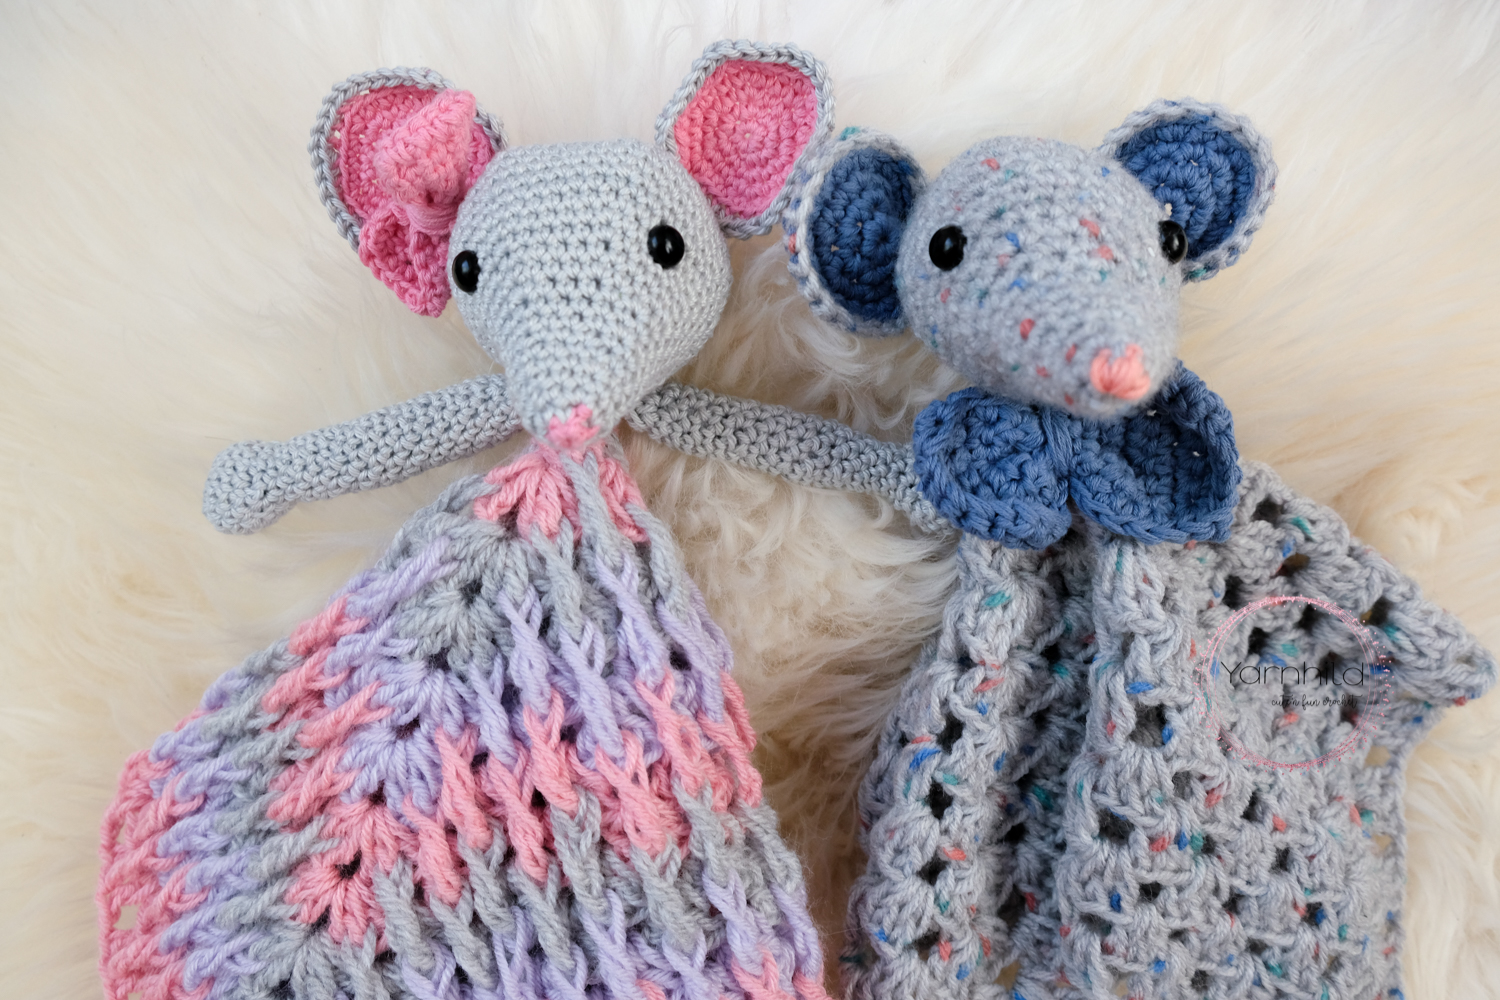
I made this mouse lovey with a soft acrylic yarn from Rico baby and the mouse head from Lisa is made with cotton yarn. You can really use all kinds of yarn for this project!
To crochet a granny square is very simple and you can make it more interesting by changing colors. But, remember that you have to weave in all those ends;) I made one with the classic granny square and the one with the amazing texture is made with the mosaic granny square.
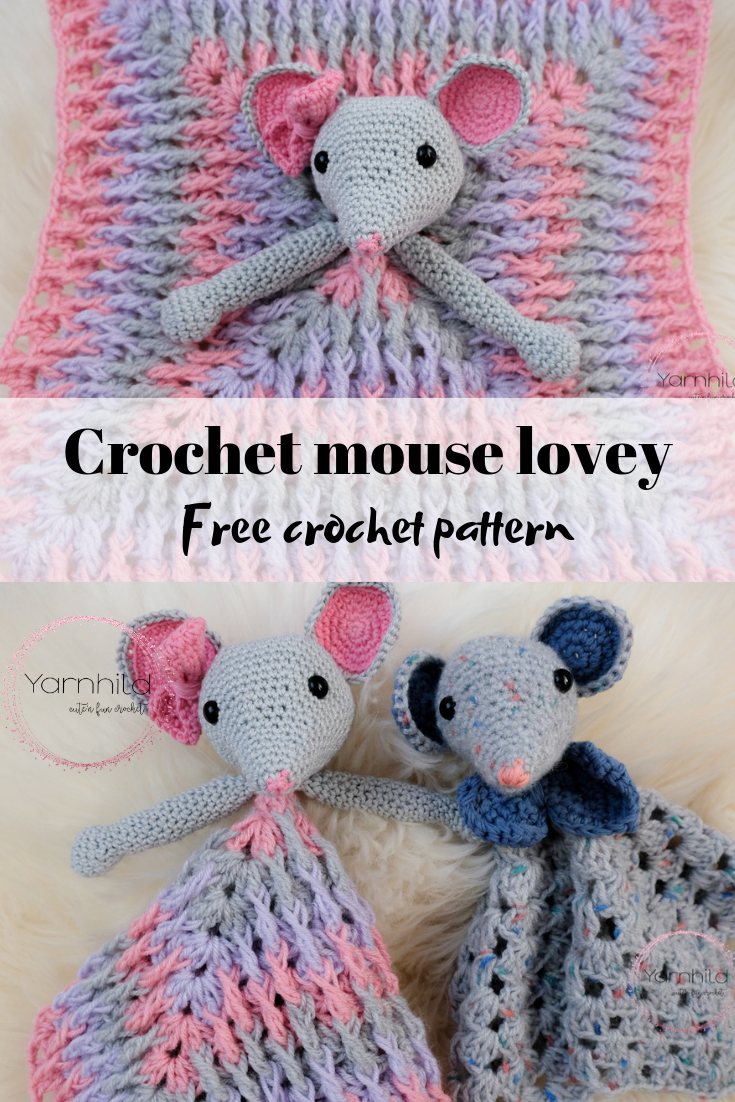
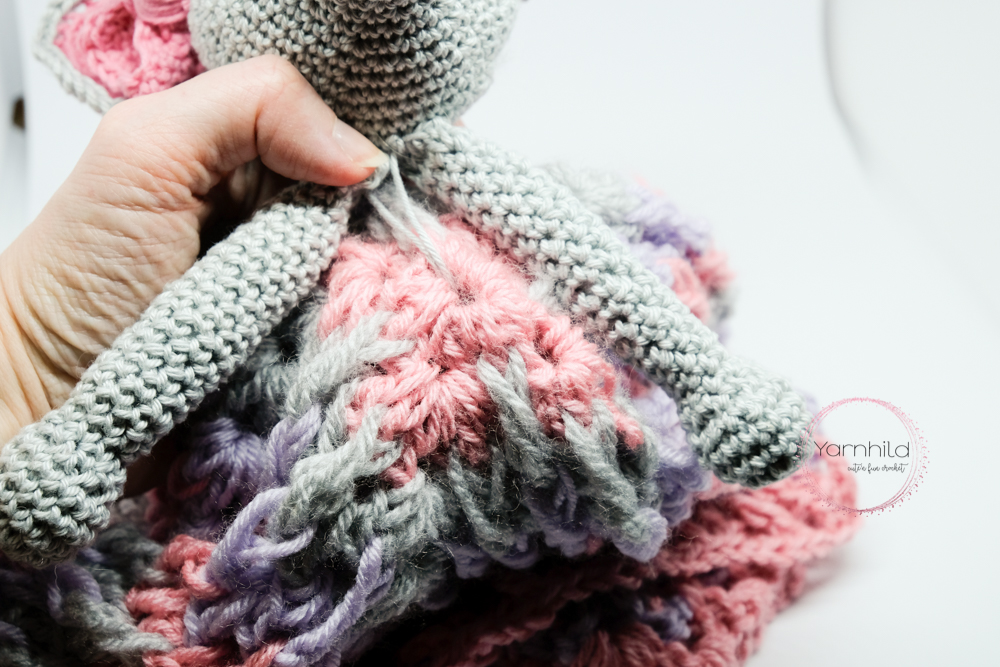
You can basically attach any kind of amigurumi head to your baby snuggle. I just made the head a little bigger than in the original mouse patterns and attached a granny square for the snuggle.
It is that simple!
Baby gifts
The reason why I made this pattern, is that my sister-in-law recently gave birth to a little boy! And because I love making cute little things, I had to make him something. He also has a big sister (she is 1 ½), so she isn't the biggest! Haha. But anyway, she also needed a gift, so I made her a Lisa-version
My son is 5 years and the only thing that he wants me to crochet for him is a skull. We have been browsing for ideas. so look out for a skull pattern in the future!
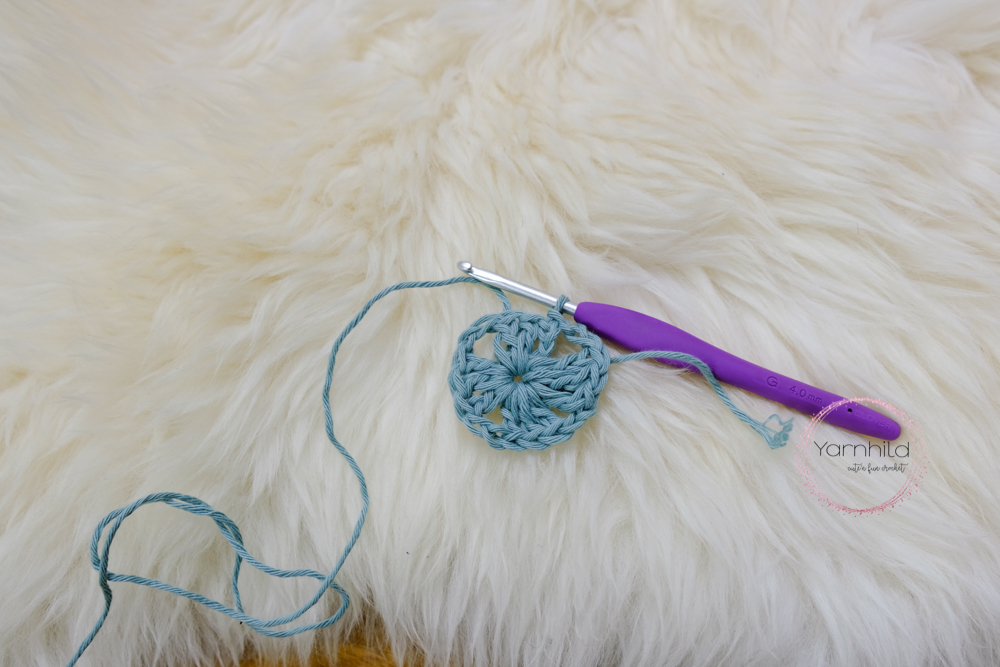
The mosaic granny square
Here you can find the video for the mosaic granny square. If you want to make it with the classical granny, then scroll for the written version.
Print friendly version
You can also purchase the print friendly version on Etsy In that way you can support my blog a little extra. Thank you!
Crochet hooks
The hooks that I am using are the ones from Clover Amour. I highly recommend these hooks, because they are simply the best I’ve tried! I got the set from my husband for Christmas last year and I’ve been only using these and the ones from Tulip. But honestly, I prefer the hooks from Clover because they have such a nice grip, that are great to prevent wrist pain. Also, my stitches look better when I use these hooks and I do crochet faster with them!
Free crochet baby lovey pattern
This pattern is the intellectual property of Yarnhild. The pattern must not be altered, translated, copied or republished without approval. You are welcome to sell the items that you have made from my patterns, but please be sure to give me credit for the pattern if you sell online. For private use only, no commercial use. 2019 – Yarnhild ©
| Abbreviations used |
| ch – chain |
| yo – yarn over |
| st – stitch |
| sl st – slip stitch |
| sc – single crochet |
| sc2tog – single crochet decrease |
| inc – single crochet increase, 2 single crochet in one stitch |
| yo – yarn over |
| dc – double crochet |
| BLO – back loop only |
| Materials used |
| Yarn rico baby 90% acrylic and 10 % polyamide. 50 g/ 1.8 oz = 150 m/ 164 yd |
| Colors grey, pink and purple. About 30 g/1.05 oz of grey and 10 g/0.35 in other colors |
| Tapestry needle |
| Scissors |
| Filling materials |
| Safety eyes 8 mm or 10 00 (how you prefer) |
| Crochet hook 3.5 mm/E and 4.0 mm/E |
Information about this pattern
I made the head with a size 3.5 mm crochet hook, you can use a size 4 mm if you crochet tight. The body consists of a granny square and is made with a 4 mm crochet hook. The head is made in continuous rounds, remember to use a stitch marker. Stuff firmly, but make sure that you don’t see the stuffing through the stitches. To make a girly version make a bow instead of a bowtie. You can make the blanket part with the classic granny square or the mosaic granny square. You’ll find a written pattern for the classic granny square in this document and a link to the video on how to do the mosaic granny square.
Level: Easy
Extra help
How to get a nice color transition.
Insert the hook with the yarn with the same color in the next st and pull up a loop, as normal, but when you finish the stitch, change the color and pull up a loop with the new color on the last pull through.
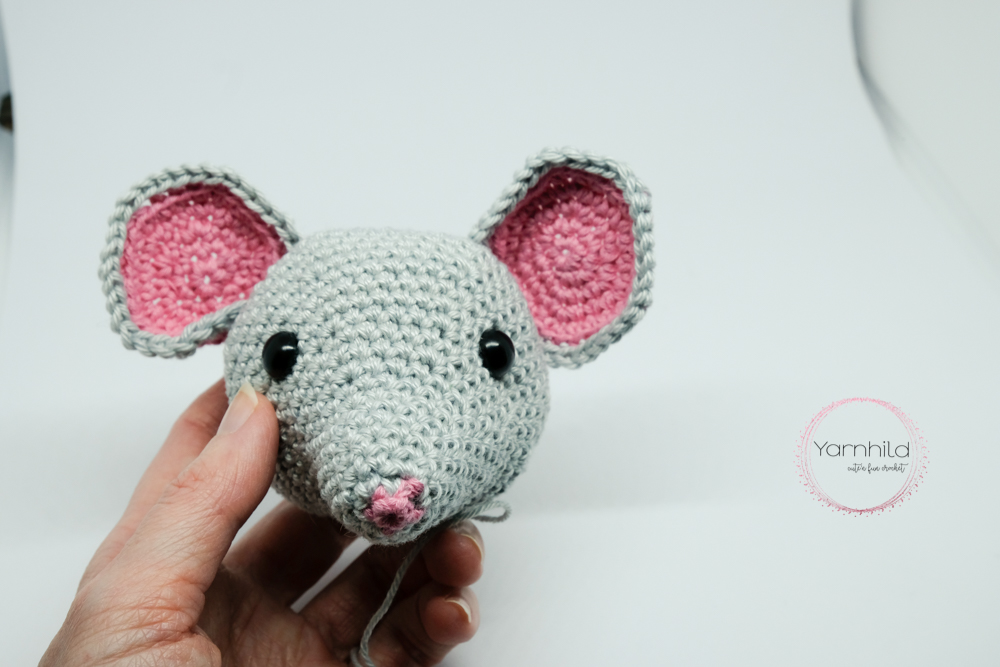
Head
Color grey and pink and 3.5 mm crochet
hook.
Start with pink
Rnd 1: Magic ring and 4 sc in the ring, pull ring closed = 4 sc
Change to grey.
Rnd 2: inc x 4 = 8 sc
Rnd 3: 8 sc = 8 sc
Rnd 4: (1 sc, inc) x 4 = 12 sc
Take a moment to weave in loose ends here.
Rnd 5: 12 sc = 12 sc
Rnd 6: (2 sc, inc) x 4 = 16 sc
Rnd 7-8: 16 sc for 2 rounds = 16 sc
Rnd 9: (3 sc, inc) x 4 = 20 sc
Rnd 10: 20 sc = 20 sc
Rnd 11: (4 sc, inc) x 4 = 24 sc
Rnd 12: (3 sc, inc) 6 = 30 sc
Rnd 13 = 30 sc = 30 sc
Rnd 15: (4 sc, inc) x 6= 36 sc
Rnd 16: (5 sc, inc) x 6 = 42 sc
Rnd 17-18: 42 sc for 2 rounds = 42 sc
Rnd 19: (6 sc, inc) x 6 = 48 sc
Rnd 20-23: 48 sc for 4 rounds = 48 sc
Rnd 24: (6 sc, sc2tog) x 6 = 42 sc
Rnd 25: (5 sc, sc2tog) x 6 = 36 sc
Rnd 26: (4 sc, sc2tog) x 6 = 30 sc
Fasten safety eyes between rows 14 – 15, leave 10 sc space apart. See that you don’t fasten the eyes at the beginning of the rounds where the seam is. Stuff firmly and continue stuffing as you go.
Rnd 27: (3 sc, sc2tog) x 6 = 24 sc
Rnd 28: (2 sc, sc2tog) x 6 = 18 sc
Rnd 29: (1 sc, sc2tog) x 6 = 12 sc
Rnd 30: sc2tog x 6 = 6 sc
Sl st in the first sc, cut the yarn. Sew hole closed and weave in ends.
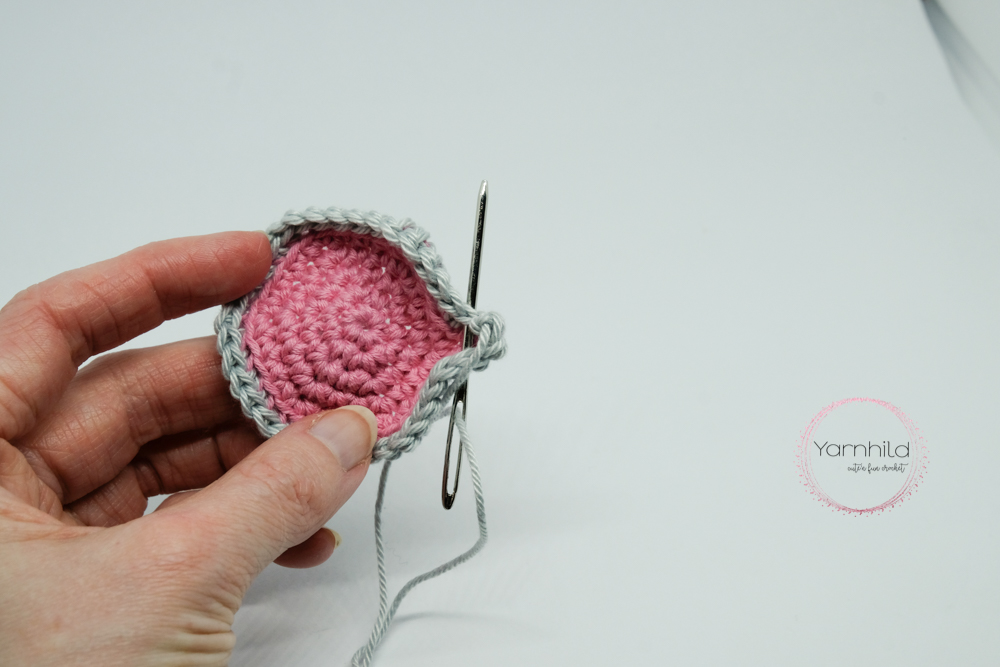
Ears, make 2
Color blue/pink and grey
Start with blue.
Rnd 1: Rnd 1: Magic ring and 6 sc in the ring, pull ring closed = 6 sc
Rnd 2: inc x 6 = 12 sc
Rnd 3: (1 sc, inc) x 6 = 18 sc
Change to grey and crochet the next rnd in the BLO.
Rnd 4: (2 sc, inc) x 6 = 24 sc
Sl st in the first sc, fasten yarn. Leave a long tail for fastening.
Bowtie for a boy mouse
4 mm crochet hook
With color blue
Row 1: ch 11, turn, 1 sc across, ch 1, turn = 10 sc
Row 2- 16: 10 sc, ch 1 turn. Repeat for 14 rows. = 10 sc
Ch 1, sc around the bowtie, 2 sc in each corner. Sl st in the first sc, fasten off. Take a long strand and wind it firmly around the bow. Weave in ends, leave a long strand for fastening.
Bow for a girl mouse
Color pink or purple, 3,5 mm crochet hook.
Row 1: Chain 10, turn, 1 sc in the 2nd loop from the hook and in each stitch, ch 1 turn = 9 sc
Row 2-4: 1 sc in each stitch, ch 1, turn = 9 sc
Single crochet around the entire bow. Put 2 sc in each corner.
Sl st in the first sc and cut the yarn. Use a long strand to wind it firmly around the bow. Weave in ends but leave a long strand for fastening.
If you want to, you can add arms
Adding arms (optional), make 2
Color grey
Work with one strand and 3.5 mm/E crochet hook
Rnd 1: Magic ring, 8 sc in the ring = 8 sc
Rnd 2: 2 sc in every stitch = 16 sc
Rnd 3-5: 1 sc in each stitch for 3 rounds = 16 sc
Stuff as you go.
Rnd 6: sc2tog x 6 = 8 sc
Rnd 7 -29: 1 sc in each stitch for 22 rounds = 8 sc
Stuff lightly as you are crocheting.
Sl st in the first sc. Cut the yarn, leave a long strand for fastening.
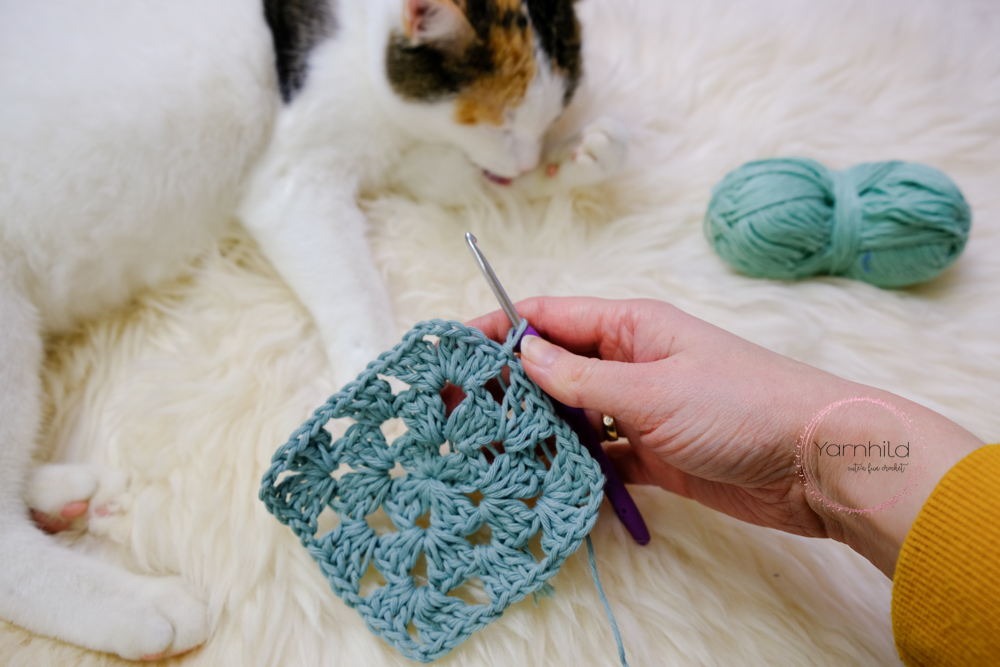
The classical granny square
The body consists of a square and I choose the classical granny square. You can choose another pattern if you want.
Rnd 1: Ch 4, sl st in the first ch and close to make a ring.
Rnd 2: 3 ch (counts as 1 dc through the entire pattern). In the ring: 2 dc, 2 ch, 3 dc, * ch 2, 3 dc, ch 2* Repeat 2 more times, sl st in the first dc.
If you want a new color, cut the yarn and attach the new color in the next corner. To continue with the same color, sl st 3 times (until you get in the next corner)
Rnd 3: ch 3. In the same place: 2 dc, 2 ch, 3 dc, *ch 1, in the next corner: 3 dc, ch 2, 3 dc, *. Repeat 2 more times. Ch 1, sl st in the first dc to join.

If you want a new color, cut the yarn and attach the new color in the next corner. To continue with the same color, sl st 3 times (until you get in the next corner)
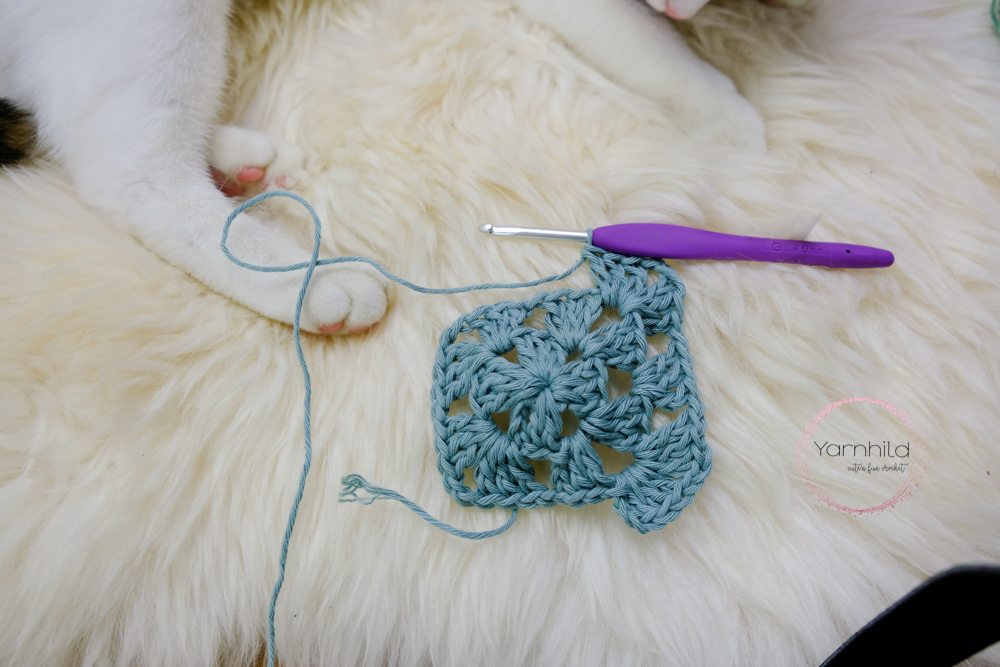
Rnd 4: ch 3. In the same place: 2 dc, 2 ch, 3 dc, *ch 1, 3 dc in the next ch 1 sp, in the next corner 3 dc, ch 2, 3 dc*. Repeat all around. Sl st in the first dc.
Continue repeating round 4. In each corner, 3 dc, 2 ch, 3 dc, and in each ch 1 sp, 3 dc and a ch 1 between. Repeat until you have 11 rounds.
Video – how to crochet the mosaic granny square.

Assembly
Pinch the end a little together and sew back and forth a few times to make it a little pointier.
Fasten the ears on round 6. Pin the ears with needles first to find the best position.
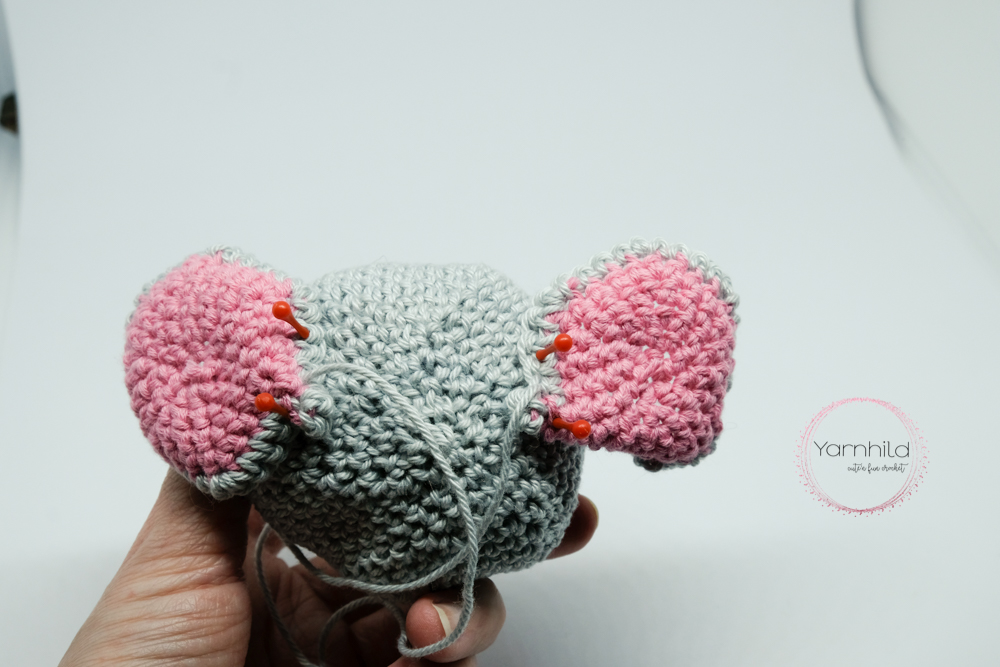
Sew on arms under the head. Find the center of the head and pin them fast first.
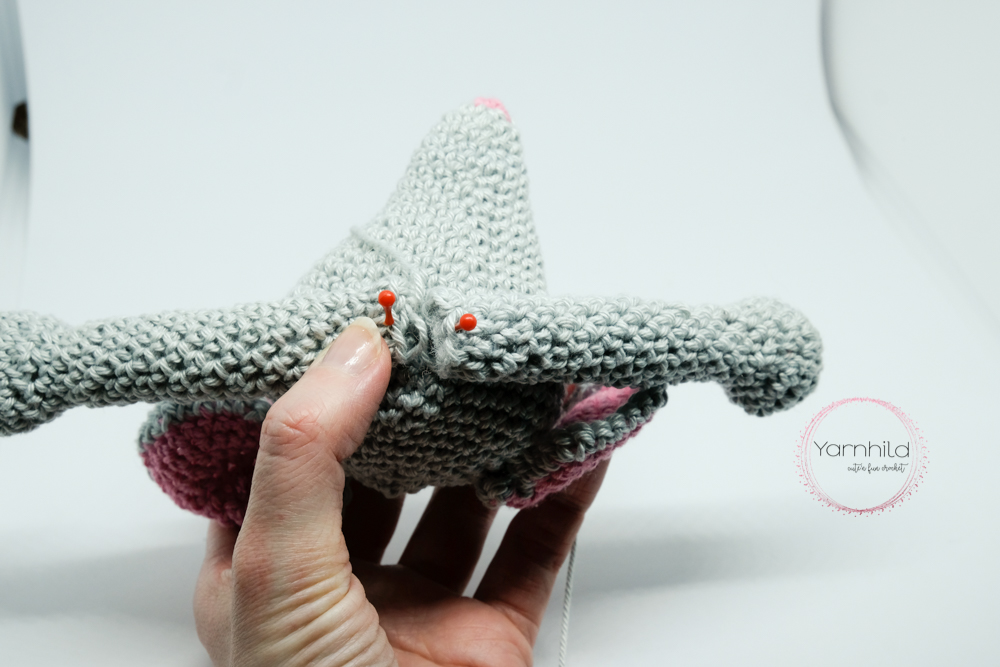
Sew on the head on the middle of the granny square.