Malvin the amigurumi mouse
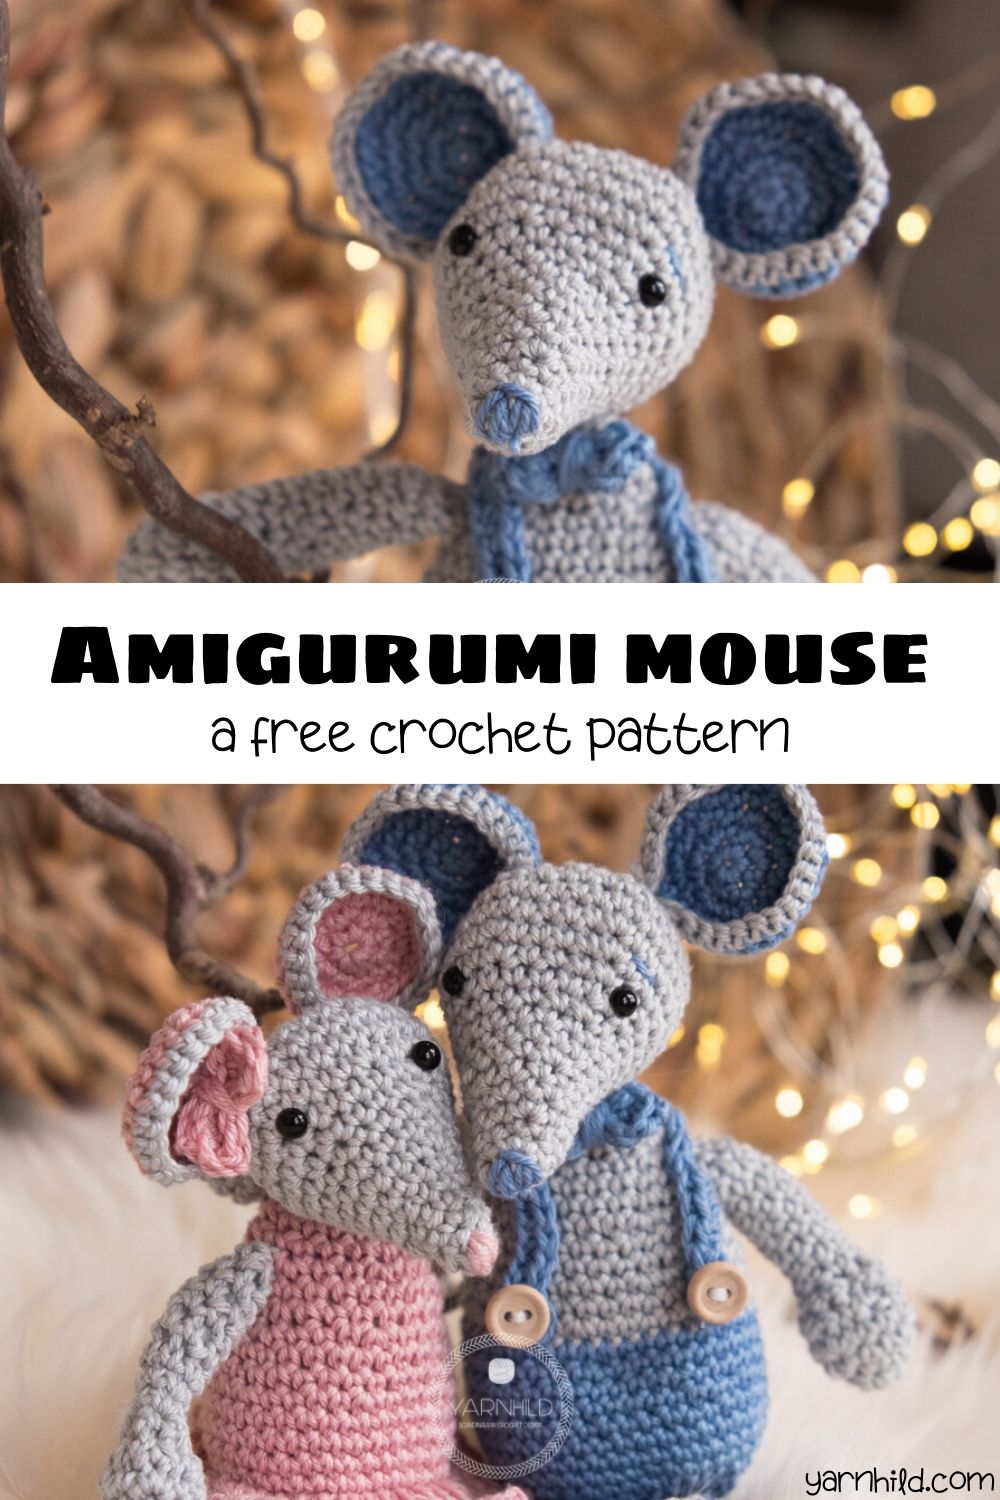
Today I am happy to share this sweet amigurumi mouse pattern with you, Malvin the mouse
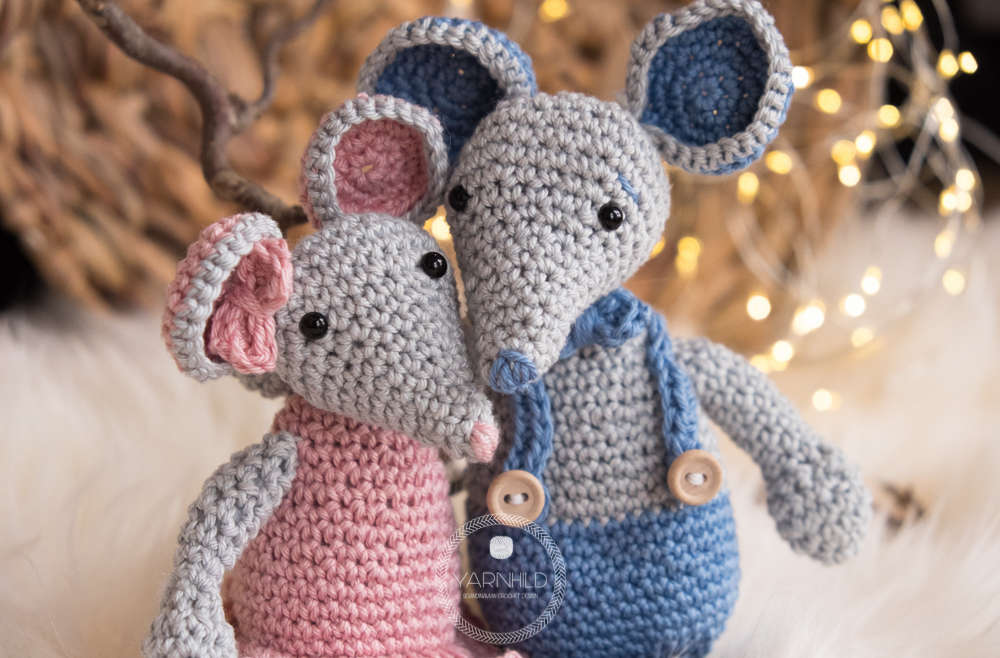
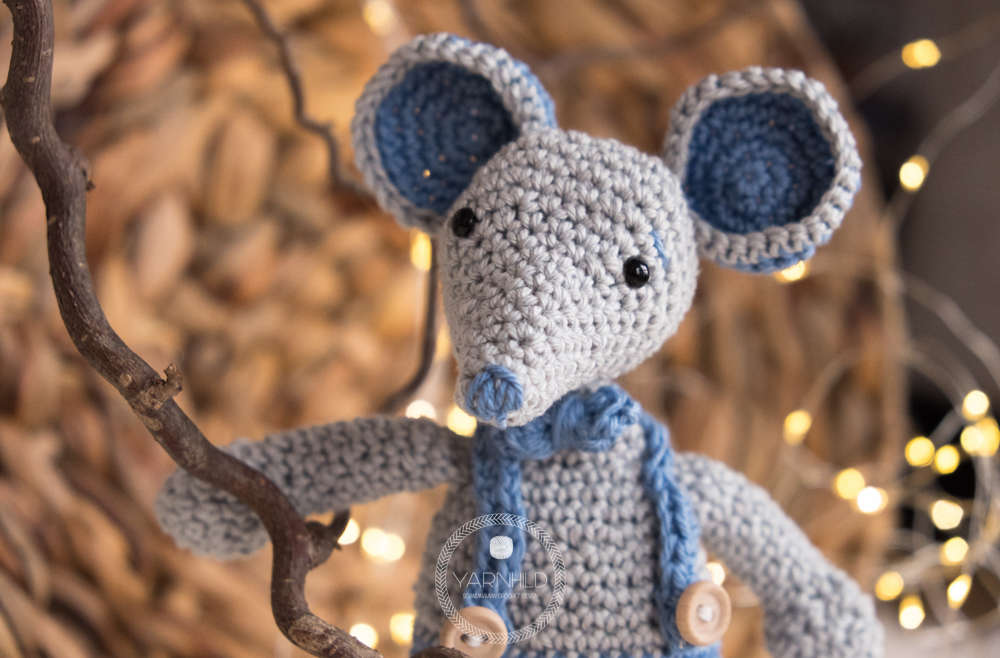
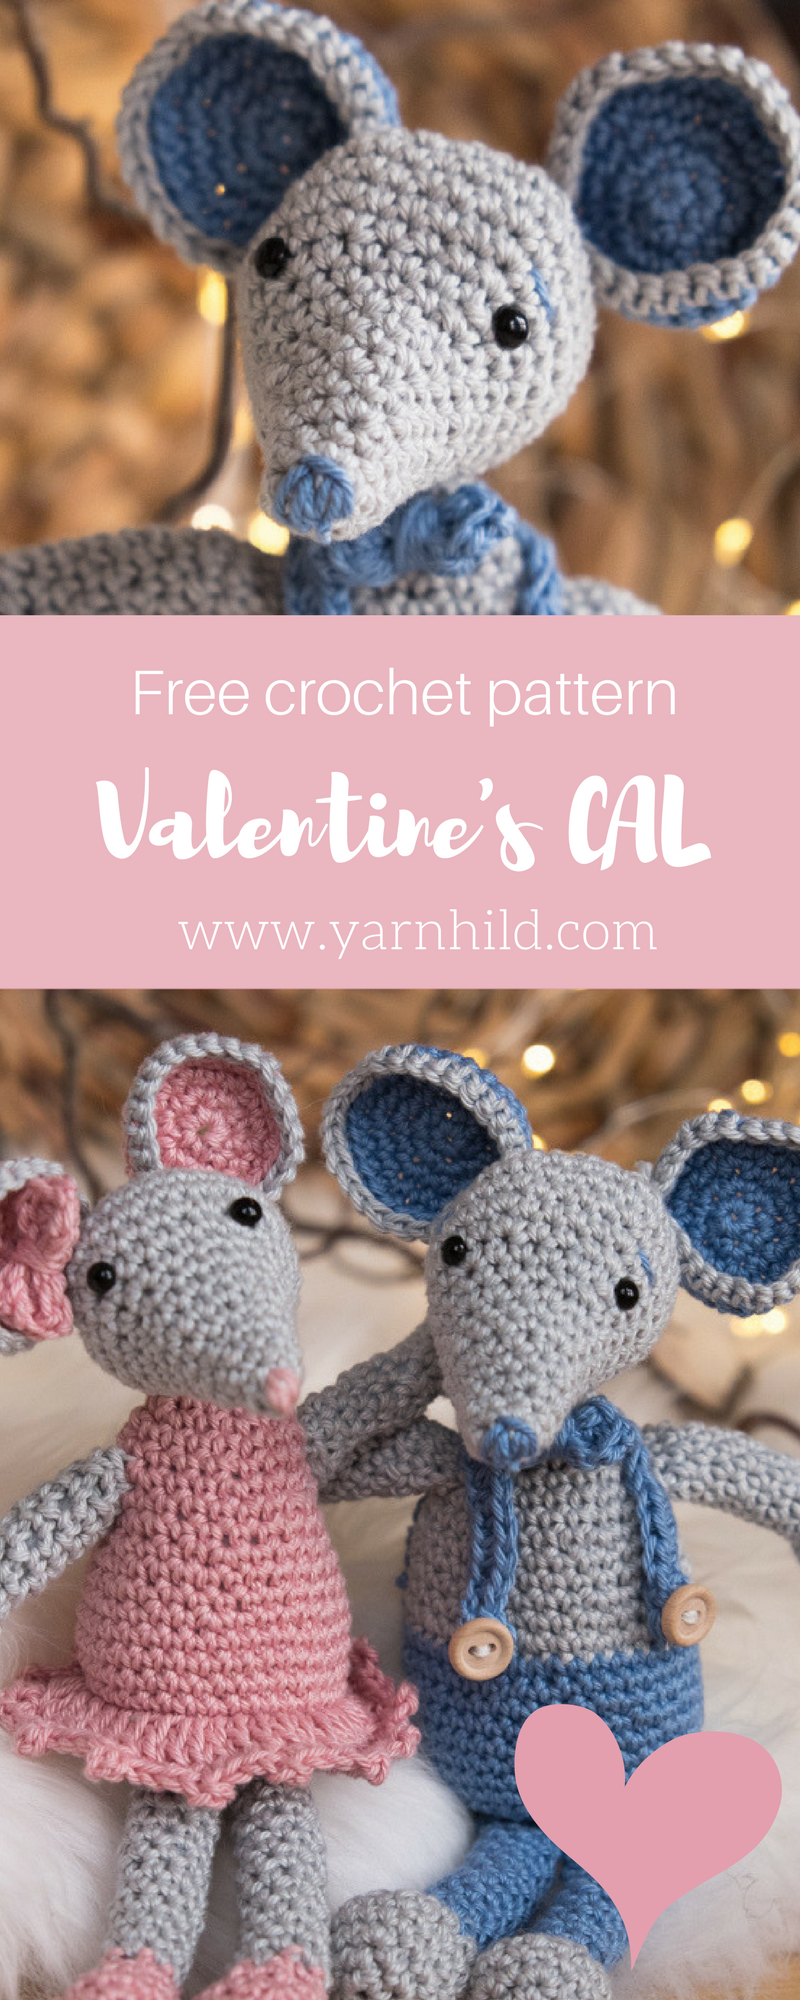
This time we will be making another amigurumi mouse, meet the Valentine mouse that Lisa has been waiting for. He is a dashing young man, who goes by the name Malvin, and he always brings her flowers and chocolate on Fridays. What a sweetheart!
This amigurumi mouse went to extra trouble to look his best for Valentine's Day. He put on his best pants with suspenders with a custom made wood buttons. He also put on a lovely bowtie to make his outfit complete.
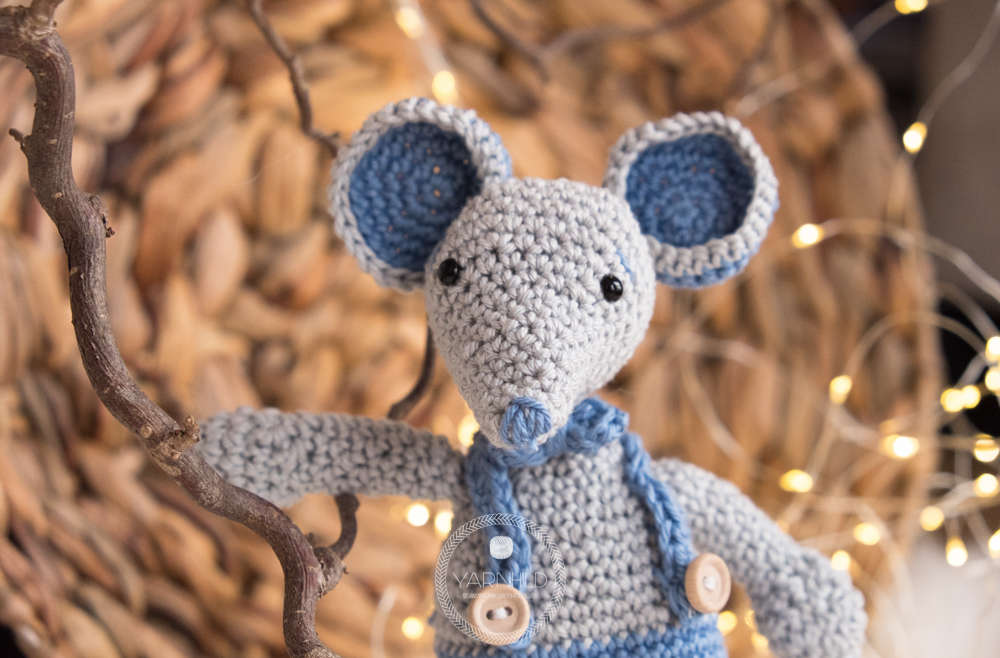
I used the same yarn for Malvin as I did for Lisa the shiny cotton yarn from Schahenmayr.
You can make both mice with less than one skein of the yarn, and you only need 50g/1,7oz.This crochet mouse is a little bigger than Lisa, and I also made his ears a little larger.
Some of you have already made the first part and it was so fun to see your versions popping up on Facebook and Instagram.
So please, continue sharing your work I absolutely LOVE seeing your versions and it is a big motivation to me to see that so many of you are actually making my patterns!
I also want to thank all my testers who are so fast, reliable, and accurate! You are making my job a lot easier! Thank you!
So many of you have signed up for my Newsletter, and that's awesome! That makes it so much easier for me to reach out to all of you, so keep signing up!
Get the free pattern to the mouse Lisa here
Get the free pattern to the mouse baby!
Malvin the amigurumi mouse
A free crochet pattern
Get the add free pattern on Etsy
Abbreviations used:
-
- ch – chain
-
- yo – yarn over
-
- st – stitch
-
- sl st – slip stitch
-
- sc – single crochet
-
- dc - double crochet
-
- inc – Increase ( single crochet increase, two single crochet in one stitch)
-
- dec – Decrease ( to single crochet together)
-
- rnd – round
-
- *-* Repeat from start to end of round/row
-
- sc2tog - 2 sc together.
-
- FLO - Front loop only
- BLO - back loop only
Materials used
-
-
- Crochet hook size 5/3 mm. I use this set from Clover 3672 Amour Crochet Hook Set, 10 sizes
- Crochet hook size 5/3 mm. I use this set from Clover 3672 Amour Crochet Hook Set, 10 sizes
-
- Tapestry needle
-
- Scissor
-
- Filling material
-
- Stitch marker
-
- Safety eyes, 6 mm
- Pipe cleaner, optional if you want to make the head more stable.
-
Note:
The pattern is written in US terms. The head, body, ears, feet, and hands for the amigurumi mouse are crocheted in continuous rounds.
Head, color silver
Rnd 1) Make a magic ring and crochet 4 sc in the ring. (4 sc)
Rnd 2) 2 sc in each sc. (8 sc)
Rnd 3) 1 sc in each stitch. (8 sc)
Rnd 4) *1 sc in the first sc, 2 sc in next* (12 sc)
Rnd 5) 1 sc in each sc. (12 sc)
Rnd 6) *1 sc in the next 2 sc, 2 sc in next* (16 sc)
Rnd 7-8) 1 sc in each stitch for 2 rounds. ( 16 sc)
Rnd 9)* 1 sc in the next 3 sc, 2 sc in next.* (20 sc)
Rnd 10) 1 sc in each stitch around. (20 sc)
Rnd 11) *1 sc in the next 4 sc, 2 sc in next. (24 sc)
Rnd 12) *1 sc in next 3 sc, 2 sc in next.* (30 sc)
Rnd 13-14) 1 sc in each stitch for 2 rounds. (30 sc)
Rnd 15) *1 sc in next 4 sc, 2 sc in next.* (36 sc)
Rnd 16) *1 sc in next 4 sc, sc2tog* (30 sc)
Rnd 17) *1 sc in the next 3 sc, sc2tog.* (24 sc)
Attach safety eyes between round 11 and 12 here. Leave 6 sc space between the eyes. Stuff the head with some filling material. Weave in ends.
Sew on the nose with blue/sky. I just sewed back and forth on round one with some blue
Rnd 18) *1 sc in the next 2 sc, sc2tog.* (18 sc)
Rnd 19) *1 sc in the next sc sc2tog.*(12 sc)
Rnd 20) 2sctog, repeat 5 more times. (6 sc)
Sew the hole closed.
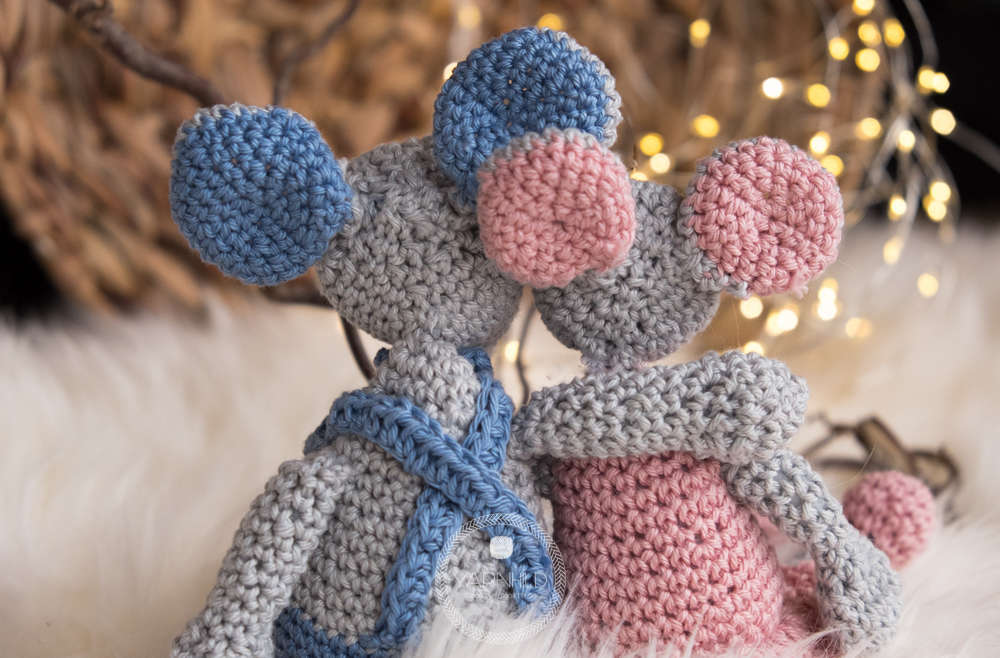
Ears, make two. Color sky/blue and silver
Start with blue/sky.
Rnd 1) Make a magic ring and put 6 sc in the ring. (6 sc)
Rnd 2) 2 sc in each sc. ( 12 sc)
Rnd 3) *1 sc in next sc, 2 sc in next.*( 18 sc)
Rnd 4) *1 sc in next 2 sc, 2 sc in next.* (24 sc)
Rnd 5) *1 sc in next 3 sc, 2 sc in next.* (30 sc)
Rnd 7) Change to grey. 1 sc in BLO (back loop only) in each stitch for the entire round. (30 sc)
Cut the yarn, weave in ends but leave a long thread so you can attach the ears to the head.
Sew the ears on the head between round 16 and 17. Weave in all ends.
Bowtie. Color sky/blue
Row 1) Ch 6, turn, 1 sc in each ch, ch 1 turn (5 sc)
Row 2-3)1 sc in each ch, ch 1 turn (5 sc)
Do a sl st around the entire bowtie. Take a long strand of yarn and wind it firmly around the bow. Weave in ends but leave a strand so you can sew the bowtie on the body.
Body. Color sky/blue and silver. Start with silver
The body is worked from top to the bottom.
Rnd 1) Make a magic ring, ch 1 and do 6 sc in the ring.
Rnd 2) 2 sc in each sc.(12 sc)
Rnd 3-4) 2 sc in each stitch for 2 rounds. (12 sc)
Rnd 5) *1 sc in the next sc, 2 sc in next.* (18 sc)
Rnd 6-7) 1 sc in each stitch for 2 rounds. (18 sc)
Rnd 8)* 1 sc in the next 2 sc, 2 sc in next.* (24 sc)
Rnd 9-10) 1 sc in each stitch for 2 rounds.(24 sc)
Rnd 11)*1 sc in the next 3 sc, 2 sc in next.* (30 sc)
Rnd 12-13)1 sc in each stitch for 2 rounds. (30 sc)
Rnd 14) )*1 sc in the next 4 sc, 2 sc in next.* (36 sc)
Rnd 15) *1 sc in the next 5 sc, 2 sc in next* (42 sc)
Change to blue/sky.
Rnd 16-24)1 sc in each stitch for 9 rounds. (42 sc)
Rnd 25) *1 sc in the next 5 sc, sc2tog*. (36 sc)
Rnd 26) *1 sc in the next 4 sc, sc2tog*. (30 sc)
Rnd 27) *1 sc in the next 3 sc, sc2tog*. (24 sc)
Start stuffing the body here.
Rnd 28) *1 sc in the next 2 sc, sc2tog*. (18 sc)
Rnd 29) *1 sc in the next sc, sc2tog.*(12 sc)
Rnd 30) 2sctog, repeat 5 more times. (6 sc)
Cut the yarn, weave in ends and sew the hole closed.
Suspenders. Make two, color sky/blue
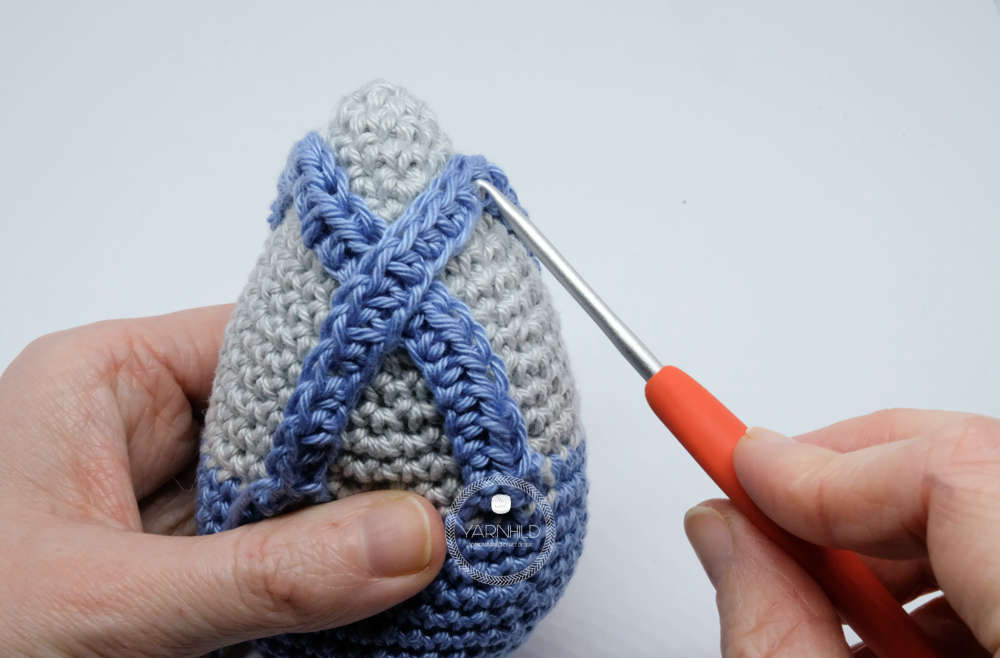
The suspenders are getting crocheted on the pants. Decide which part will be the back part and at row 30 (where the blue part starts) Attach some blue/sky yarn and do 1 sc in the next 3 sc.
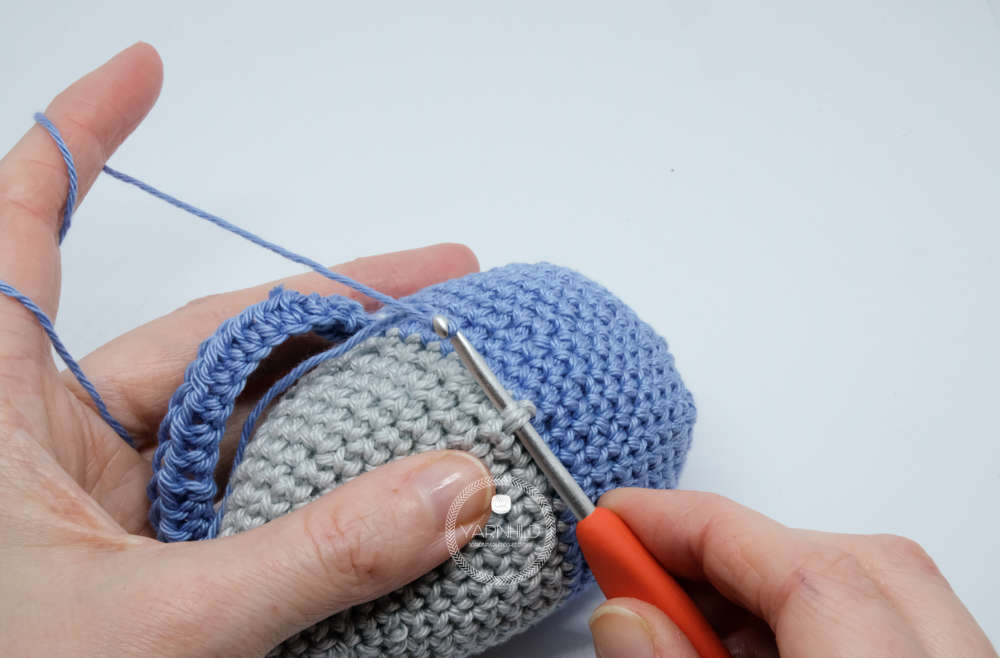
Now start making chains. You’ll need enough chains so suspenders can cross over each other and they should reach to the other side where the blue/sky part starts on the front.

I chained 27 chains, then I skipped two chains and did 1 HDC in each chain. It might be that you’ll need more or fewer chains that I do, depending on the yarn you use.
Extra tip: To get a better finish, turn the loop chain and do your HDC in the “bumpy loops” Look where I am pointing with the needle on the picture.
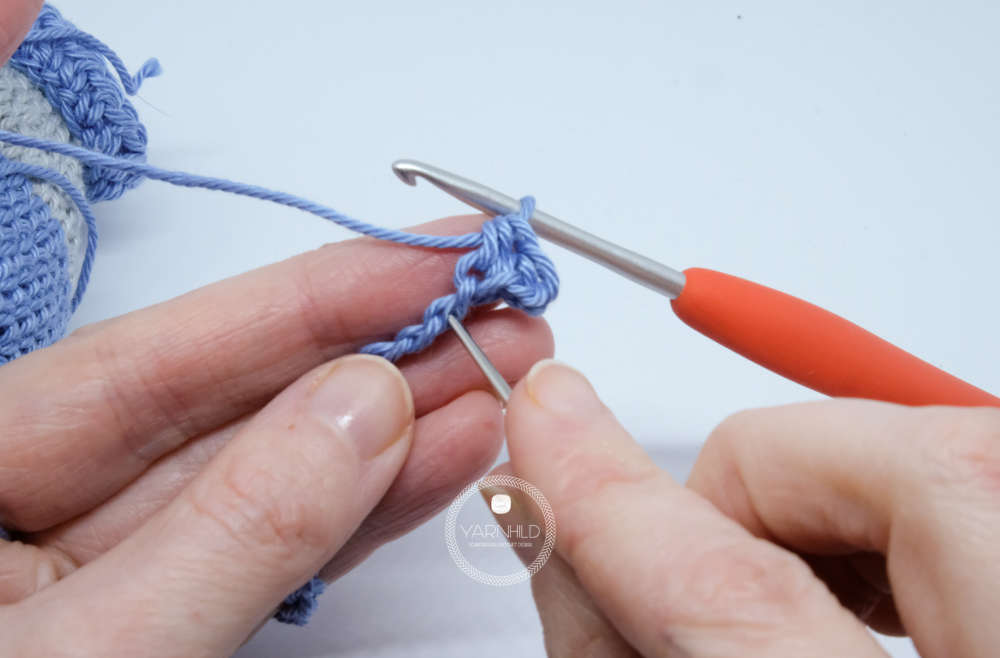
When you get to the end of your chains, do a sl st in the 3rd sc.
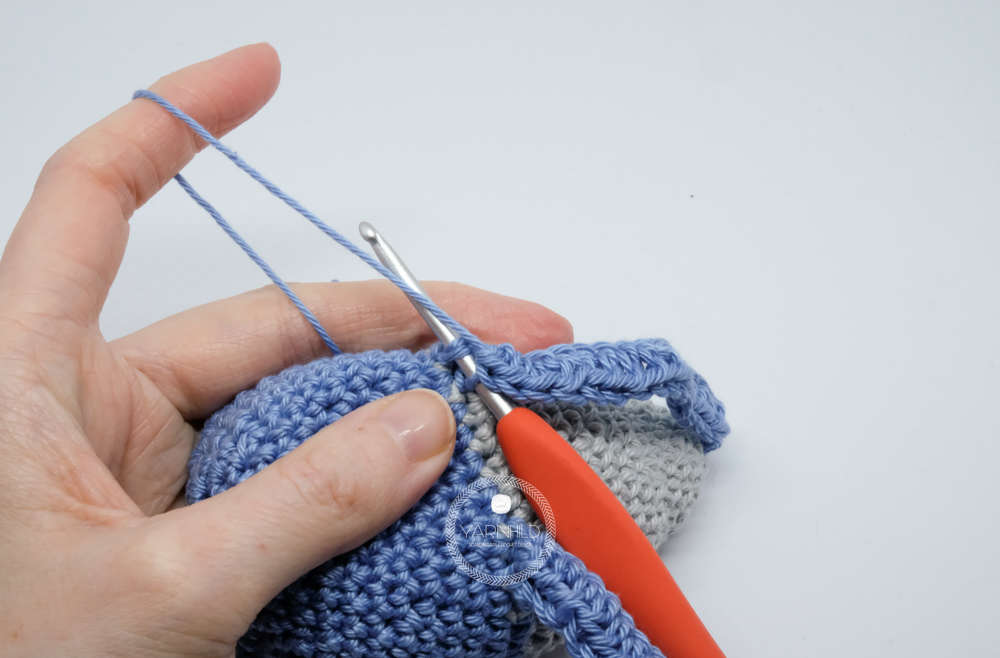
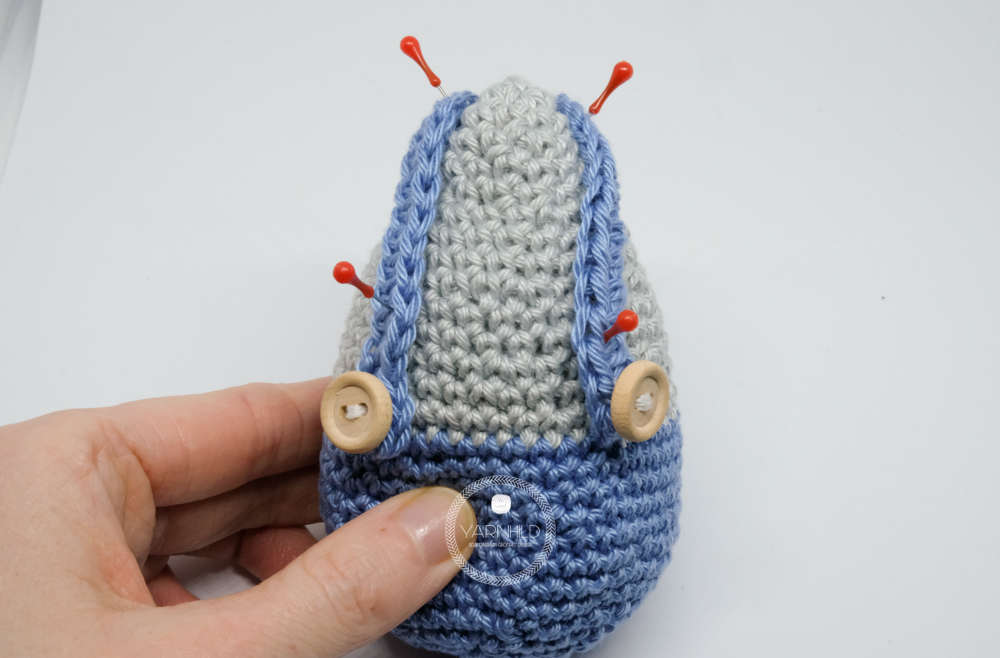
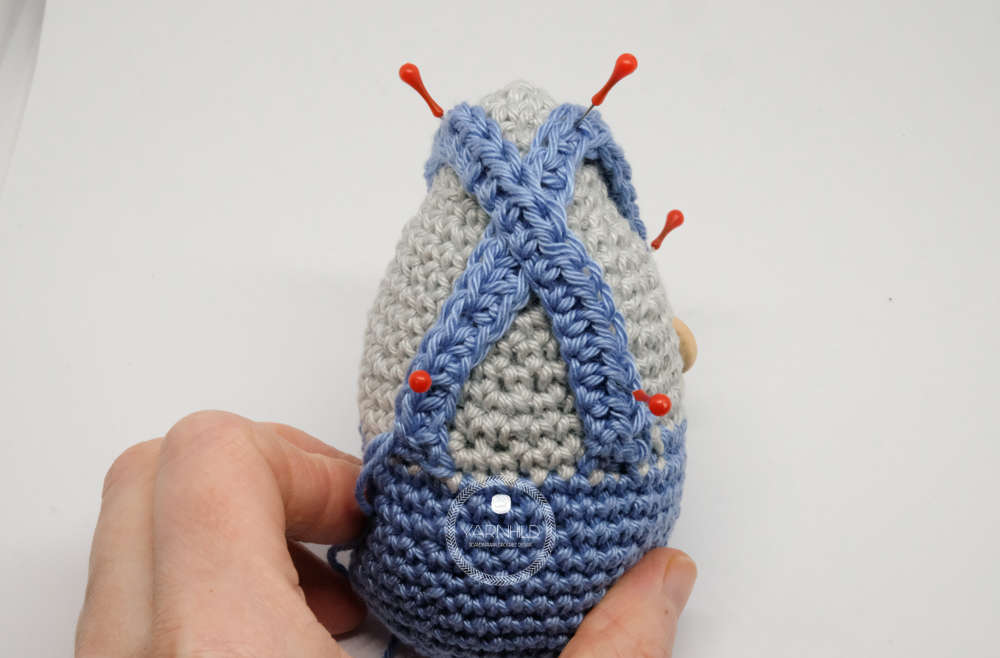
Now do the other chain. Skip 6 sc and start crochet the 3 chains into the pants from left to right. This will ensure that the chains appear parallel to each other.
Sew on buttons to the front part of the suspenders and cross the on the back. Use needles and decide where they should be.
Now secure them with some yarn. I just fastened it with a couple of stitches in the front and back. No need to make it tight.
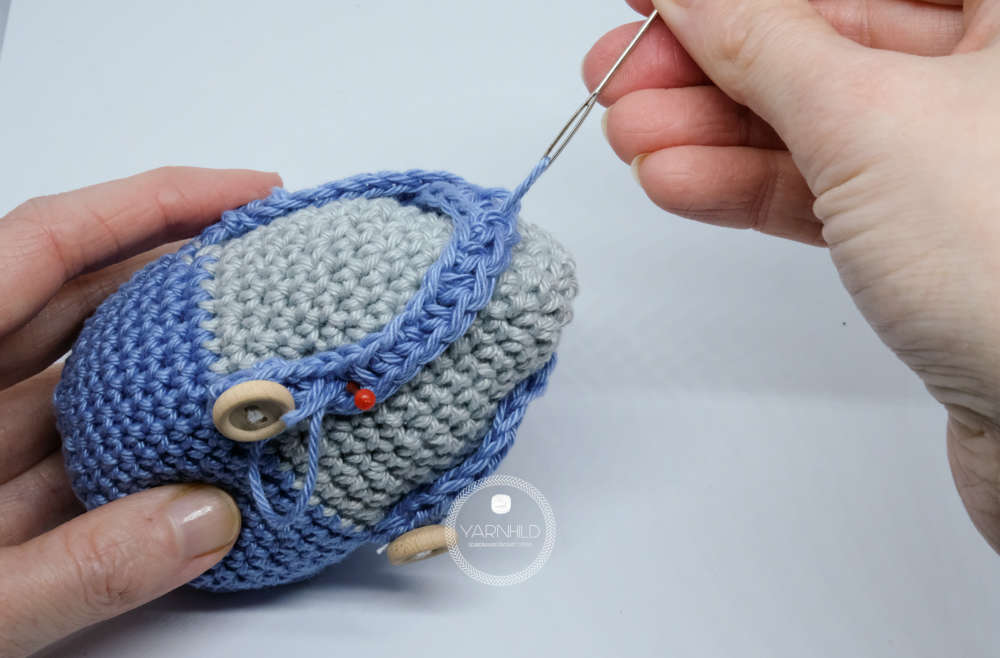
When you are finished, cut the yarn and weave in all ends.
[adToAppearHere]
Feet, make 2. Color sky/blue and silver. Start with silver
Stuff as you go.
Rnd 1) Make a magic ring and put 6 sc in the ring. (6 sc)
Rnd 2) 2 sc in each sc. ( 12 sc)
Rnd 3) *1 sc in next sc, 2 sc in next.*( 18 sc)
Rnd 4) 1 sc in each stitch for the entire round. (18 sc)
Rnd 5) *1 sc in the next sc, sc2tog.*(12 sc)
Remember to stuff as you go.
Rnd 6) sc2tog, repeat 4 times, 1 sc in the next 4 sc. (8 sc)
Change to sky/blue.
Rnd 7 - 21) 1 sc in each stitch for 15 rounds. (8 sc)
Cut the yarn, leave a long tail to sew the feet to the body.
Hands, make 2, color silver.
Stuff as you go. I advise you to stuff lightly here.
Rnd 1) Make a magic ring and put 4 sc in the ring. (4 sc)
Rnd 2) 2 sc in each sc. ( 8 sc)
Rnd 3) *1 sc in next sc, 2 sc in next.*( 12sc)
Rnd 4) *1 sc in next 2 sc, 2 sc in nest.* (16 sc)
Rnd 5) *1 sc in the next 2 sc, sc2tog.* (12 sc)
Rnd 6) sc2tog for a total of 6 times. (8 sc)
Rnd 7- 15) 1 sc in each stitch for 8 rounds. (8 sc)
Cut the yarn, but leave a long strand and sew the arms on the body. Weave in all loose ends.
Assembly
Sew the head on the body. Use a pipe cleaner if you want to make it more stable. Fasten the bowtie under the head. Weave in all loose ends.
I hope you liked the pattern for this sweet amigurumi mouse! Don't forget to share <3


Hola, por favor donde puedo conseguir el patrón en español
Hi!
Sorry, I don't speak Spanish, I also can't translate the pattern into Spanish. Hope you can find somebody who can help you.
I hope you don't mind, I took the liberty to put both mice into Word and had them translated to Spanish, hope this works. I noticed that the photos didn't show up but they can refer back to here for that. The English version is below the Spanish version.:D
Yarnhild: I took away the english version, hope you don't mind. They can just look in the main post instead.
LISA EL RATÓN crochet mouse, crochet amirugumi free pattern
https://www.yarnhild.com/en/crochet-Mouse-Free-crochet-Pattern/
El patrón está escrito en nosotros términos. El ratón de ganchillo todo se hace en rondas continuas, excepto el arco que se hace en hileras. Usar un limpiador de pipa para hacer más estable la cabeza y lo puede hacer si usted cree que es necesario.
Abreviaturas utilizadas:
CH – cadena
Yo – hilado sobre
St – puntada
SL st – puntada de resbalón
SC – punto bajo
DC – crochet doble
Inc – aumento (aumento del punto bajo, punto bajo dos en una puntada)
RND-ronda
*-* Repite de principio a fin de round/row
sc2tog – dos solo ganchillo juntos.
FLO – lazo de frente solamente
BLO, lazo trasero sólo
Materiales utilizados
Catania 100% algodón plata 172 Se necesita ca 0,9 onzas
Catania 100% algodón 246 rosa luz Se necesita ca 0,5 oz
Gancho de ganchillo tamaño 5/3 mm
Aguja de tapicería
Tijera
Material de relleno
Marcador de punto
Ojos de seguridad, 6 mm.
Cabeza, color plata
RND 1) hacer un anillo mágico y ganchillo 4 sc en el ring. (4 sc)
NúmAleat 2) 2 sc en cada SC. (8 sc)
RND 3) 1 sc en cada punto. (8 sc)
RND 4) * 1 MP en el primer MP, 2 MP en el siguiente * (12 sc)
RND 5) 1 sc en cada SC. (12 sc)
RND 6) * 1 sc en el siguiente 2 sc, 2 sc en el siguiente * (16 sc)
RND 7-8) 1 sc en cada punto de 2 rondas. (16 sc)
9 RND) * 1 sc en los siguiente 3 sc, 2 sc en next.* (20 sc)
RND 10) 1 sc en cada punto alrededor. (20 sc)
RND 11) * 1 sc en el siguiente 4 sc, 2 sc en el siguiente. (24 sc)
RND 12) * 1 sc en el siguiente 3 sc, 2 sc en next.* (30 sc)
RND 13-14) 1 sc en cada punto de 2 rondas. (30 sc)
RND 15) * 1 sc en los próximos 3 sc, sc2tog.* (24 sc)
Colocar ojos de seguridad entre la Ronda 11 y 12 aquí. Deje 6 sc espacio entre los ojos. Cosas de la cabeza con algún material de relleno. Tejer en los extremos.
Cose en la nariz con rosa. Simplemente cosí ida y vuelta en 1ª ronda con algún color de rosa.
RND 16) * 1 sc en los próximos 2 sc, sc2tog.* (18 sc)
RND 17) * 1 sc en el siguiente sc2tog.*(12 sc) sc
2sctog RND 18), repetir 5 veces más. (6 sc)
Coser el orificio cerrado.
Orejas, hacer dos. Color rosa y plata
Comenzar con rosa claro.
RND 1) hacer un anillo mágico y poner 6 sc en el ring. (6 sc)
NúmAleat 2) 2 sc en cada SC. (12 sc)
RND 3) * 1 sc SC próxima, 2 sc en next.* (18 sc)
RND 4) * 1 sc en el siguiente 2 sc, 2 sc en next.* (24 sc)
RND 5) cambio a gris. 1 sc en BLO (lazo trasero solamente) en cada punto para la ronda entera. (24 sc)
Cortar el hilo, tejer en los extremos pero dejar un hilo largo para que puede unir las orejas a la cabeza.
Coser las orejas sobre la cabeza de entre 16 y 17. La armadura en todos los extremos.
Arco. Color rosa claro.
Ch de fila 1) 6, a su vez, 1 sc en cada ch, ch 1 vuelta (5 sc)
Fila 2-3) 1 sc en cada ch, ch 1 vuelta (5 sc)
Hacer un sl st en la proa entre. Tomar una hebra larga de hilo y enróllelo firmemente alrededor de la proa. Tejer en los extremos pero deja una hebra, así que usted puede coser el lazo a la cabeza. justo al lado de la oreja,
Cuerpo. Color rosa claro y plata. Empezar con color de rosa.
El cuerpo es trabajado desde la parte superior hasta la parte inferior.
RND 1) hacer un anillo mágico, ch 1 y 6 sc en el ring.
NúmAleat 2) 2 sc en cada sc.(12 sc)
RND 3-4) 1 sc en cada punto de 2 rondas. (12 sc)
RND 5) * 1 MP en el siguiente MP, 2 MP en next.* (18 sc)
RND 6-7) 1 sc en cada punto de 2 rondas. (18 sc)
RND 8)* 1 sc en el siguiente 2 sc, 2 sc en next.* (24 sc)
RND 9-10) 1 sc en cada punto de 2 rondas. (24 sc)
RND 11) * 1 sc en los siguiente 3 sc, 2 sc en next.* (30 sc)
RND 12-13) 1 sc en cada punto de 2 rondas. (30 sc)
RND 14) * 1 sc en el siguiente 4 sc, 2 sc en el next.* (36 sc)
RND 15-17) 1 sc en cada punto de 3 rondas. (36 sc)
Ahora vamos a la falda de ganchillo y la próxima ronda a ganchillo en el (FLO) del frente del lazo sólo
RND 1 de falda) Sl st en la primera SC. Ch 3 (cuenta como 1 dc) trabajar en FLO para la ronda entera: 1 dc en los próximos 4 sc, 2 dc en próximo, * 1 dc en los siguientes 5 sc, 2 dc en próximo * Sl st en la parte superior del ch 3. (42 dc)
crochet front loop only (FLO), crochet mouse
NúmAleat 2 de la falda) trabajar como normal a través de ambos lazos. CH 1, 1 MP en el mismo punto, 1 sc en próximo dc, ch 3, sl st en el primer capítulo (puntada de la Puntilla), * 1 sc en próximos 2 dc, ch 3, sl st en el primer Cap. (puntada picot) * Sl st en la SC. de puño corta el hilo , en los extremos de la armadura. Ver fotos a continuación sobre cómo hacer la puntada de la puntilla.
crochet mousecrochet mousecrochet mouse
Coge un hilo de plata. Estamos cerrando el orificio del cuerpo y vamos a trabajar en (BLO) nuevo bucle de alrededor de 17.
RND 18) en BLO * 1 sc en los próximos 3 sc, 2sctog, (30 sc)
crochet mouse
RND 19) funcionan como nor4mal a través de ambos lazos. * 1 sc en los próximos 3 sc, 2sctog.* (24 sc)
RND 20) * 1 sc en el siguiente CP, 2sctog.* (18 sc)
Empezar a llenar el cuerpo con material de relleno.
RND 21) * 1 sc en el siguiente CP, sc2tog.*(12 sc)
2sctog RND 22), repetir 5 veces más. (6 sc)
Coser el orificio cerrado. La armadura en todos los extremos. Coser la cabeza sobre el cuerpo.
Pies, que 2. Color rosa claro y plata. Comenzar con rosa claro.
Cosas como vas.
RND 1) hacer un anillo mágico y poner 6 sc en el ring. (6 sc)
NúmAleat 2) 2 sc en cada SC. (12 sc)
RND 3) * 1 sc SC próxima, 2 sc en next.* (18 sc)
RND 4) 1 sc en cada punto para la ronda entera. (18 sc)
RND 5) * 1 sc en el siguiente CP, sc2tog.*(12 sc)
No olvide cosas como vas.
RND 6) sc2tog, repetir 4 veces, 1 MP en los próximos 4 SC. (8 sc)
Cambio a la plata.
RND 7 – 21) 1 sc en cada punto de 15 rondas. (8 sc)
Cortar el hilo, deja una larga cola coser las patas al cuerpo.
Manos, hacen 2, color plata.
Cosas como vas. Te aconsejo rellenar ligeramente aquí.
RND 1) hacer un anillo mágico y poner 6 sc en el ring. (6 sc)
NúmAleat 2) 2 sc en cada SC. (12 sc)
RND 3) * 1 sc SC próxima, 2 sc en next.* (18 sc)
RND 4) * 1 sc en el siguiente CP, sc2tog.*(12 sc)
Sc2tog RND 5) para un total de 6 veces. (6 sc)
RND 6 - 20) 1 sc en cada punto de 9 rondas. (6 sc)
Cortar el hilo, pero dejar una hebra larga y coser los brazos en el cuerpo. La armadura en todos los extremos sueltos.
¡Eso es todo!
crochet mouse, free amirugumi pattern crochet mouse, free amirugumi pattern
Usé el mismo hilo para Malvín como lo hice para la Lisa el hilo de algodón brillante de Schahenmayr. Usted puede hacer ambos ratones con menos de una madeja de hilo, y sólo necesita 50g/1, de 7 oz. Este ratón de ganchillo es un poco más grande que Lisa, y también hice las orejas un poco más grande.
MALVIN EL RATÓN AMIRUGUMI https://www.yarnhild.com/wp-content/uploads/2018/01/DSCF3464-1000x658.jpg
Abreviaturas utilizadas:
CH – cadena
Yo – hilado sobre
St – puntada
SL st – puntada de resbalón
SC – punto bajo
DC – crochet doble
Inc – aumento (aumento del punto bajo, punto bajo dos en una puntada)
Dec – disminución (single crochet juntos)
RND-ronda
*-* Repite de principio a fin de round/row
sc2tog – 2 sc junto
FLO – lazo de frente solamente
BLO, lazo trasero sólo
Materiales utilizados
Catania 100% algodón plata 172
Catania 100% algodón cielo 247
Gancho de ganchillo tamaño 5/3 mm
Aguja de tapicería
Tijeras
Material de relleno
Marcador de punto
Ojos de seguridad, 6 mm
Limpiador de pipa - opcional si desea hacer más estable la cabeza.
Nota: El patrón está escrito en nosotros términos. La cabeza, cuerpo, orejas, pies y manos para el ratón amirugumi son crocheted en rondas continuadas.
Cabeza - Color Plata
RND 1) hacer un anillo mágico y ganchillo 4 sc en el ring. (4 sc)
NúmAleat 2) 2 sc en cada SC. (8 sc)
RND 3) 1 sc en cada punto. (8 sc)
RND 4) * 1 MP en el primer MP, 2 MP en el siguiente * (12 sc)
RND 5) 1 sc en cada SC. (12 sc)
RND 6) * 1 sc en el siguiente 2 sc, 2 sc en el siguiente * (16 sc)
RND 7-8) 1 sc en cada punto de 2 rondas. (16 sc)
9 RND) * 1 sc en los siguiente 3 sc, 2 sc en next.* (20 sc)
RND 10) 1 sc en cada punto alrededor. (20 sc)
RND 11) * 1 sc en el siguiente 4 sc, 2 sc en el siguiente. (24 sc)
RND 12) * 1 sc en el siguiente 3 sc, 2 sc en next.* (30 sc)
RND 13-14) 1 sc en cada punto de 2 rondas. (30 sc)
RND 15) * 1 sc en el siguiente 4 sc, 2 sc en el next.* (36 sc)
RND 16) * 1 sc en próximos 4 sc, sc2tog * (30 sc)
RND 17) * 1 sc en los próximos 3 sc, sc2tog.* (24 sc)
Colocar ojos de seguridad entre la Ronda 11 y 12 aquí. Deje 6 sc espacio entre los ojos. Cosas de la cabeza con algún material de relleno. Tejer en los extremos.
Cose en la nariz con azul/cielo. Cosí a ida y vuelta en 1ª ronda con algún azul
RND 18) * 1 sc en los próximos 2 sc, sc2tog.* (18 sc)
RND 19) * 1 sc en el siguiente sc2tog.*(12 sc) sc
2sctog RND 20), repetir 5 veces más. (6 sc)
Coser el orificio cerrado.
Orejas, hacer dos - Color Celeste y plata. Iniciar con azul/cielo.
RND 1) hacer un anillo mágico y poner 6 sc en el ring. (6 sc)
NúmAleat 2) 2 sc en cada SC. (12 sc)
RND 3) * 1 sc SC próxima, 2 sc en next.*(18 sc)
RND 4) * 1 sc en el siguiente 2 sc, 2 sc en next.* (24 sc)
RND 5) * 1 sc en el siguiente 3 sc, 2 sc en next.* (30 sc)
RND 7) cambio a gris. 1 sc en BLO (lazo trasero solamente) en cada punto para la ronda entera. (30 sc)
Cortar el hilo, tejer en los extremos pero dejar un hilo largo para que puede unir las orejas a la cabeza.
Coser las orejas sobre la cabeza de entre 16 y 17. La armadura en todos los extremos.
Pajarita - Color Celeste
Ch de fila 1) 6, a su vez, 1 sc en cada ch, ch 1 vuelta (5 sc)
Fila 2-3) 1 sc en cada ch, ch 1 vuelta (5 sc)
Hacer un sl st alrededor de la pajarita todo. Tomar una hebra larga de hilo y enróllelo firmemente alrededor de la proa. Tejer en los extremos pero deje un filamento para que puede coser el corbatín en el cuerpo.
Cuerpo - Color Celeste y plata. Comenzar con plata
El cuerpo es trabajado desde la parte superior hasta la parte inferior.
RND 1) hacer un anillo mágico, ch 1 y 6 sc en el ring.
NúmAleat 2) 2 sc en cada sc.(12 sc)
RND 3-4) 2 sc en cada punto de 2 rondas. (12 sc)
RND 5) * 1 MP en el siguiente MP, 2 MP en next.* (18 sc)
RND 6-7) 1 sc en cada punto de 2 rondas. (18 sc)
RND 8) * 1 sc en el siguiente 2 sc, 2 sc en next.* (24 sc)
RND 9-10) 1 sc en cada punto de 2 rondas. (24 sc)
RND 11) * 1 sc en los siguiente 3 sc, 2 sc en next.* (30 sc)
RND 12-13) 1 sc en cada punto de 2 rondas. (30 sc)
RND 14) * 1 sc en el siguiente 4 sc, 2 sc en el next.* (36 sc)
RND 15) * 1 sc en el siguiente 5 sc, 2 sc en el siguiente * (42 sc)
Cambio a azul/cielo.
RND 16-24) 1 sc en cada punto de 9 rondas. (42 sc)
RND 25) * 1 sc en los próximos 5 sc, sc2tog *. (36 sc)
RND 26) * 1 sc en los próximos 4 sc, sc2tog *. (30 sc)
RND 27) * 1 sc en los próximos 3 sc, sc2tog *. (24 sc)
Empezar a rellenar el cuerpo aquí.
RND 28) * 1 sc en los próximos 2 sc, sc2tog *. (18 sc)
RND 29) * 1 sc en el siguiente CP, sc2tog.*(12 sc)
2sctog RND 30), repetir 5 veces más. (6 sc)
Cortar el hilo, tejer en los extremos y coser el agujero cerrado.
Tirantes, hacer dos - Color azul de cielo
Los tirantes están consiguiendo ganchillo en los pantalones. Decidir qué parte será la parte trasera y en la fila 30 (donde comienza la parte azul) Conecte un hilo azul/cielo y hacer 1 MP en los próximos 3 sc.
crochet mouse, free amirugumi pattern
Ahora empezar a hacer cadenas. Usted necesitará suficiente cadenas tirantes pueden cruzar sobre la otra y debe llegar al otro lado donde la parte azul/cielo comienza en la parte delantera.
crochet mouse, free amirugumi pattern
Encadenaron 27 cadenas, y luego saltan dos cadenas y 1 HDC en cada cadena. Podría ser que usted necesitará más o menos cadenas que hago, según el hilo que utilizas.
Consejo extra: para obtener un mejor acabado, girar a la cadena de bucle y parece su HDC en los lazos"baches" donde yo estoy apuntando con la aguja en la fotografía.
crochet mouse, free amirugumi pattern
Al llegar al final de sus cadenas, hacer un st sl SC 3.
crochet mouse, free amirugumi pattern
Ahora no la otra cadena. Inicio y Skip 6 sc crochet 3 cadenas en los pantalones de izquierda a derecha. Esto asegurará que las cadenas aparecen paralelas entre sí.
crochet mouse, free amirugumi pattern
Coser botones en la parte delantera de los tirantes y Cruz el de la parte posterior. Usar agujas y decidir donde debe ser.
crochet mouse, free amirugumi patterncrochet mouse, free amirugumi pattern
Ahora fijar con algunos hilados. Yo apenas había sujetado con un par de puntadas en la parte delantera y trasera. No es necesario que quede apretado.
crochet mouse, free amirugumi pattern
Cuando termine, cortar el hilo y tejido en todos los extremos.
Pies, que 2 - Color Celeste y plata. Comenzar con plata
Cosas como vas.
RND 1) hacer un anillo mágico y poner 6 sc en el ring. (6 sc)
NúmAleat 2) 2 sc en cada SC. (12 sc)
RND 3) * 1 sc SC próxima, 2 sc en next.*(18 sc)
RND 4) 1 sc en cada punto para la ronda entera. (18 sc)
RND 5) * 1 sc en el siguiente CP, sc2tog.*(12 sc)
No olvide cosas como vas.
RND 6) sc2tog, repetir 4 veces, 1 MP en los próximos 4 SC. (8 sc)
Cambio a azul de cielo.
RND 7 – 21) 1 sc en cada punto de 15 rondas. (8 sc)
Cortar el hilo, deja una larga cola coser las patas al cuerpo.
Manos, hacen 2 - Color Plata.
Cosas como vas. Te aconsejo rellenar ligeramente aquí.
RND 1) hacer un anillo mágico y poner 4 sc en el ring. (4 sc)
NúmAleat 2) 2 sc en cada SC. (8 sc)
RND 3) * 1 sc SC próxima, 2 sc en next.*(12sc)
RND 4) * 1 sc en el siguiente 2 sc, 2 sc en nest.* (16 sc)
RND 5) * 1 sc en los próximos 2 sc, sc2tog.* (12 sc)
Sc2tog RND 6) para un total de 6 veces. (8 sc)
RND 7 - 15) 1 sc en cada punto de 8 rondas. (8 sc)
Cortar el hilo, pero dejar una hebra larga y coser los brazos en el cuerpo. La armadura en todos los extremos sueltos.
Asamblea
Coser la cabeza sobre el cuerpo. Use un limpiador de pipa para hacerla más estable. Fije la pajarita debajo de la cabeza. En todo el extremo suelto de la armaduras.
LISA THE MOUSE
https://www.yarnhild.com/en/crochet-mouse-free-crochet-pattern/
Wow! That’s so generous of you! Thank you so much! I am sure many will be very happy for this:)
WOW!!!! They are sooo cute! I love it!! Thank you very much for sharing! I will give it a go with my kids next weekend 🙂
All best!