How to crochet an elephant
In today's tutorial, I am gonna show you how to make this cute and easy crochet elephant! Elephants are so amazing animals, big, cute, and intelligent. Many reasons to crochet some in other words!
You can scroll down to the free pattern or you can purchase the (German and English) PDF in my shops!
Pin this for later on Pinterest!
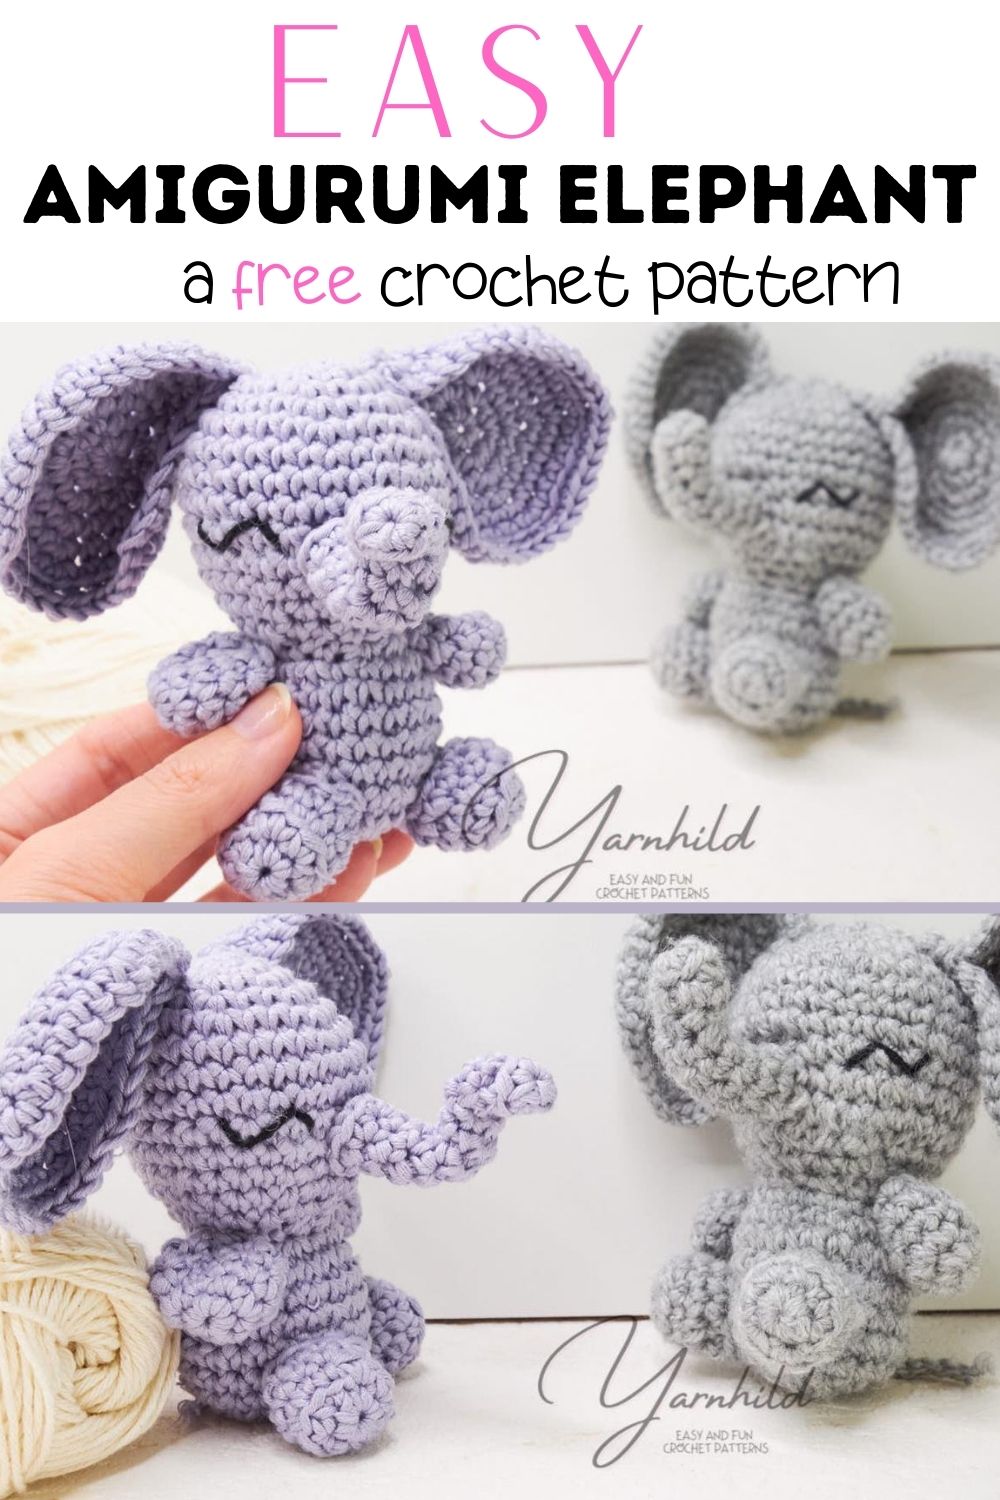
These little elephants are only about 10 cm tall (4"), so these are very quick to make! Please share your finished elephant with me on Instagram.
I sometimes include affiliate links in my blog posts. That means that I earn a small commission if you purchase a product that I recommend, on no extra costs on your behalf. Thank you for your support!
Video patterns
I have made a video too! Be sure to watch that for my tips and tricks. Lately, I have started to make video tutorials as well! I know most of you who follow this blog are so advanced and most of you might prefer to read patterns. But there are many newbies and some experienced crocheters are more visual too.
I prefer videos over written patterns if I had to choose. Even though I am not exactly a beginner, I am more of a visual type. But if I want it to go fast, I'd prefer a written pattern. Also, it is an opportunity for us to connect in a different way, I find.
You are welcome to subscribe to my channel if you enjoy videos too! Also I have a little different content coming up!
English pattern
Back to the elephant pattern
So back to the pattern! The head and the body are made in one part, and the limbs separately. The elephant is not so big, about 10 cm (4"). You can change the size by choosing a larger or smaller hook and matching yarn.
The inspiration behind the design
Actually, a follower on my YouTube channel asked me if I could make a little crochet elephant, and I thought it was a great idea. First, I made the ears smaller, but then my husband said it looked like a mouse. Lol, he and his snarky comments! But he was right. I made bigger ones, and that looked so much better!
The crochet elephant carries the cute name "Flopsy the Elephant". I thought it was fitting because of the big ears.
Looking for more free amigurumi patterns?
There are several quick and easy amigurumi patterns on this blog! Feel free to look around! Here are some popular patterns that you can check out!
Recommended materials
I used a 2.5 mm crochet hook in this pattern, but you choose whatever fits the yarn that you're using. I love the hooks from clover!
Also, you'll need a pipe cleaner for the trunk. Be careful not to use a normal scissors to trim these, but try a multitool instead.
You'll also need some filling materials and sports weight yarn.


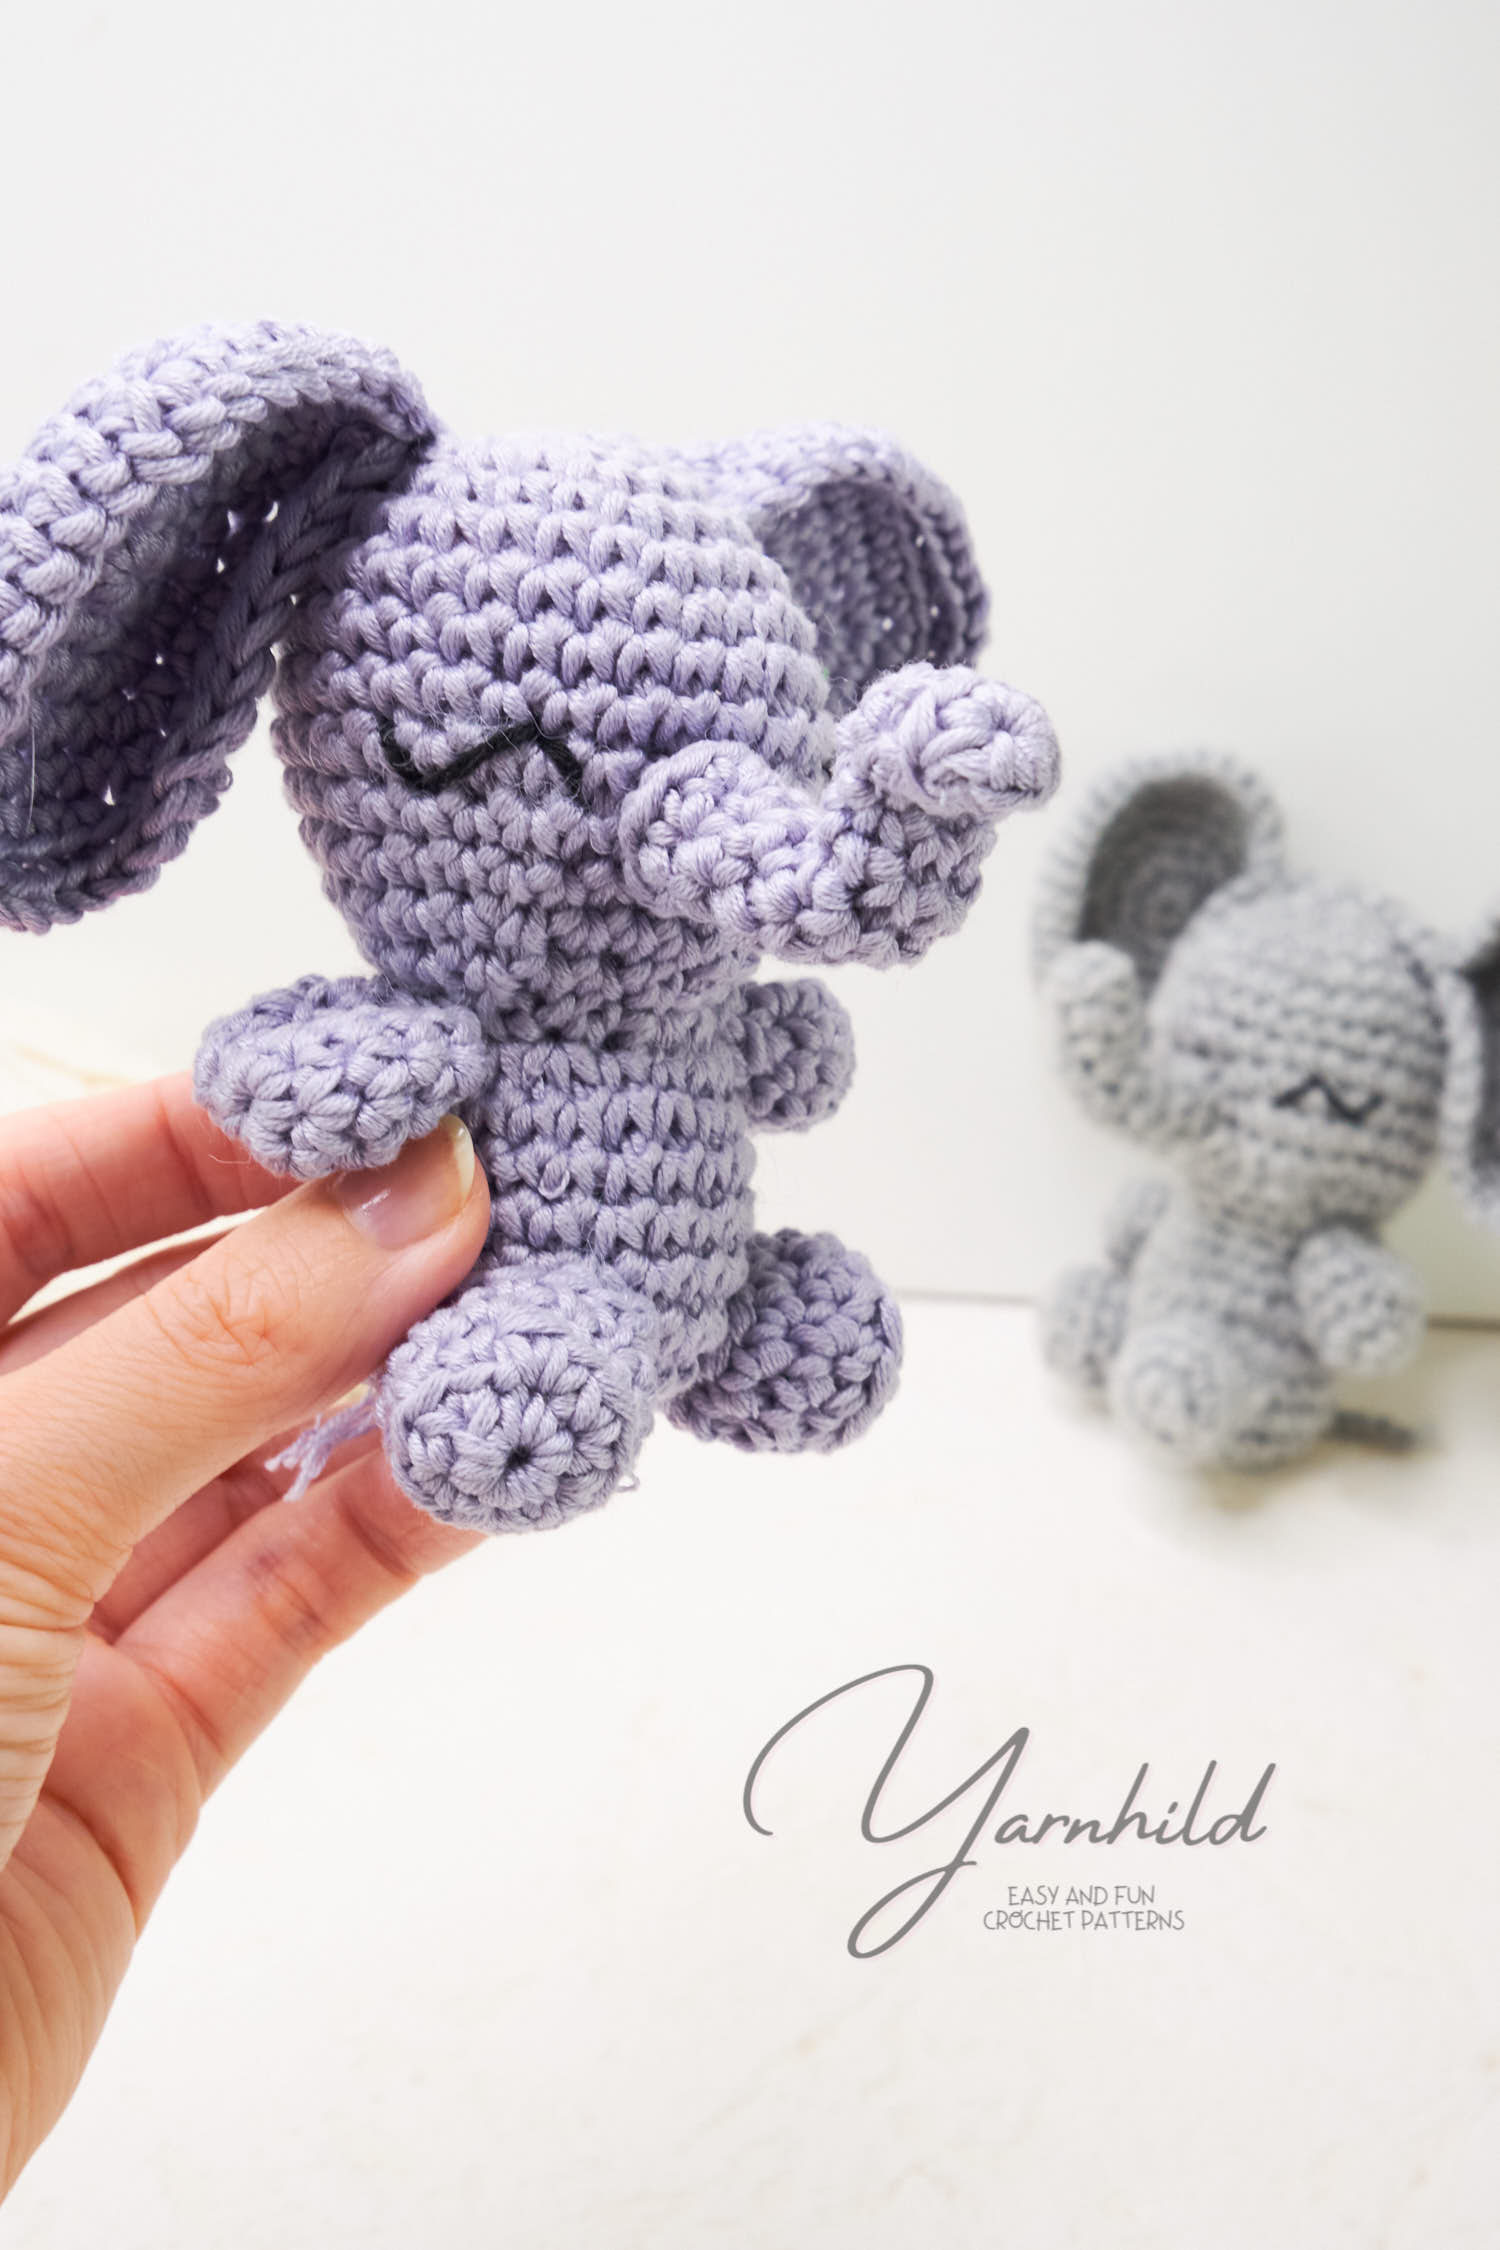
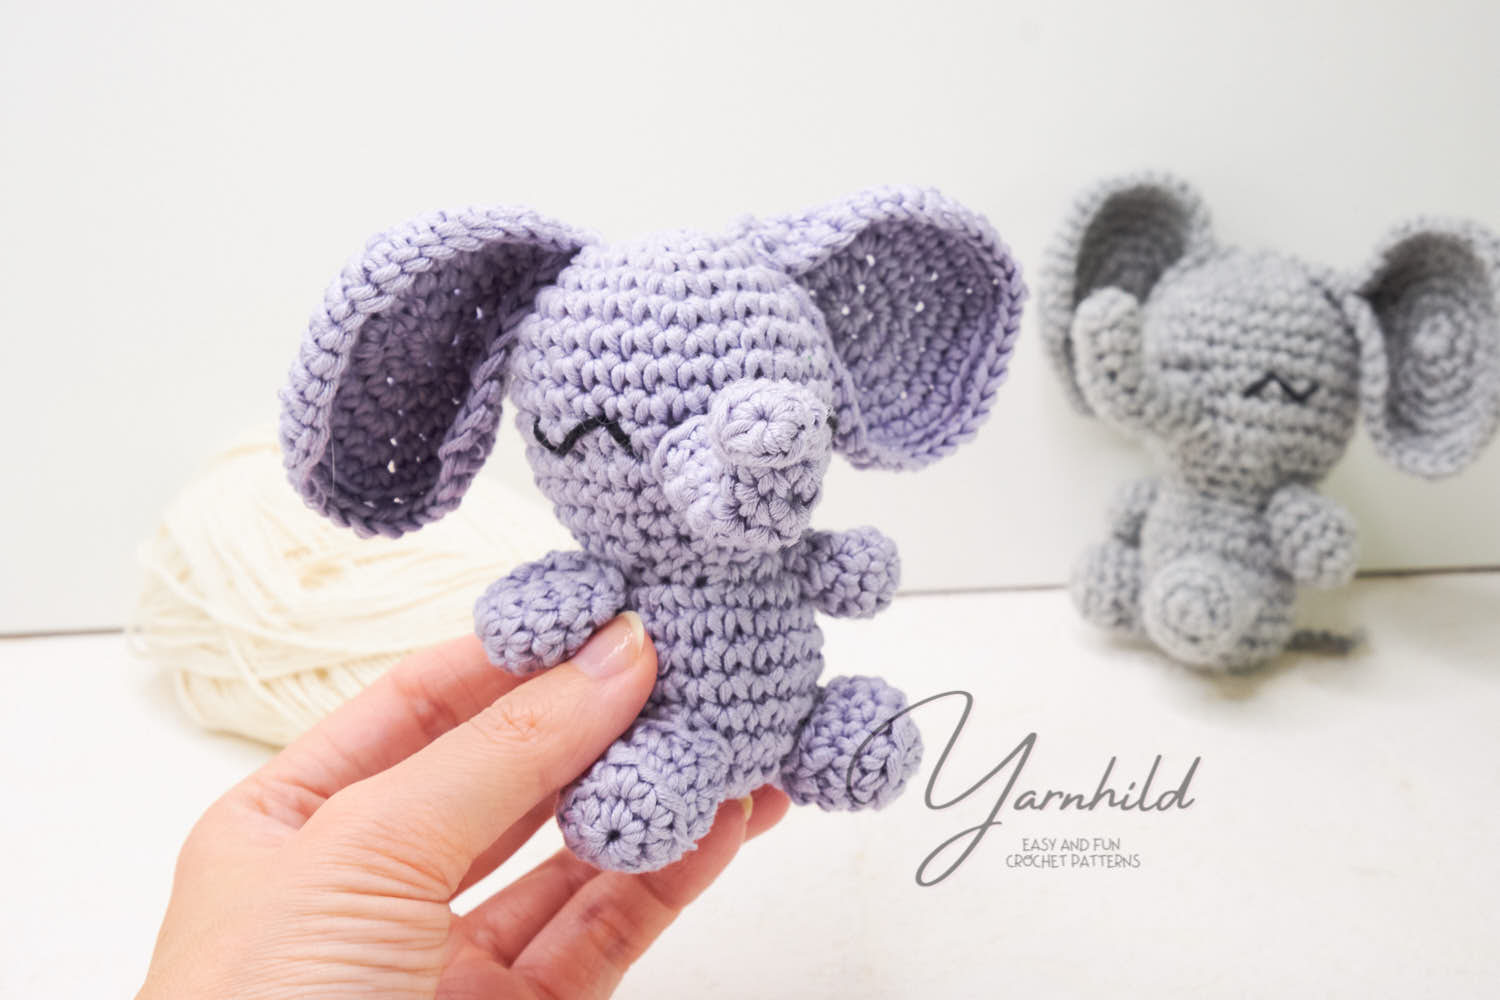
Flopsy the elephant
About the pattern
The elephant is made in continuous rounds. Use a stitch marker and move it up as you finish the rounds. The head and the body are made in one piece and the ears, limbs and tail are made separately. You’ll need a pipe cleaner for the trunk.
Abbreviations – US terms
Ch-chain
rnd–round
st–stitch
sl st–slip stitch
sc–single crochet
r–round
sc2tog–single crochet decrease
sc inc–single crochet increase, 2 single crochet in one stitch
mr–Magic ring
yo –yarn over
( ) –repeat action
BLO –crochet in the back loop only
Materials
- Sports weight yarn in one color of choice. I used Drops Muskat (purple) and Schahenmayr bravo (grey) in this pattern.
- Crochet hook 2.5 mm (or fitting for the yarn).
Small amounts of black yarn to embroider the eyes.
-Filling materials.
- Pipe cleaner for the trunk.
- Forceps for cutting the pipe cleaner.
Materials
Instructions
Body
Work in continuous rounds. Use a stitch marker and move it up as you finish the rounds.
Rnd 1: 6 sc in a mr = 6 sc
Rnd 2: sc inc x 6 = 12 sc
Rnd 3: (1 sc, sc inc) x 6 = 18 sc
Rnd 4: (2 sc, sc inc) x 6 = 24 sc
Rnd 5: (3 sc, sc inc) x 6 = 30 sc
Rnd 6- 11: 1 sc in every st (6 rounds) = 30 sc
Rnd 12: (3 sc, sc2tog) x 6 = 24 sc
Rnd 13: (2 sc, sc2tog) x 6 = 18 sc
Add stuffing
Rnd 14: (1 sc, sc2tog) x 6 = 12 sc
Rnd 15: sc inc in every st = 24 sc
Rnd 16-21: 1 sc in every st (6 rounds) = 24 sc
Rnd 22: (2 sc, sc2tog) x 6 = 18 sc
Add stuffing here.
Rnd 23: (1 sc, sc2tog) x 6 = 12 sc
Rnd 24: sc2tog x 6 = 6 sc
Fasten off and sew the hole closed.
Ears
Make 2. Work in continuous rounds.
Rnd 1: 6 sc in a mr = 6 sc
Rnd 2: sc inc x 6 = 12 sc
Rnd 3: (1 sc, sc inc) x 6 = 18 sc
Rnd 4: (2 sc, sc inc) x 6 = 24 sc
Rnd 5: (3 sc, sc inc) x 6 = 30 sc
Rnd 6: (4 sc, sc inc) x 6 = 36 sc
Rnd 7: Work in BLO (5 sc, sc inc) x 6 = 42 sc
Sl st in the first sc and finish off. Leave a long tail. Pinch the ear and sew back and forth until the ear gets a little pointy.
Trunk
Work in continuous rounds.
Rnd 1: 6 sc in a mr = 6 sc
Rnd 2: Work in BLO. 1 sc in each st = 6 sc
Rnd 3 -8: 1 sc in each st (8 rounds)
Continue making more rounds if you want a
longer trunk. Sl st in the first st and fasten off, leave a long tail for fastening.
Cut a pipe cleaner, so that it fits the trunk. Don’t use normal scissors, but instead forceps or something. Fold the tip and put the pipe cleaner in the trunk. Now the trunk can be folded in every direction.
Arms
Make 2. Work in continuous rounds.
Rnd 1: 6 sc in a mr = 6 sc
Rnd 2: sc inc x 6 = 12 sc
Rnd 3-4: 1 sc in each st (2 rounds) = 12 sc
Rnd 5: (1 sc, sc2tog) x 4 = 8 sc
Fasten off, leave a long tail for fastening.
Feet
Make 2. Work in continuous rounds.
Rnd 1: 6 sc in a mr = 6 sc
Rnd 2: sc inc x 6 = 12 sc
Rnd 3: 1 sc in each st in BLO = 12 sc
Rnd 4-5: 1 sc in each st (2 rounds) = 12 sc
Fasten off. Leave a tail for fastening
Tail
Chain 5. Fasten off. Leave a tail for fastening
Assembly
Place all the parts with pins to decide the best position. Add a little bit of stuffing to the feet. The arms are unstuffed.
The trunk is fastened between rows 9-11
The ears on rows 3-4
The hands on rows 15-16
The feet on rows 21 -22
The tail on the back
Take some black yarn and embroid on the eyes. See pictures for more details and extra help!


I would love to know where and how to get the magnet holder for your scissors and needles please. I’m always loosing them thank you
Hi! I got mine from Amazon. They are really practical! I found a similar here: https://amzn.to/3cEW0jB ( Thank you for using my Affiliate link)