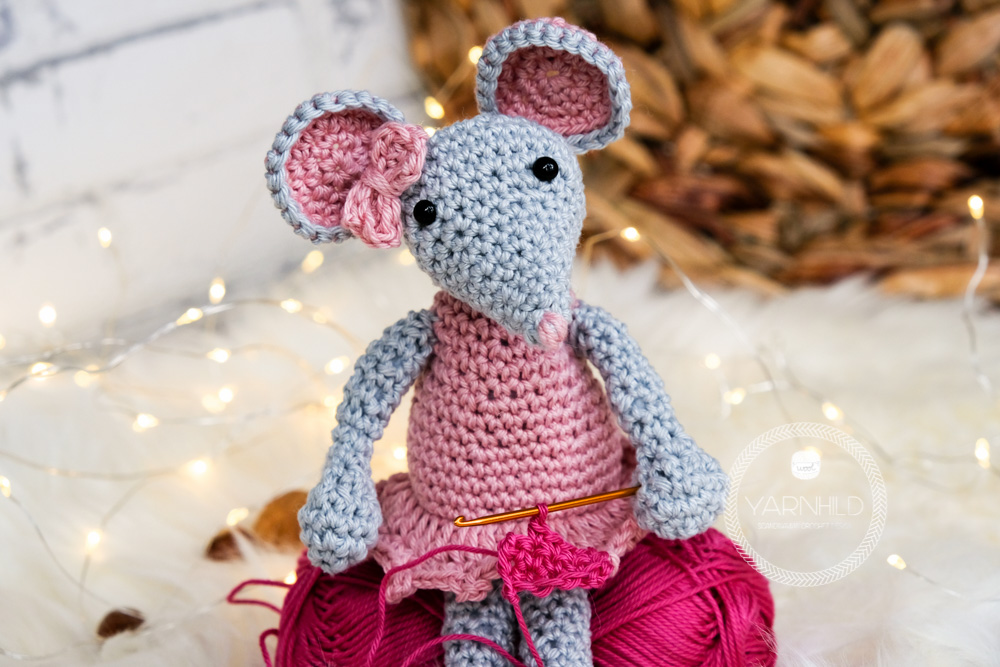
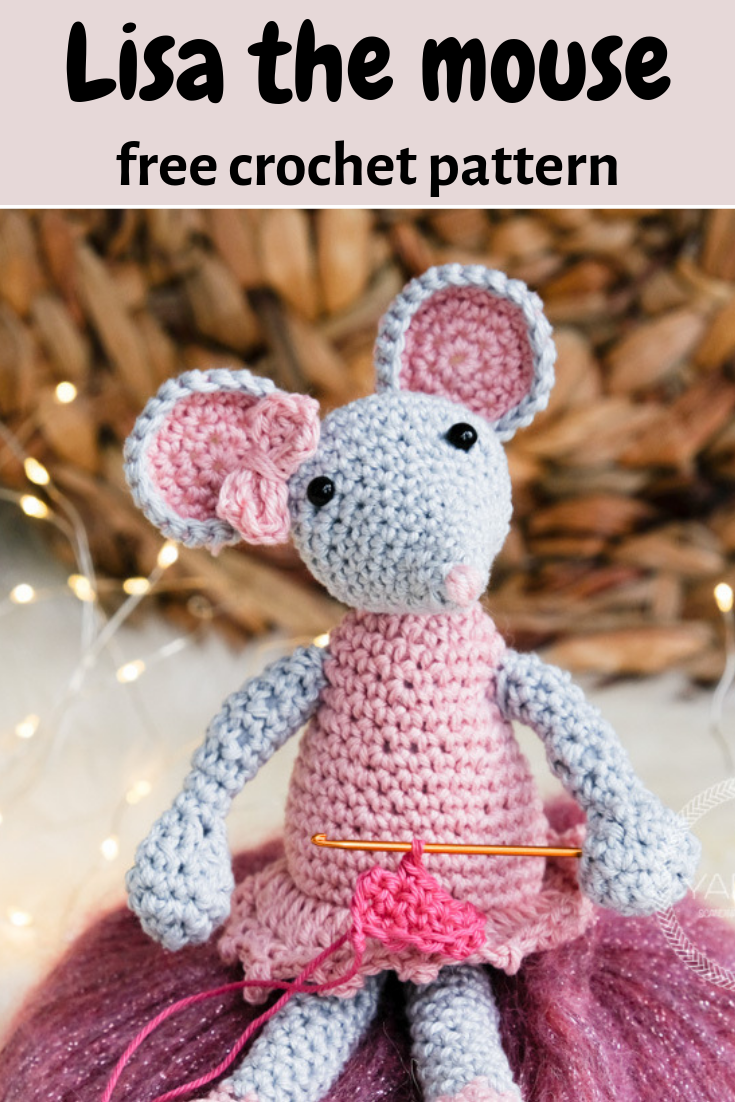
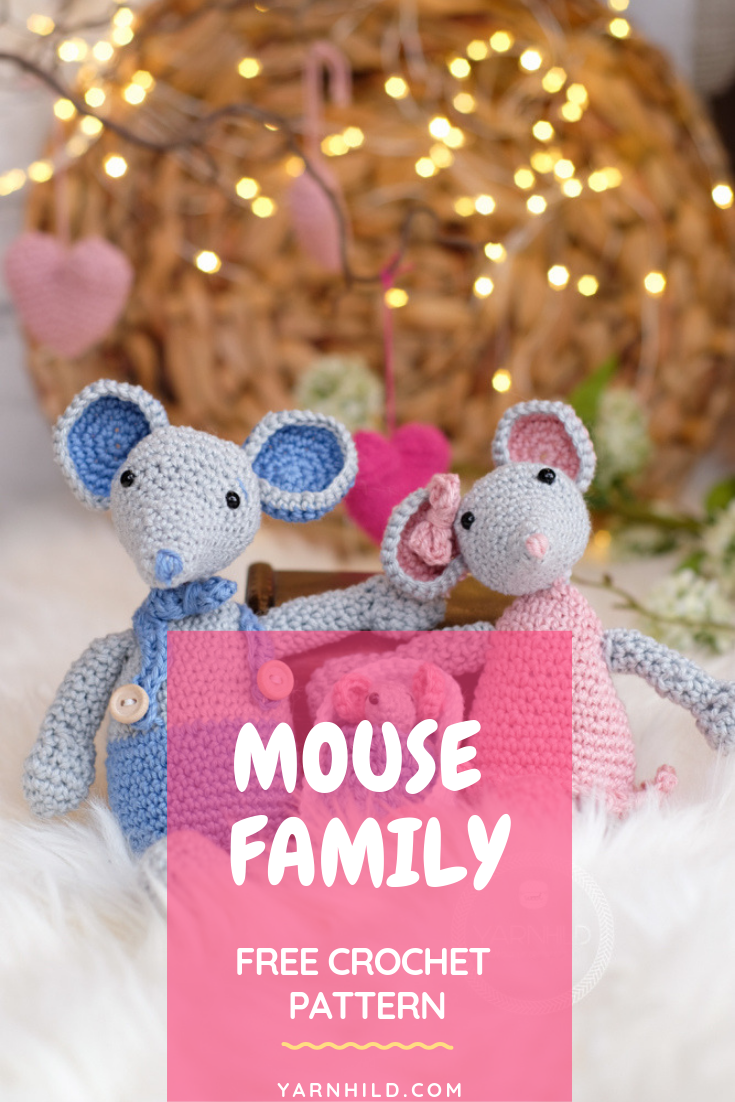
Lisa the mouse - A free crochet pattern
Here is a free crochet pattern for a cute amigurumi mouse; Lisa the mouse. This is the first part of the Valentines CAL. Scroll down to find the free crochet pattern for Lisas family. Her husband Malvin and baby Mila.

Materials
The crochet mouse is crocheted with cotton yarn called Schachenmayr. You can use a 3.0 mm or 3.5 mm crochet hook.
If you do decide to make this crochet mouse, would be so happy if you show me a picture on Facebook or tag me on Instagram! It is always nice to see your versions! Also if be sure to follow me on Facebook so you don’t miss any of my FREE patterns! I am also active on Instagram where you can see what’s going on behind the scenes!
This post may contain affiliate links. Read our disclosure to learn more about it.
Find the free pattern for the handsome boyfriend Malvin here
Get the free pattern to the mouse baby here
Hier geht's zu der Anleitung für Deutsche Lisa die Maus!
Her finner du den norske oppskriften!

Get the add free version on Etsy here
Or get it at Ravelry: add to cart
Abbreviations used:
- ch – chain
- yo – yarn over
- st – stitch
- sl st – slip stitch
- sc – single crochet
- dc - double crochet
- inc – Increase ( single crochet increase, two single crochet in one stitch)
- rnd – round
- *-* Repeat from start to end of the round/row
- sc2tog - two single crochet together.
- FLO - Front loop only
- BLO - back loop only
Materials used
- Catania 100% cotton Silver 172
You will need ca 0.9 oz
- Catania 100% cotton Light Pink 246
You will need ca 0,5 oz
- Crochet hook size 5/3 mm
- Tapestry needle
- Scissor
- Filling material
- Stitch marker
- Safety eyes, 6 mm. Check out this great deal: 100 x Dolls Safety Plastic Eyes Animal Crafts for Kids DIY Set
The pattern is written in US terms. The entire crochet mouse is made in continuous rounds, except the bow which is made in rows. I did use a pipe cleaner to make the head more stable and you can do that if you feel that it is necessary.
Crochet pattern for Lisa the mouse
Head, color silver
Rnd 1) Make a magic ring and crochet 4 sc in the ring. (4 sc)
Rnd 2) 2 sc in each sc. (8 sc)
Rnd 3) 1 sc in each stitch. (8 sc)
Rnd 4) *1 sc in the first sc, 2 sc in next* (12 sc)
Rnd 5) 1 sc in each sc. (12 sc)
Rnd 6) *1 sc in the next 2 sc, 2 sc in next* (16 sc)
Rnd 7-8) 1 sc in each stitch for 2 rounds. ( 16 sc)
Rnd 9)* 1 sc in the next 3 sc, 2 sc in next.* (20 sc)
Rnd 10) 1 sc in each stitch around. (20 sc)
Rnd 11) *1 sc in the next 4 sc, 2 sc in next. (24 sc)
Rnd 12) *1 sc in next 3 sc, 2 sc in next.* (30 sc)
Rnd 13-14) 1 sc in each stitch for 2 rounds. (30 sc)
Rnd 15) *1 sc in the next 3 sc, sc2tog.* (24 sc)
Attach safety eyes between round 11 and 12 here. Leave 6 sc space between the eyes. Stuff the head with some filling material. Weave in ends.
Sew on the nose with pink. I just sewed back and forth on round one with some pink.
Rnd 16) *1 sc in the next 2 sc, sc2tog.* (18 sc)
Rnd 17) *1 sc in the next sc sc2tog.*(12 sc)
Rnd 18) 2sctog, repeat 5 more times. (6 sc)
Sew the hole closed.
Ears, make two. Color light pink and silver
[adToAppearHere]
Start with light pink.
Rnd 1) Make a magic ring and put 6 sc in the ring. (6 sc)
Rnd 2) 2 sc in each sc. ( 12 sc)
Rnd 3) *1 sc in next sc, 2 sc in next.*( 18 sc)
Rnd 4) *1 sc in next 2 sc, 2 sc in next.* (24 sc)
Rnd 5) Change to grey. 1 sc in BLO (back loop only) in each stitch for the entire round. (24 sc)
Cut the yarn, weave in ends but leave a long thread so you can attach the ears to the head.
Sew the ears on the head between round 16 and 17. Weave in all ends.
Bow. Color light pink.
Row 1) Ch 6, turn, 1 sc in each ch, ch 1 turn (5 sc)
Row 2-3)1 sc in each ch, ch 1 turn (5 sc)
Do a sl st around the entire bow. Take a long strand of yarn and wind it firmly around the bow. Weave in ends but leave a strand so you can sew the bow to the head. just beside the ear,
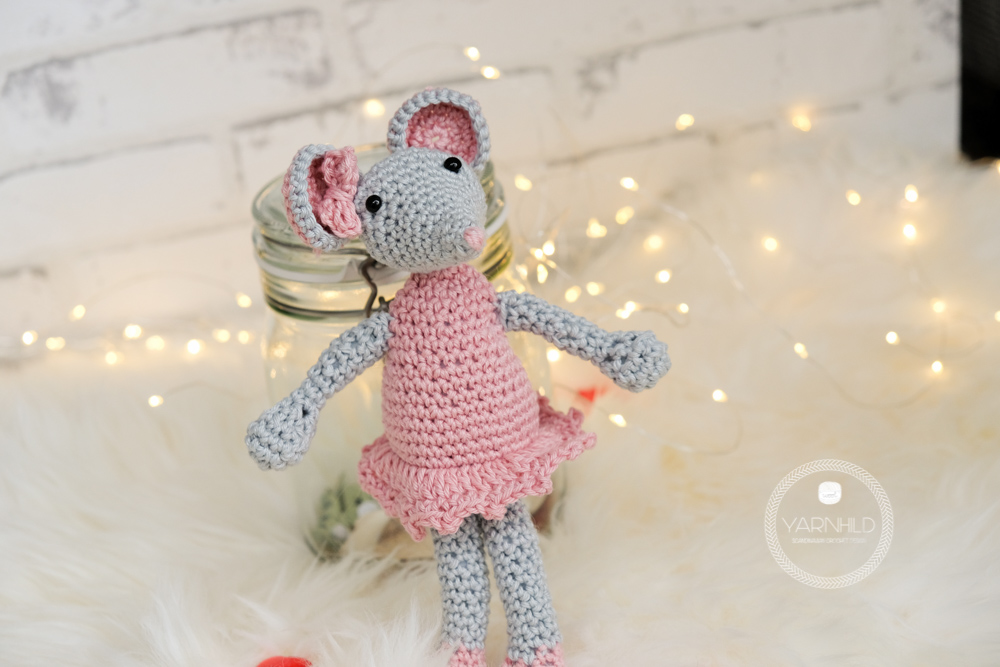
Body. Color light pink and silver. Start with pink.
The body is worked from top to the bottom.
Rnd 1) Make a magic ring, ch 1 and do 6 sc in the ring.
Rnd 2) 2 sc in each sc.(12 sc)
Rnd 3-4) 1 sc in each stitch for 2 rounds. (12 sc)
Rnd 5) *1 sc in the next sc, 2 sc in next.* (18 sc)
Rnd 6-7) 1 sc in each stitch for 2 rounds. (18 sc)
Rnd 8)* 1 sc in the next 2 sc, 2 sc in next.* (24 sc)
Rnd 9-10) 1 sc in each stitch for 2 rounds.(24 sc)
Rnd 11)*1 sc in the next 3 sc, 2 sc in next.* (30 sc)
Rnd 12-13)1 sc in each stitch for 2 rounds. (30 sc)
Rnd 14) )*1 sc in the next 4 sc, 2 sc in next.* (36 sc)
Rnd 15-17)1 sc in each stitch for 3 rounds.(36 sc)
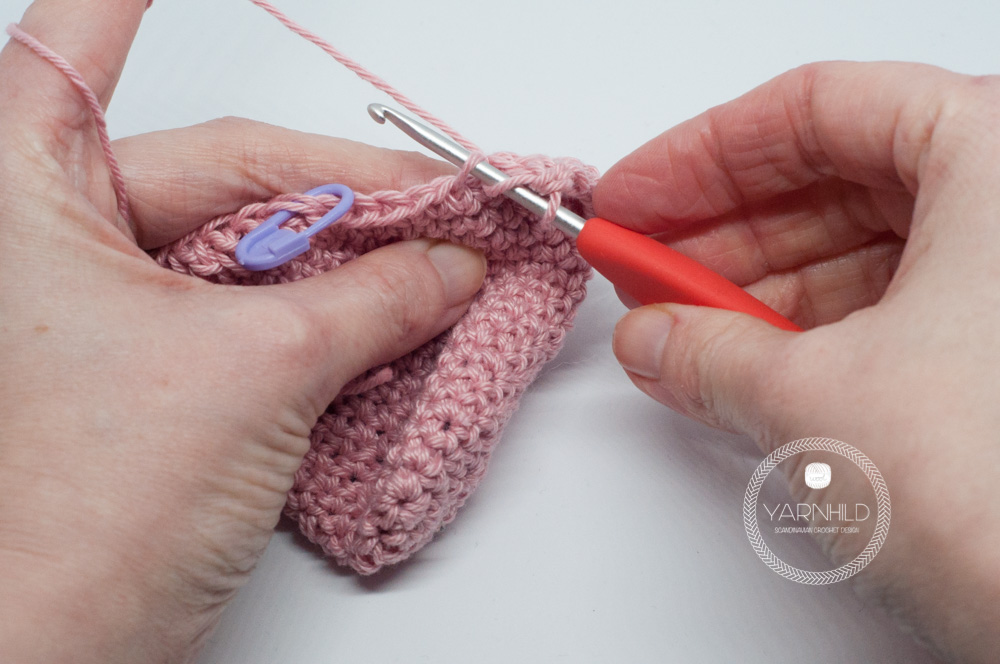
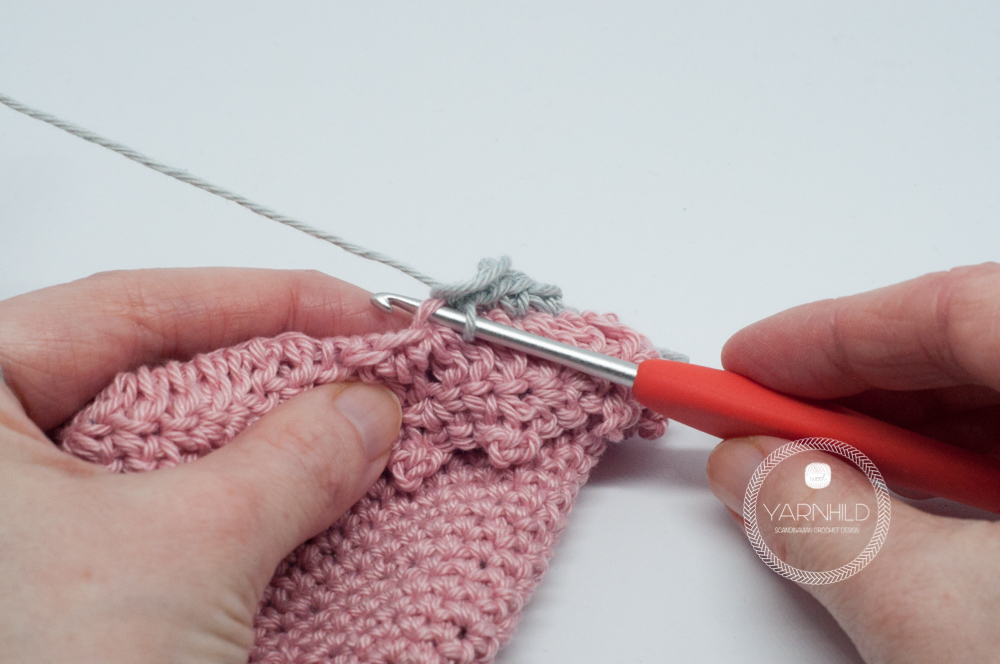
Now we are going to crochet the skirt and the next round will be crocheted in the (FLO) front loop only
Rnd 1 of the skirt) Sl st in the first sc. Ch 3 (count as 1 dc)Work in FLO for the entire round: 1 dc in the next 4 sc, 2 dc in next, *1 dc in the next 5 sc, 2 dc in next* Sl st in the top of ch 3. (42 dc) See picture below.
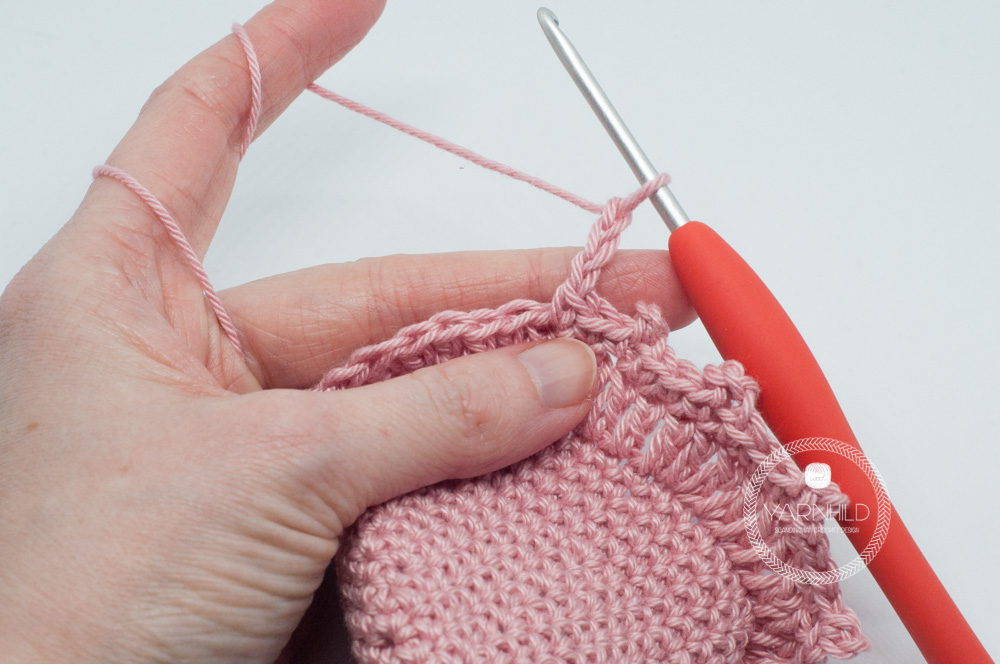
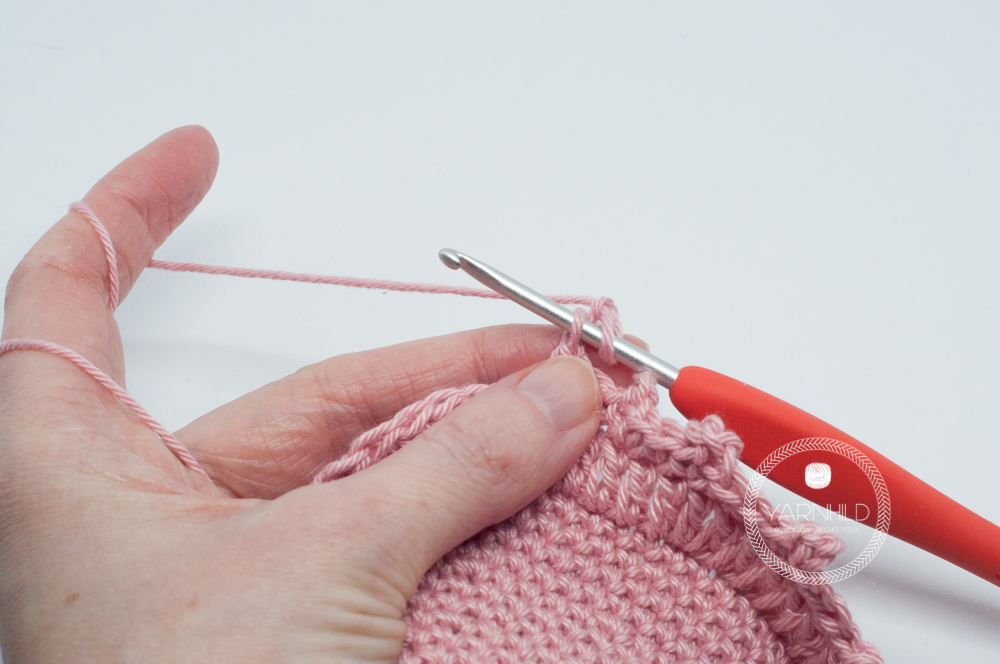
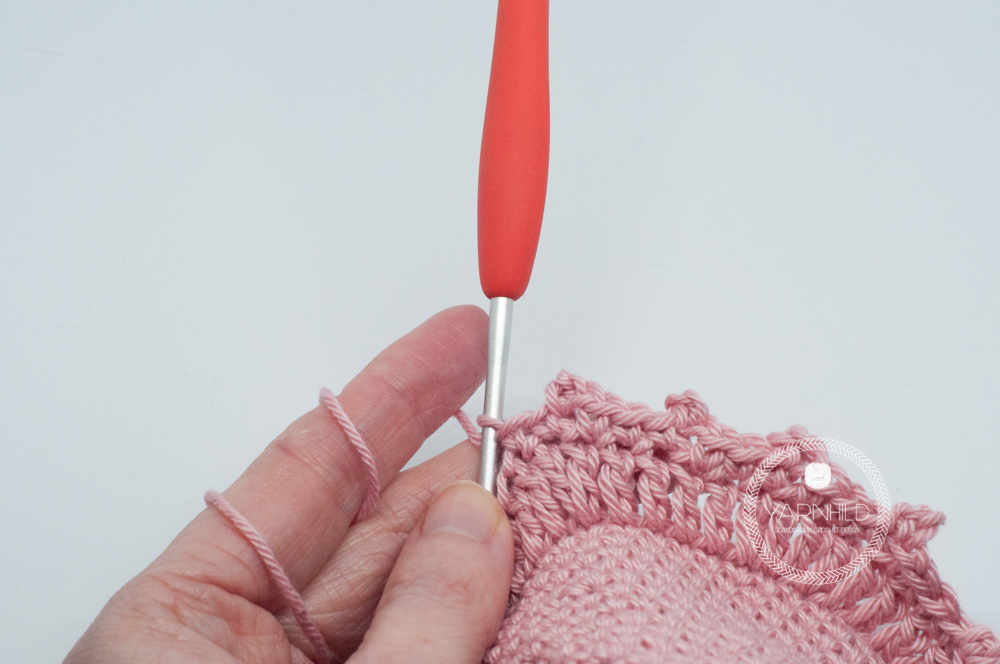
Rnd 2 of the skirt) Work as normal through both loops. Ch 1, 1 sc in the same stitch, 1 sc in next dc, ch 3, sl st in the first ch. (picot stitch), *1 sc in next 2 dc, ch 3, sl st in the first ch. (picot stitch)* Sl st in the first sc. Cut the yarn, weave in ends. See pictures below on how to do the picot stitch.
Grab some silver yarn. We are closing the hole of the body and we are going to work in (BLO) back loop only from round 17.
Rnd 18)In BLO * 1 sc in the next 3 sc, 2sctog, ( 30 sc)
Rnd 19) Work as normal trough both loops. * 1 sc in the next 3 sc, 2sctog.* ( 24 sc)
Rnd 20) *1 sc in the next sc, 2sctog.* (18 sc)
Start filling the body with filling material.
Rnd 21) *1 sc in the next sc, sc2tog.*(12 sc)
Rnd 22) 2sctog, repeat 5 more times. (6 sc)
Sew the hole closed. Weave in all ends. Sew the head on the body.
Feet, make 2. Color light pink and silver. Start with light pink.
Stuff as you go.
Rnd 1) Make a magic ring and put 6 sc in the ring. (6 sc)
Rnd 2) 2 sc in each sc. ( 12 sc)
Rnd 3) *1 sc in next sc, 2 sc in next.*( 18 sc)
Rnd 4) 1 sc in each stitch for the entire round. (18 sc)
Rnd 5) *1 sc in the next sc, sc2tog.*(12 sc)
Remember to stuff as you go.
Rnd 6) sc2tog, repeat 4 times, 1 sc in the next 4 sc. (8 sc)
Change to silver.
Rnd 7 - 21) 1 sc in each stitch for 15 rounds. (8 sc)
Cut the yarn, leave a long tail to sew the feet to the body.
Hands, make 2, color silver.
Stuff as you go. I advise you to stuff lightly here.
Rnd 1) Make a magic ring and put 6 sc in the ring. (6 sc)
Rnd 2) 2 sc in each sc. ( 12 sc)
Rnd 3) *1 sc in next sc, 2 sc in next.*( 18 sc)
Rnd 4) *1 sc in the next sc, sc2tog.*(12 sc)
Rnd 5) sc2tog for a total of 6 times. (6 sc)
Rnd 6- 20) 1 sc in each stitch for 9 rounds. (6 sc)
Cut the yarn, but leave a long strand and sew the arms on the body. Weave in all loose ends.
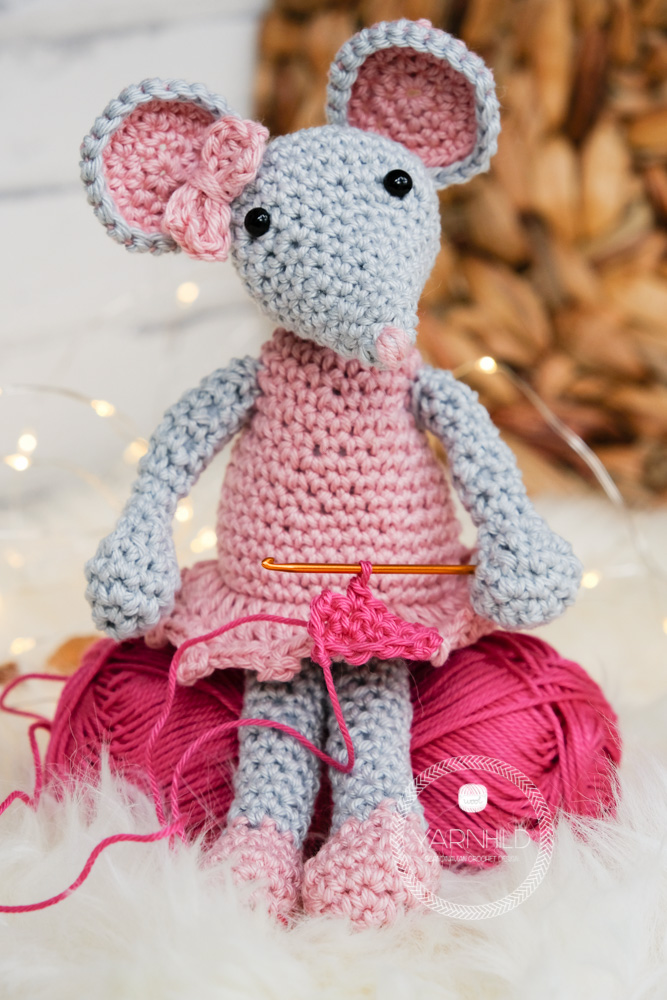
That's it! I hope you like the pattern for the crochet mouse. Be sure to follow subscribe for my newsletter for the next part of this romantic pattern!

Adorable! My daughter loves mice... and pink! I’ve never seen a better mouse pattern! As a mother, I cannot tell you thank you enough for putting this up for free! We don’t have much money but this enables me to make her something precious! Thank you so much!
Aww..thank you so much for your kind words💕 I am so happy that you took the time to tell me this. I would love to see you in my group on Facebook, if you’re not already a member, search for Yarnhild-
Crochet Club. There you can share pics of your work if you want to. Have a nice day!