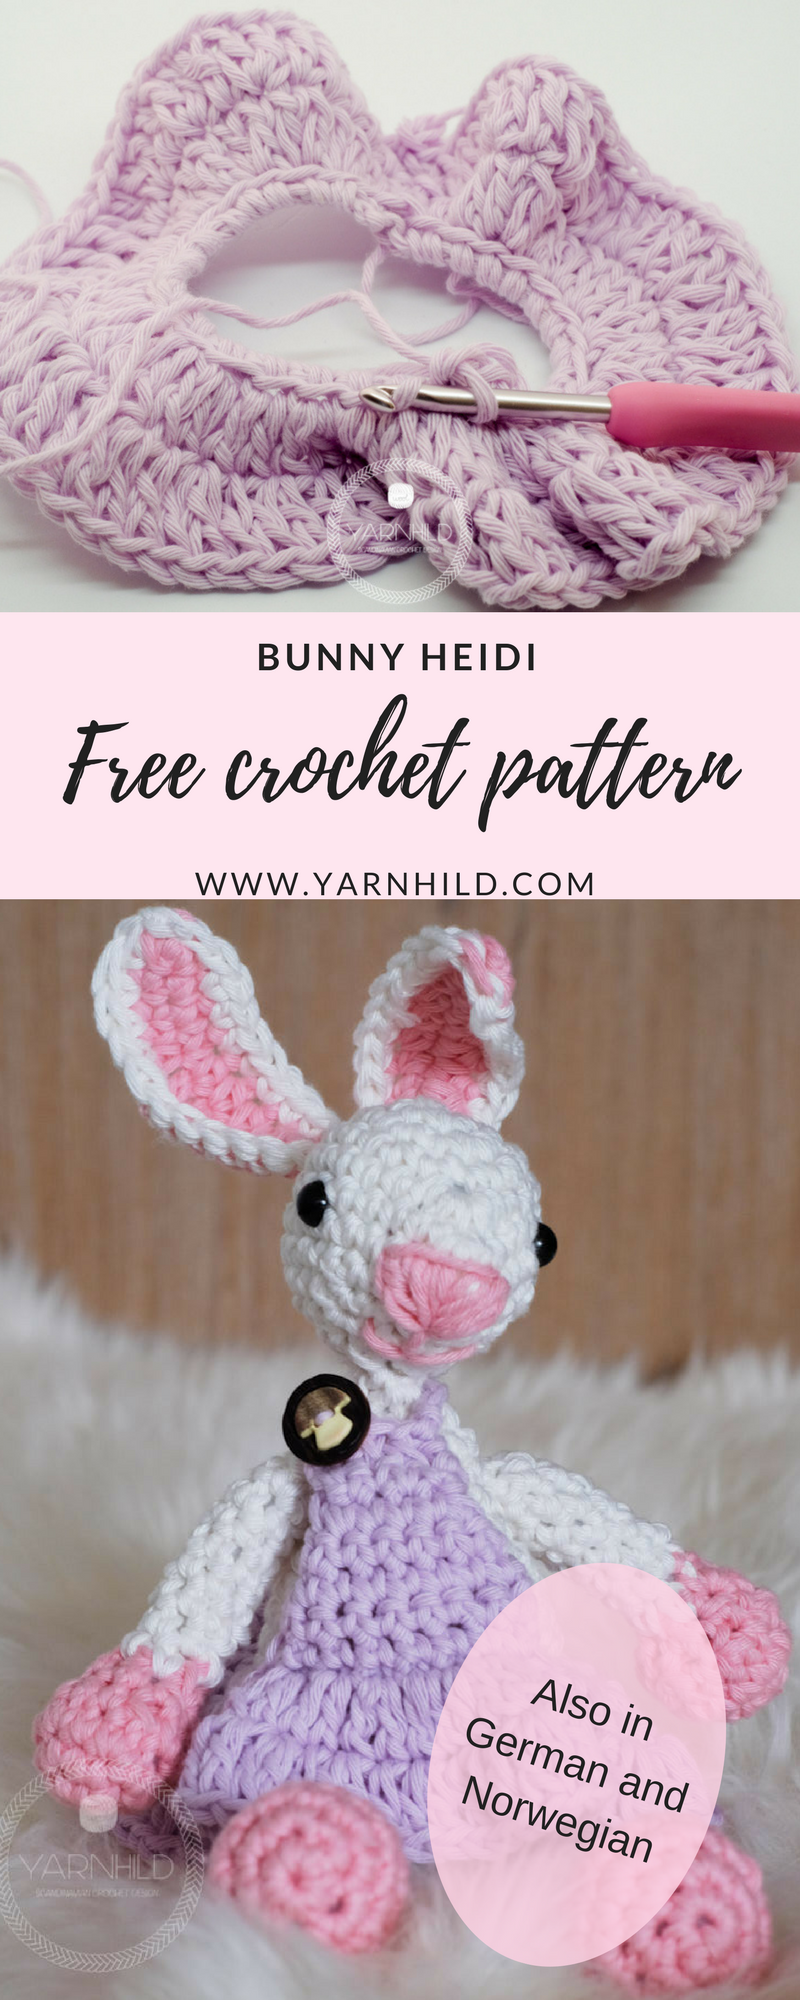
Crochet bunny Heidi
Hello friends! Meet Heidi - she is a happy little crochet bunny and she is preparing her easter baskets for the holiday. The baskets are filled with delicious chocolate eggs which she will hide in the garden for the children to find. She is so exited for easter and she just crocheted her self a dashing dress in a bright purple to match her baskets. When she isn't hiding eggs in the garden, she is busy jumping around and practising her jumping technique. Those easter eggs have to be delivered and there is much work to do, so practising jumping technique is mandatory.
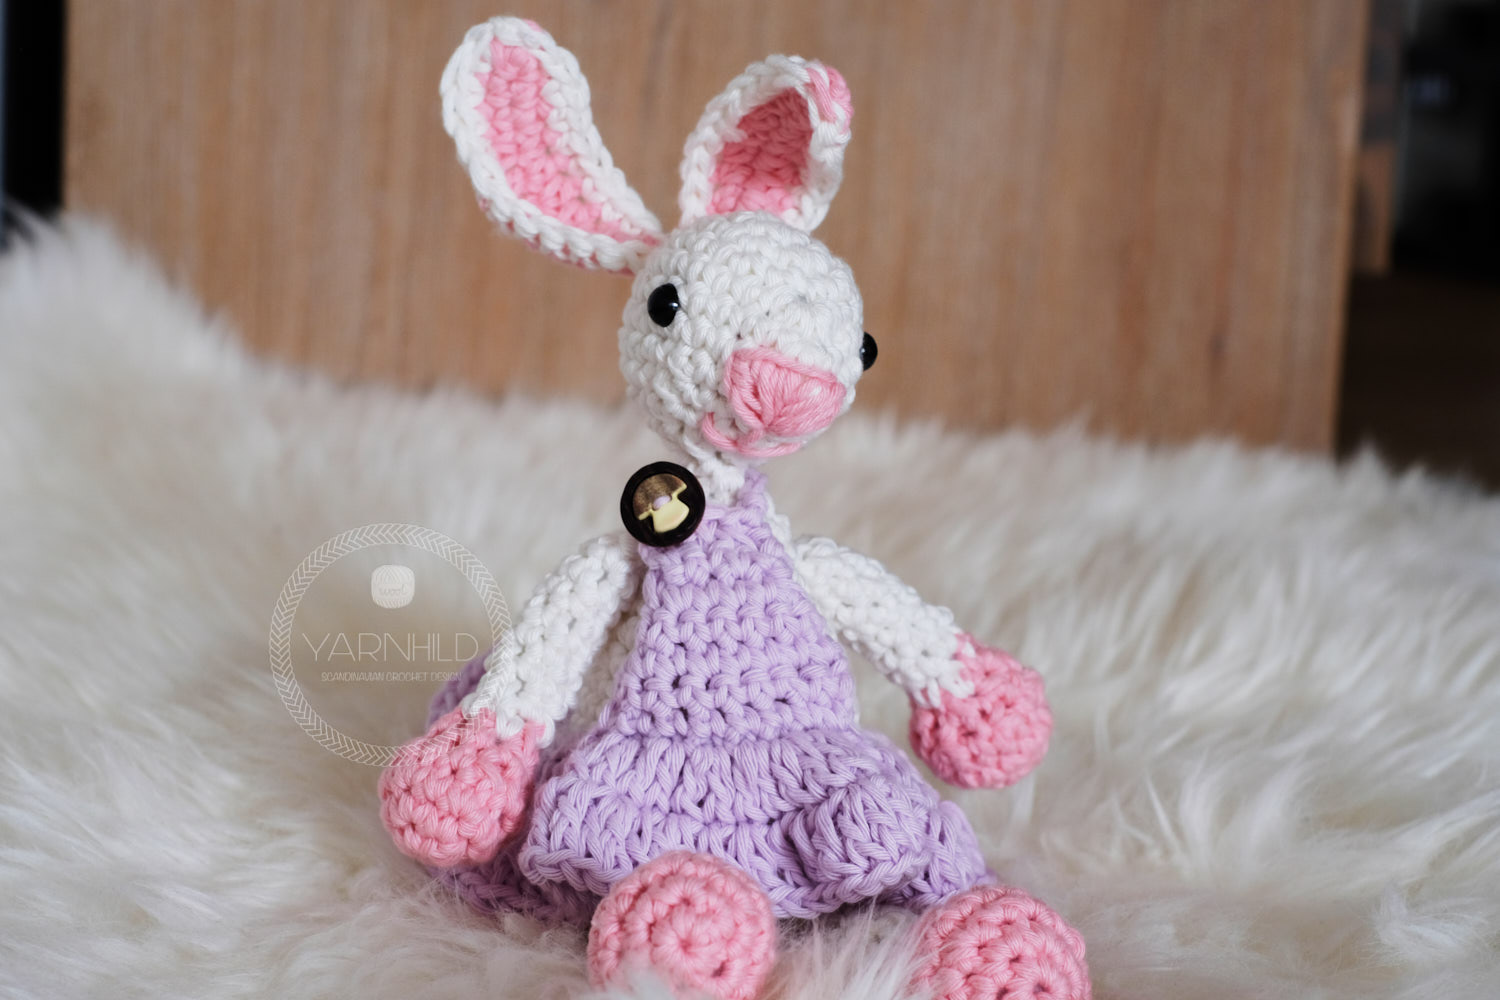
She has a cute pom-pom tale and looks just adorable with her springy dress.

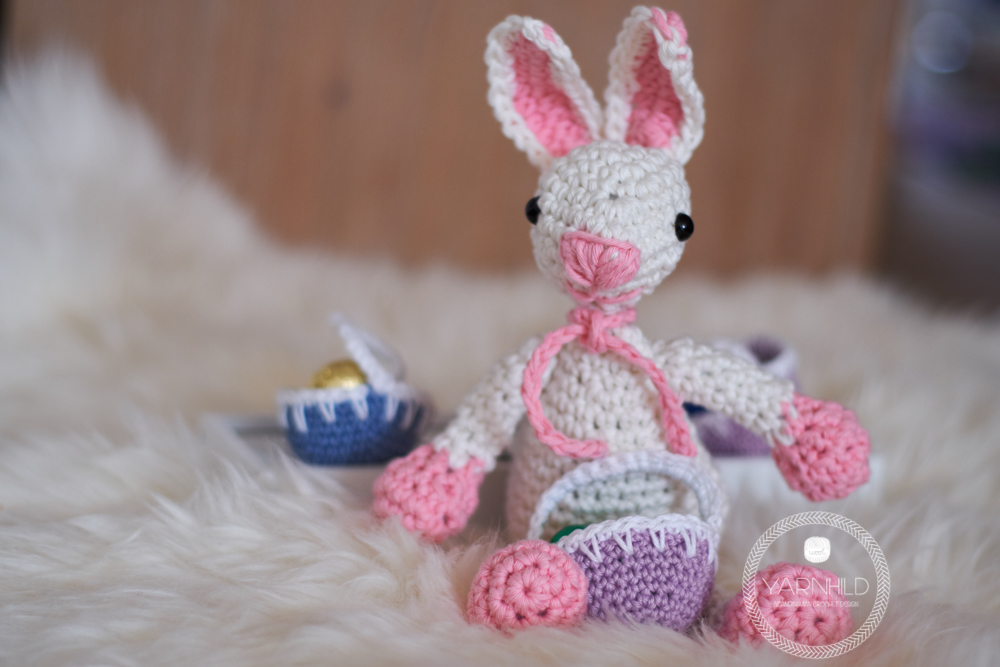
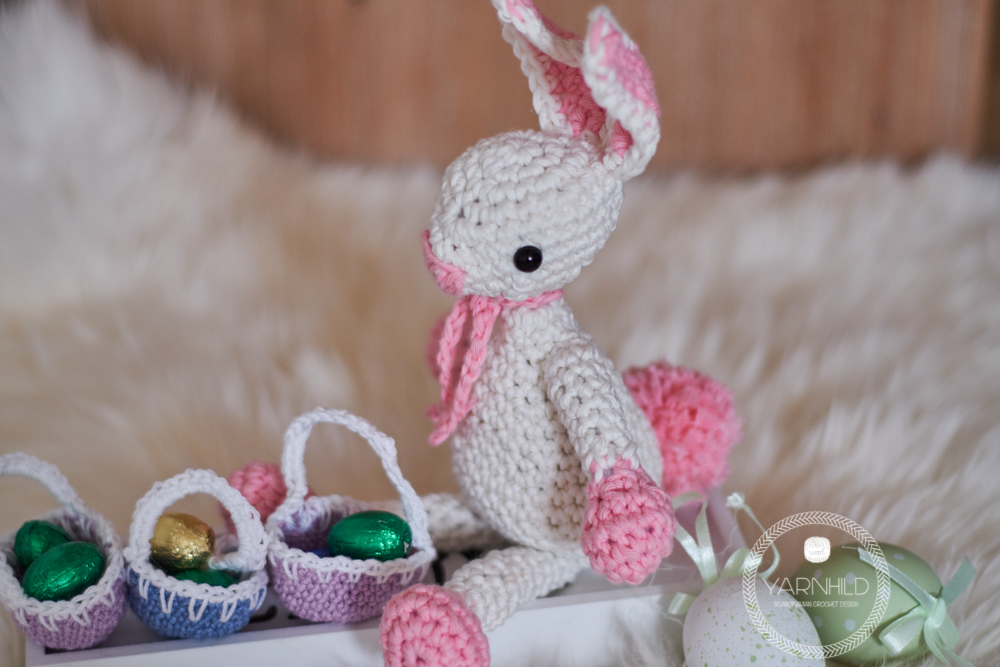
Without her dress she looks dashing too. The scarf is perfect for those chilly spring evenings.
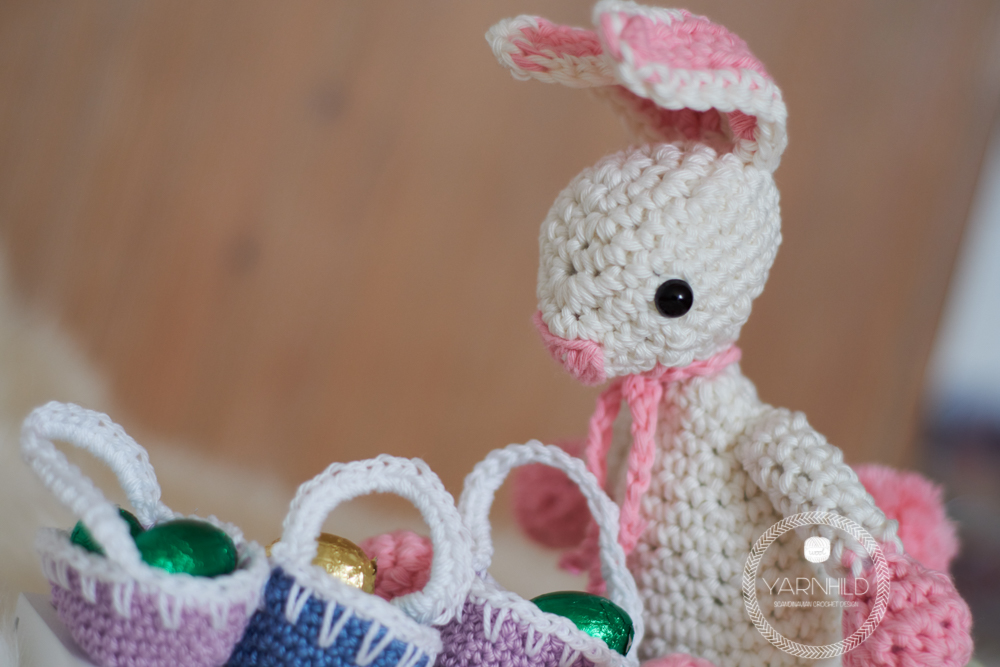
Each egg gets inspected and she can make sure that the children only get the best quality there is!
If you decide to make the crochet bunny Heidi I appreciate if you give me credit for the pattern and link back to this blog post or my Instagram account or Facebook page. I really love seeing your versions of my creations so keep sharing those pictures! The crochet bunny is the third easter pattern that I made. Check out the easter chicks and the easter basket for more fun patterns! This blog post contains affiliate links. Read more about it here.
Add this pattern to your Ravelry favourites or buy the add free PDF-version--> add to cart
Never miss a free pattern, sign up for our newsletter!
Crochet bunny Heidi
A free crochet pattern from ©Yarnhild
Abbreviations used:
- ch – chain
- yo – yarn over
- st – stitch
- sl st – slip stitch
- sc – single crochet
- rnd – round
- *-* Repeat from start to end of round/row
- sc2tog - 2 sc together.
- BLO - back loop only
- FLO - front loop only
- One button.
Materials used
- Cotton yarn. Schachenmayr Catania Grande. 50 g, cream and ca 35 g Dahile (pink) Alternative drops Paris, color off white (17) and medium pink (33)
- Crochet hook size 4,5 mm Clover Amour Crochet Hook Set, 10 sizes
is on sale right now (price may have changed)
- Tapestry needle
- Scissor
- Filling material
- Stitch marker
- Safety eyes, 8 mm
- Pipe cleaner, optional if you want to make the head more stable.
[adToAppearHere]
Note:
The pattern is written in US terms. The head, body, feet and hands are crocheted in continuous rounds. The ears are made in rows.
Body, color cream.
Rnd 1) Make a magic ring and crochet 6 sc in the ring. (6 sc)
Rnd 2) 2 sc in each sc. (12 sc)
Rnd 3-4) 1 sc in each stitch for 2 rounds. (12 sc)
Rnd 5) *1 sc in the next sc, 2 sc in next.* (18 sc)
Rnd 6) 1 sc in each stitch. (18 sc)
Rnd 7) *1 sc in the next 2 sc, 2 sc in next.* (24 sc)
Rnd 8-10) 1 sc in each stitch for 3 rounds. (24 sc)
Rnd 11) *1 sc in the next 3 sc, 2 sc in next.* (30 sc)
Rnd 12 - 17) 1 sc in each stitch for 6 rounds. (30 sc)
Rnd 18 ) *1 sc in the next 3 sc, sc2tog*. (24 sc)
Rnd 19) *1 sc in the next 2 sc, sc2tog*. (18 sc)
Rnd 20) *1 sc in the next sc, sc2tog.*(12 sc)
Rnd 21) 2sctog, repeat 5 more times. (6 sc)
Cut the yarn, weave in ends and sew the hole closed.
Head, color cream.
Rnd 1) Make a magic ring and crochet 6 sc in the ring. (6 sc)
Rnd 2) 2 sc in each sc. (12 sc)
Rnd 3) *1 sc in the next sc, 2 sc in next.* (18 sc)
Rnd 4)* 1 sc in the next 2 sc, 2 sc in next.* (24 sc)
Rnd 5) 1 sc in the next 5 sc, 3 sc in the next sc, 3 sc in the next sc, 1 sc in the next 17 sc. (28 sc) This forms the nose tip of the bunny.
Rnd 6) 1 sc in the next 7 sc, 2 sc in the next 2 sc, 1 sc in the next 19 sc. (30 sc)
Rnd 7) 1 sc in each stitch. (30 sc)
Rnd 8) *1 sc in the next 3 sc, sc2tog*. (24 sc)
Rnd 9) *1 sc in the next 2 sc, sc2tog*. (18 sc)
Sew on the mouth and nose. Attach the safety eyes and start to stuff the head. Attach the eyes between row 5 and 6 and leave about 9 sc in between.
Rnd 10) *1 sc in the next sc, sc2tog.*(12 sc)
Rnd 11) 2sctog, repeat 5 more times. (6 sc)
[adToAppearHere]
Hands. Color pink and cream. Make 2.
Start with pink. Stuff as you go.
Rnd 1) Make a magic ring and crochet 6 sc in the ring. (6 sc)
Rnd 2) 2 sc in each sc. (12sc)
Rnd 3) *1 sc in the next sc, 2 sc in next.* (18 sc)
Rnd 4) *1 sc in the next sc, sc2tog*. (12 sc)
Rnd 5) 2sctog, repeat 5 more times. (6 sc)
Change to white.
Rnd 6-11) 1 sc in each stitch for 7 rounds.
Cut the yarn, leave a strand to sew the hands on the body.
Feet, make 2. Color pink and cream.
Start with pink. Stuff as you go
Rnd 1) Make a magic ring and crochet 6 sc in the ring. (6 sc)
Rnd 2) 2 sc in each sc. (12sc)
Rnd 3) *1 sc in the next sc, 2 sc in next.* (18 sc)
Rnd 4) 1 sc in each stitch. (18 sc)
Rnd 5) *1 sc in the next sc, sc2tog*. (12 sc)
Rnd 6) 2sctog, repeat 5 more times. (6 sc)
Change to white.
Rnd 7-17) 1 sc in each stitch for 11 rounds.
Cut the yarn, leave a strand to attach the limbs on the body.
Ears, Make 2.
Start with pink.
Row 1) 11 chains, turn. 1 sc in the next 4 ch, 1 hdc in the next 6 ch. Now work on the opposite site; 1 hdc in the next 6 hdc, 1 sc in the next 4 sc. (12 hdc, 8 sc)
Row 2) Change to nature. 1 sc the next 9 sc, 2 sc in next 2 stitches, 1 sc in the next 9 sc. Sl st in the first stitch. Cut the yarn, leave a strand to attach the ears on the head. The bottom of the ear is where the increases are. (22 sc)
Scarf. Color pink.
Make a chain of 35. Cut the yarn and weave in ends.
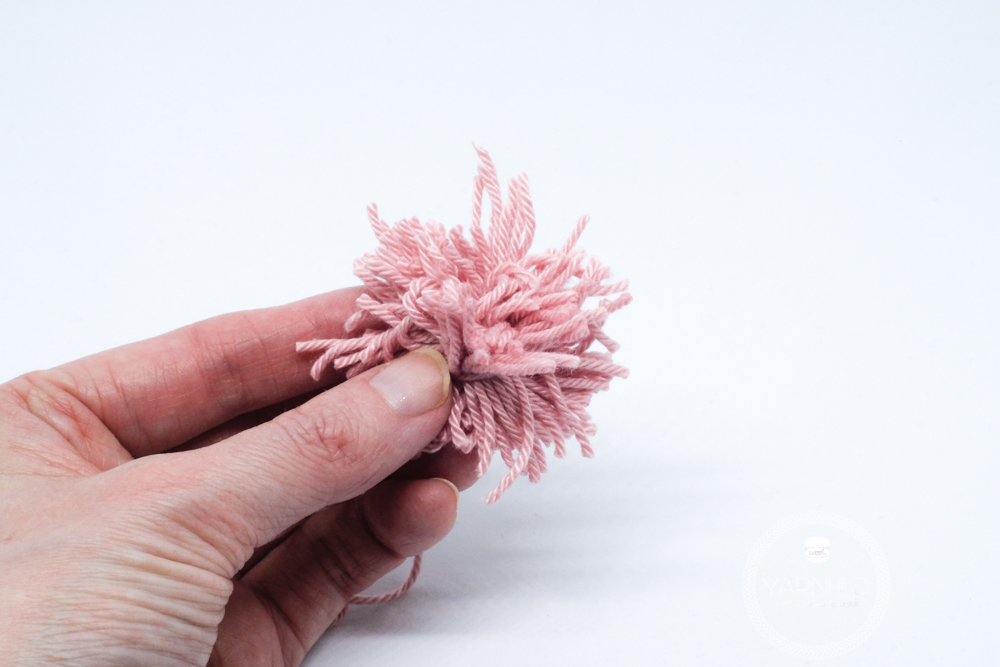
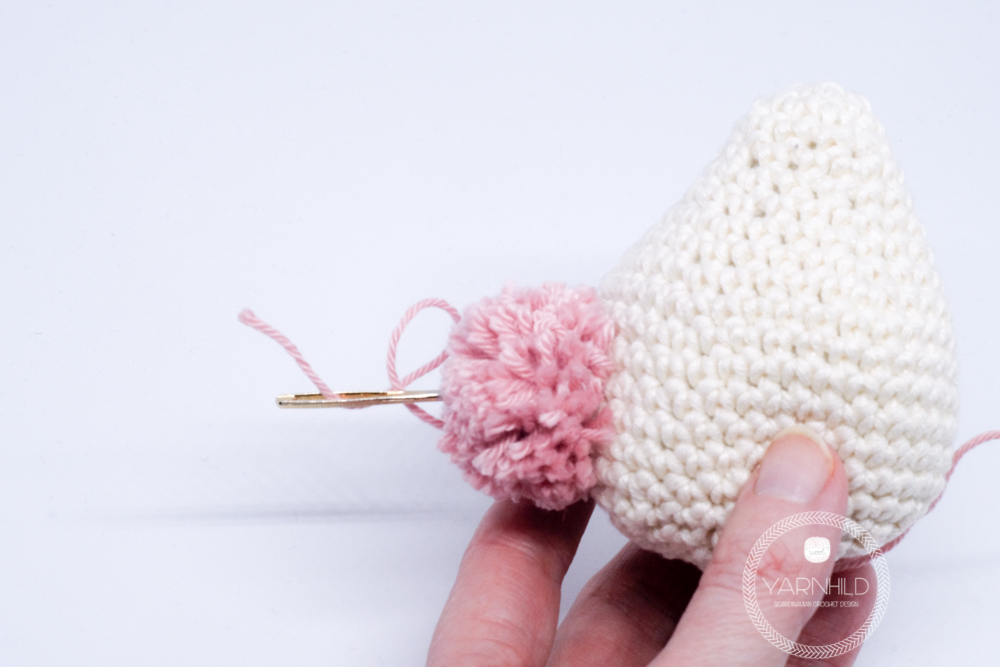
Pom pom tale
Wind some yarn between two fingers. Pull the work away from your fingers and lay it down. Grab a strand of yarn and tie it around like shown on the picture.

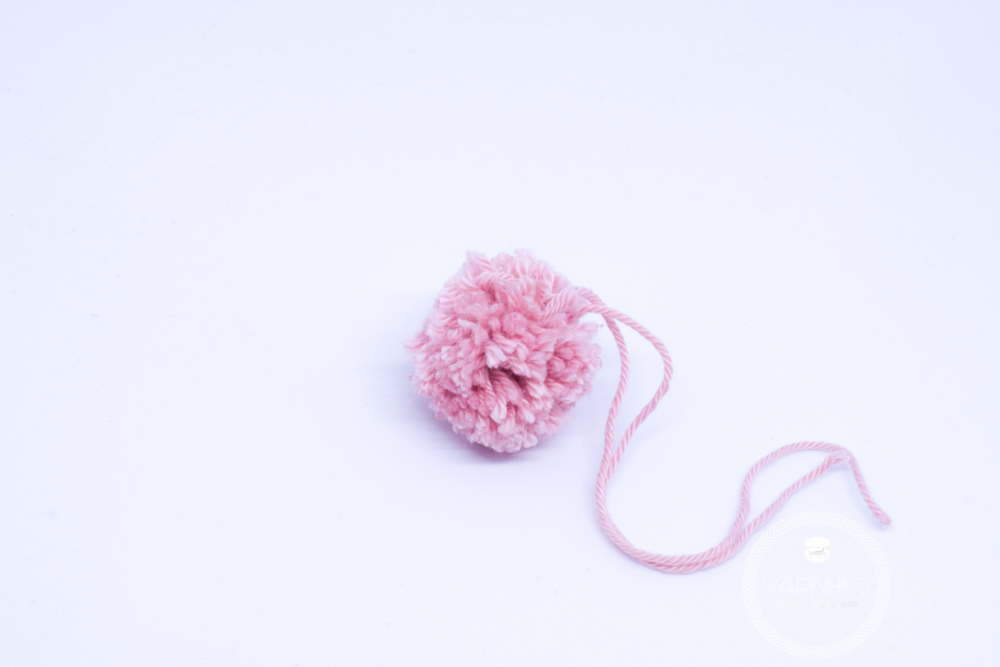
Cut the loops.
And trim the ends
Assembly
Attach the limbs on the body. Sew on ears and the tail on your crochet bunny.
Dress for the crochet bunny
Note: The stitch count does not actually matter so much here. I will show you how you can make the dress and adjust it so it fits your bunny.
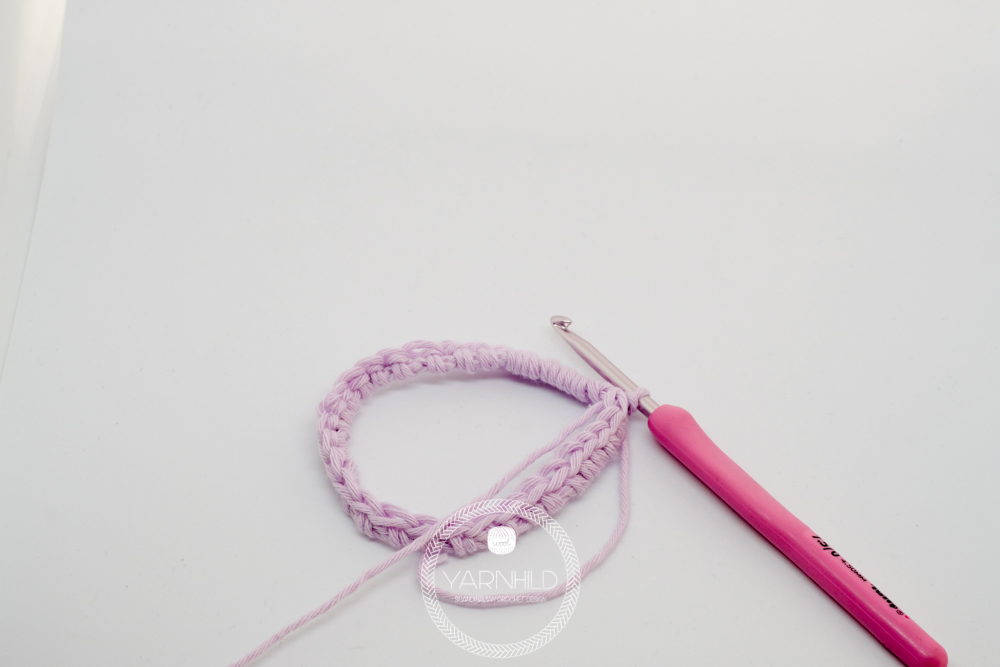
Rnd 1 ) Make a number of chains and control if it's big enough to fit around the bunny's belly. I needed 23 chains. Sl st to join. Do sc ( I did 26 sc, but you might need more or less) around the chains and join with a sl st in the first stitch. Do as many as you need to get to the beginning. Be sure that the chain doesn't twist.
Now check again if you’re happy with the size.
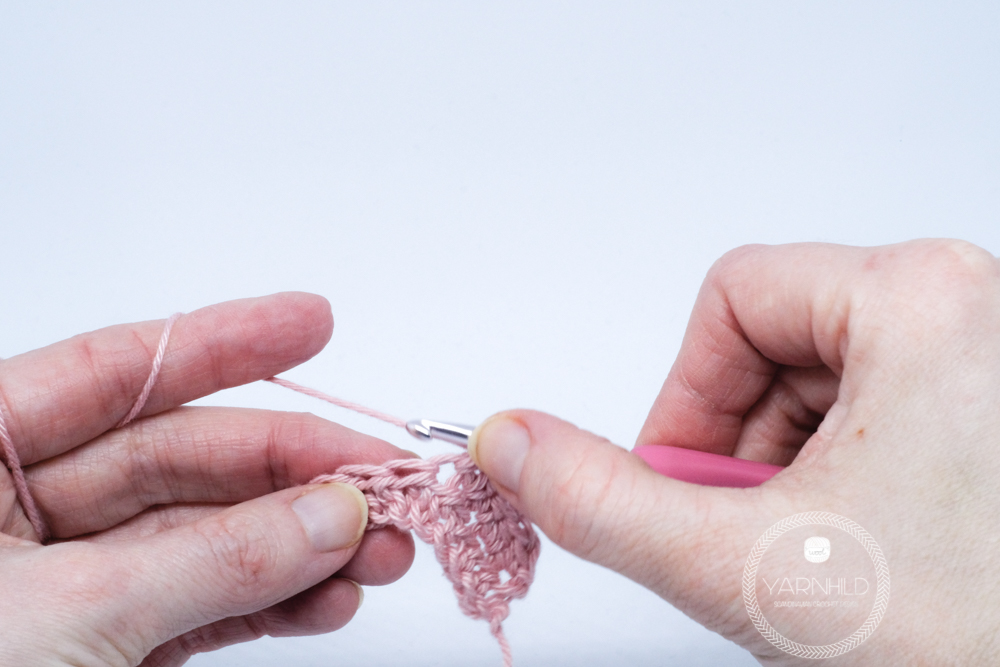
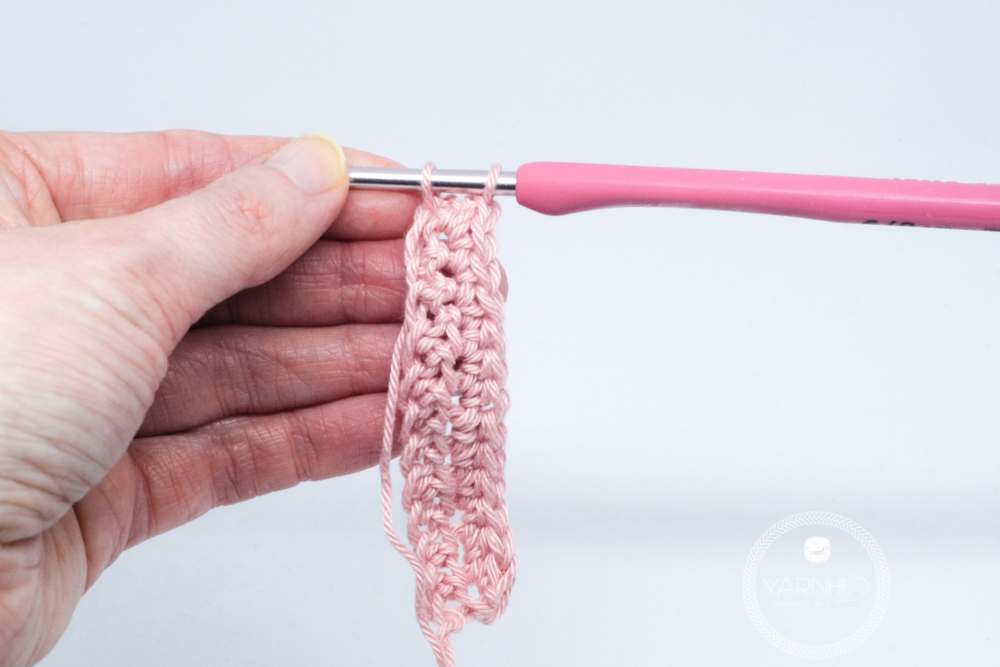
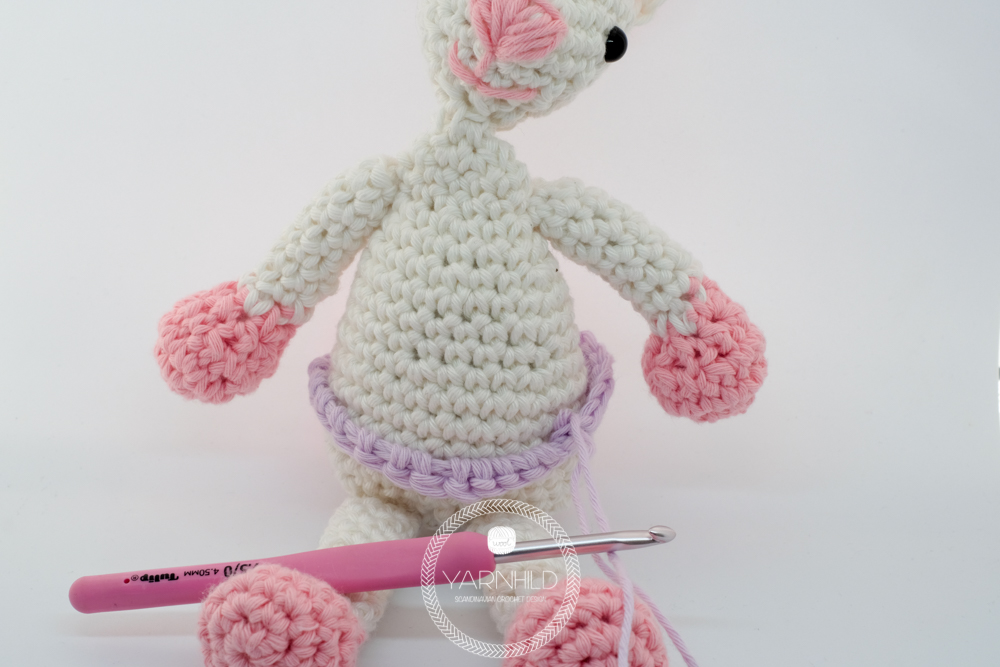
Rnd 2) When the size fits, chain 3, (does not count like 1 dc) and do 2 dc in BLO. (back loop only). Keep putting 2 dc in each sc in BLO for the complete round. Join with a sl st in the first dc. (not the chain 3)

Rnd 3) Chain 3. *1 dc, 2 dc in next* through both loops- Repeat for entire round. Join with a sl st in the first stitch. The stitch count does not matter here.
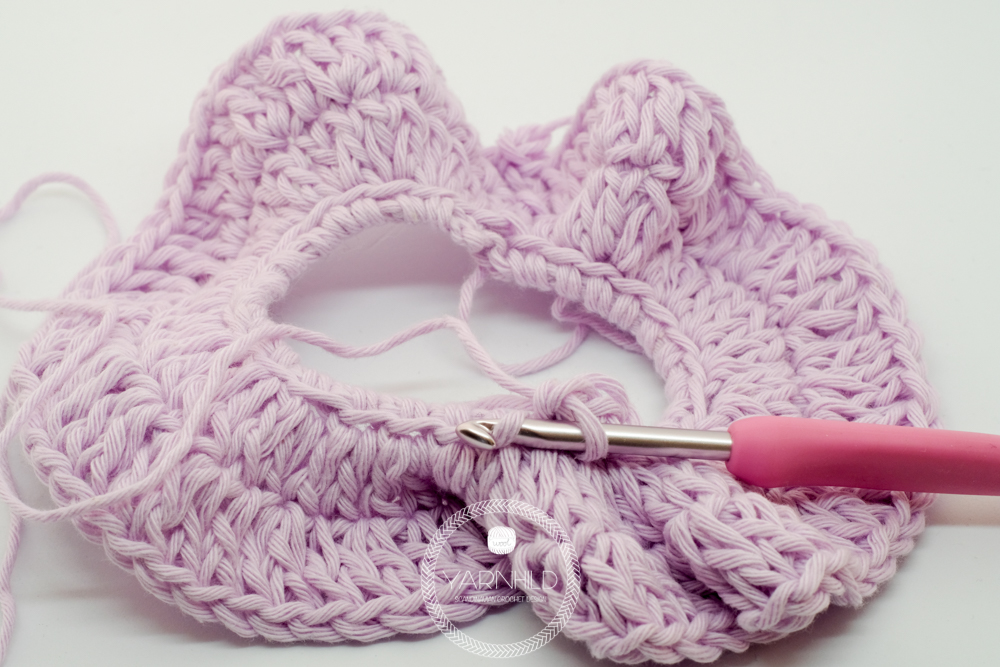
Upper part of the dress
Insert the hook somewhere on the opposite site of the dress from the point where you started. Attach some yarn and to 1 sc in the next 8 dc. Put your stitches in the front loop (FLO) this time.
Row 1) 1 sc in the next 8 sc in FLO. Ch 1, turn. (8 sc)
Row 2-3) Work through both loops. 1 sc in the next 8 sc, ch 1 turn. Repeat one more time. (8 sc)
Row 4) sc2tog, 4 sc, sc2tog. Ch1, turn. (6 sc)
Row 5) sc2tog, 2 sc, sc2tog. Ch1, turn. (4 sc)
Row 6) sc2tog, repeat 1 more time. (2 sc) Do not cut the yarn
Buttonhole:
Chain 4, sl st in the first chain. Cut the yarn, weave in ends.
On the opposite site from the buttonhole: Attach new strand of yarn and chain about 7-8 chains. You can add more if you like to. When you’re happy with the size sew a button on the end of the chain that you just made.

Weave in all loose ends.
If you do love this crochet bunny pattern, help he spread the love!


One Comment
Comments are closed.