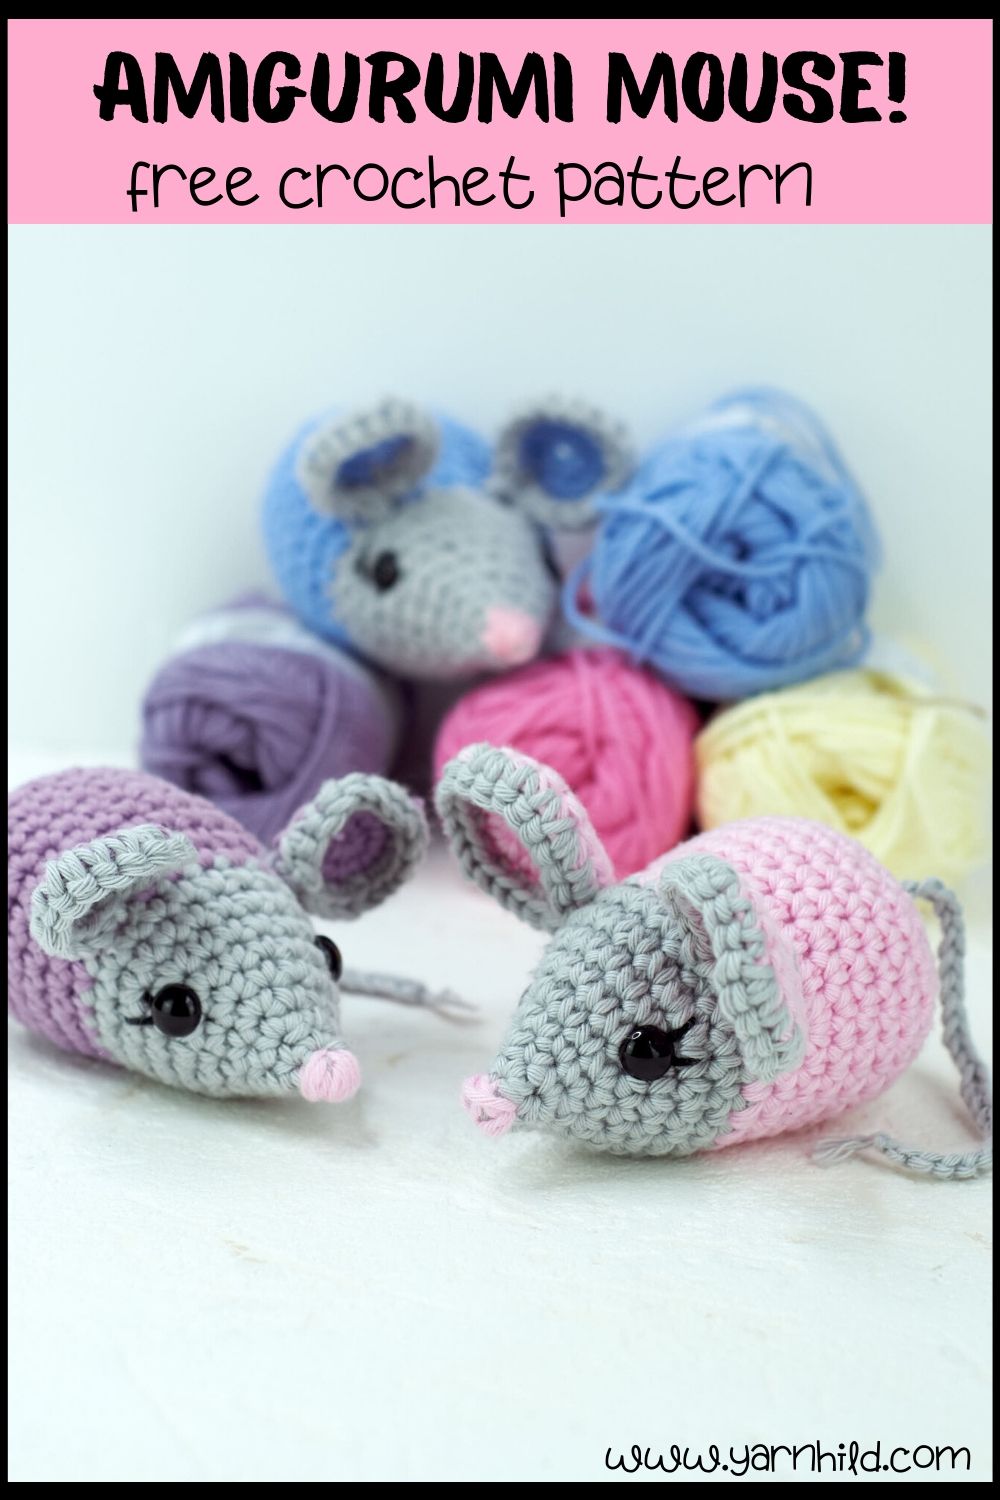
Crochet amigurumi mouse pattern
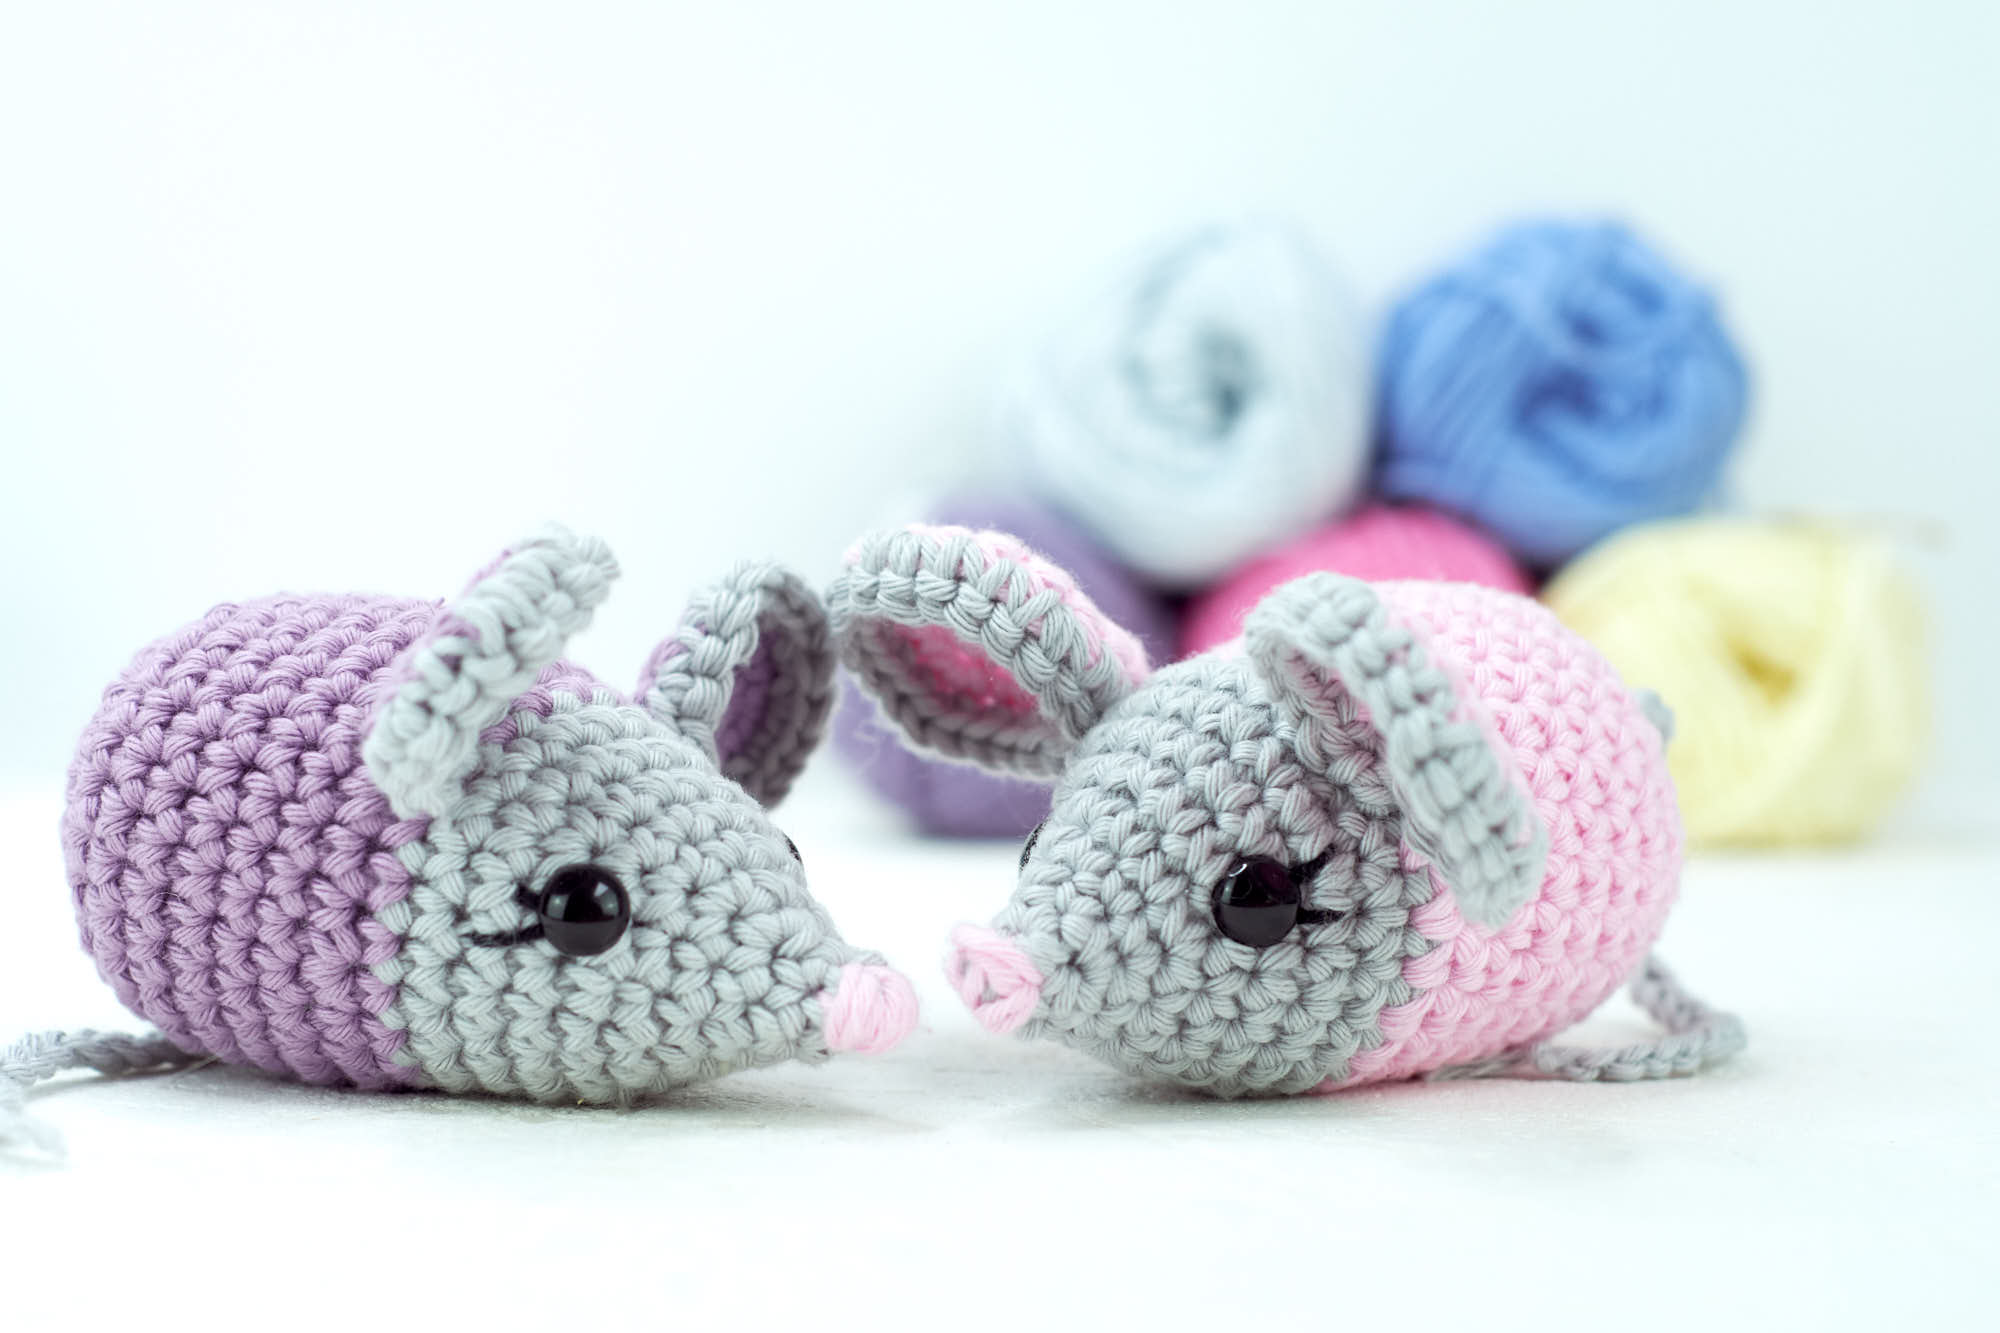
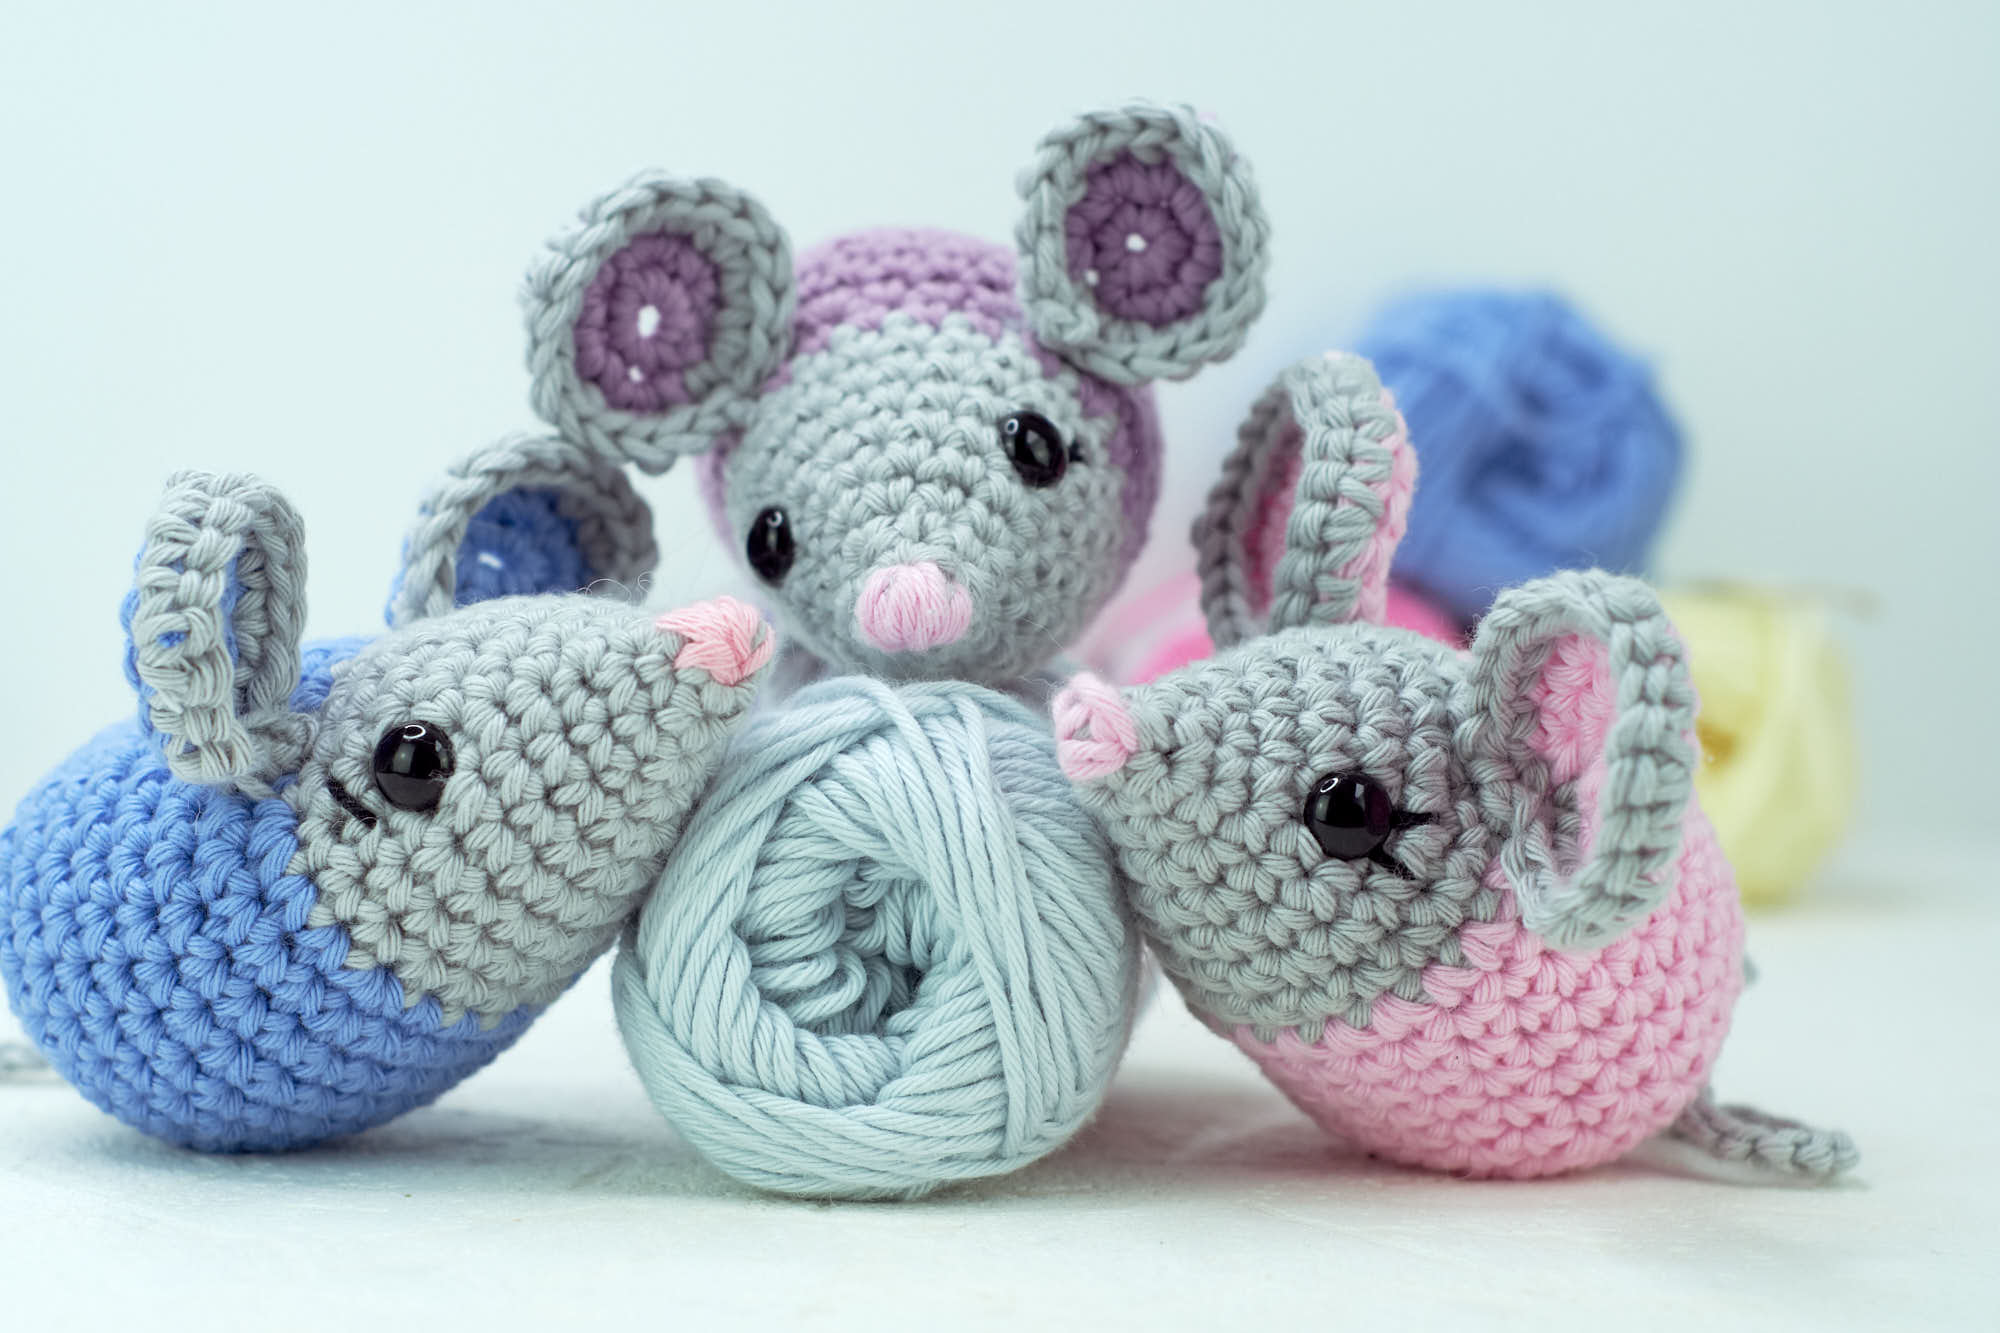
Today we are back with another amigurumi mouse pattern! These little mice are easy and quick to make and perfect for using up those yarn scraps. There are no limbs, only the ears and tail to sew on so if you hate sewing on many parts, this is for you!
Over the last weeks, we have released many quick and easy amigurumi patterns on the blog. Be sure to check them out too!
The video tutorial is available in German and English. You can also find the written version in English.
I love how quick and easy these are. Sometimes I suffer from wrist pain when I crochet too much, so these quick patterns are perfect. So if you suffer from wrist pain due to too much crocheting, try and rest and crochet small things for a while.
I sometimes include affiliate links in my blog posts. That means that I earn a small commission if you purchase a product that I recommend, on no extra costs on your behalf. Thank you for your support!
Materials
My amigurumi mouse is made with yarn from Hobbii. I love working with their Rainbow yarn! You can choose from so many colors and the yarn is very affordable, still, it has a high quality.
I used a 3.5 mm crochet hook (I use clover amour), scissors, tapestry needle, safety eyes, and filling materials. I went with 10 mm safety eyes. But you can also sew on the eyes of this is supposed to be a cat toy or something. You can fill it with a cat-nip to make it more attractive for your cat as well.
Share this on Pinterest!
Amigurumi mouse pattern as a pdf version
You can also purchase the PDF version in my Etsy shop! All sales go back to supporting our work and helps us make more patterns. Thank you for your support!
Video pattern
As usual, the pattern is also available on our YouTube channel! So if you are looking for extra tips and tricks on how to add that little extra finish and make your mouse even cuter, check out the video as well
The video is going live this evening! Join us in the chat! Go to YouTube and see when it's going live:)
English video
Newsletter
Never miss a pattern! Sign up to our newsletter and get notified every time there is something new on the blog.
Amigurumi mouse - A free crochet pattern
Crochet pattern written by Ragnhild Hynne Uebler – Yarnhild ©This pattern is the intellectual property of Yarnhild. The pattern must not be altered, translated, copied, or republished without approval.You are welcome to sell the items that you have made from my patterns, but please be sure to give me credit for the pattern that you sell online. For private use only, no commercial use. 2020 – Yarnhild ©
Abbreviations – US terms
Ch - chain
Rnd – round
St – stitch
sl st – slip stitch
sc – single crochet
sc2tog – single crochet decrease
sc inc – single crochet increase, 2 single crochet in one stitch
mr – magic ring
Yo – yarn over
Materials
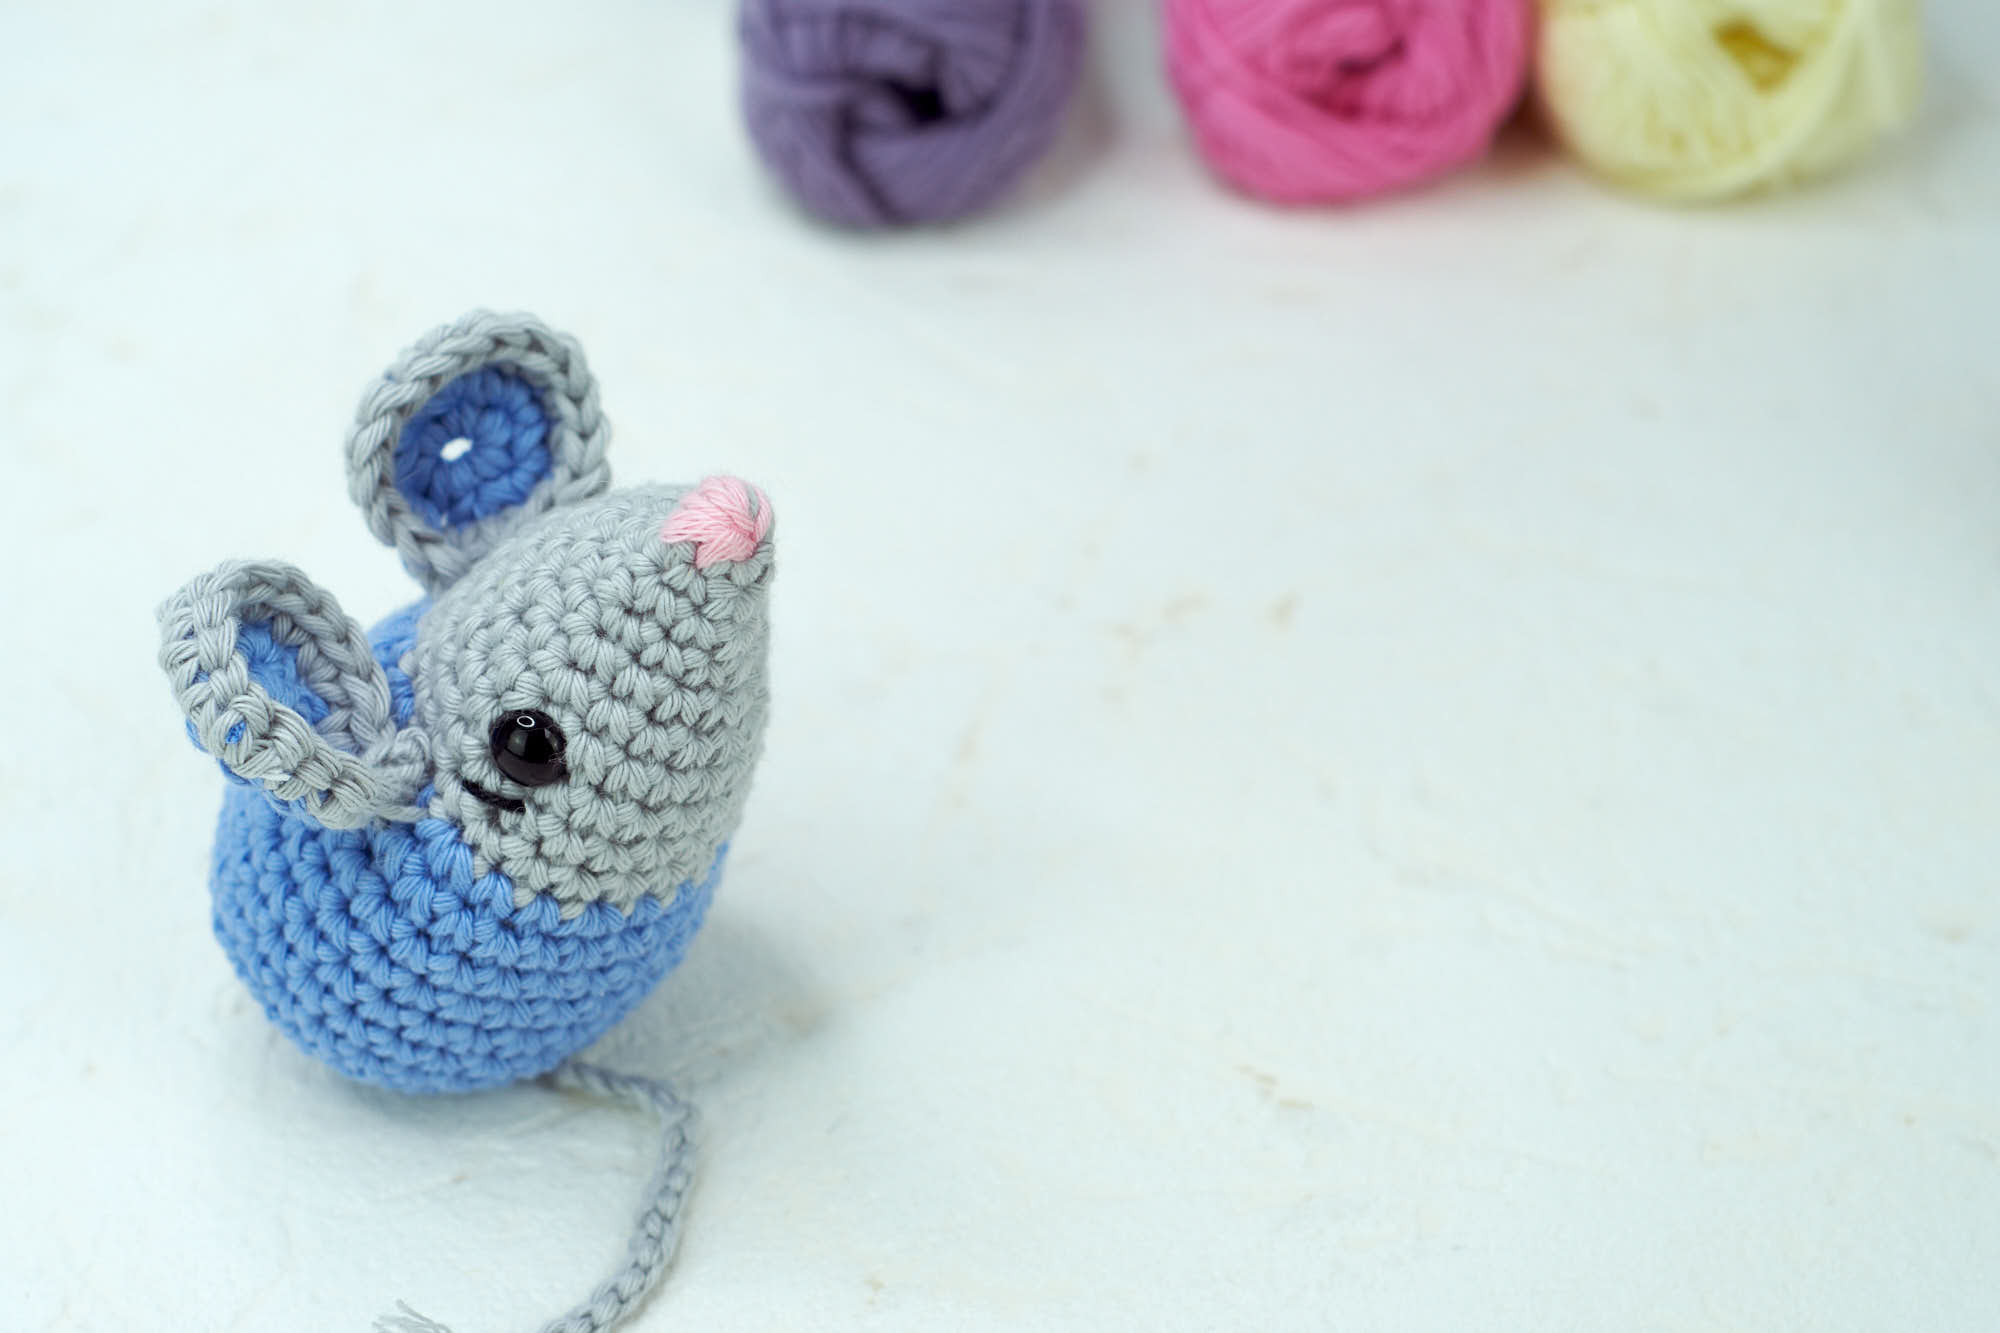
Sports weight yarn or worsted weight yarn. I used Hobbii 8/8 Rainbow yarn. Two colors; grey = A, and blue/pink = B
Small amounts of pink and black yarn.
Filling materials
Crochet hook 3.5 mm
Scissors and stitch marker
Safety eyes 10 mm (use smaller if you use thinner yarn
About the pattern
The mouse is made in continuous rounds. Use a stitch marker and move it up as you finish the rounds. You can adjust the size by choosing a thicker or thinner yarn and a hook that matches. You can choose between small or bigger ears.
All parts are made with a 3.5 mm crochet hook.
Finished size: 13 cmDifficulty level: Advanced beginners
Body
In color A:
Rnd 1: 4 sc in a mr = 4 sc
Rnd 2: (1 sc, sc inc) x 2 = 6 sc
Rnd 3: (1 sc, sc inc) x 3 = 9 sc
Rnd 4: (2 sc, sc inc) x 3 = 12 sc
Rnd 5: (3 sc, sc inc) x 3 = 15 sc
Rnd 6: (4 sc, sc inc) x 3 = 18 sc
Rnd 7: (5 sc, sc inc) x 3 = 21 sc
Rnd 8-10: 1 sc in each st (3 rounds) = 21 sc
Change to color B after round 10.
Attach safety eyes between rounds 7-8, 6 sc stitches apart. Sew on eyelashes or eyebrows. Attach the back part of the safety eye after sewing on the eyelashes.
Sew on a little nose with pink yarn. See pictures below for more details
Rnd 11: (2 sc, sc inc) x 7 = 28 sc
Rnd 12-19 1 sc in each st (8 rounds) = 28 sc
Add filling materials
Rnd 19: (2 sc, sc2tog) x 7 = 21 sc
Rnd 20: (1 sc, sc2tog) x 7 = 14 sc
Rnd 21: sc2tog x 7 = 7 sc
Sew the hole closed.
Chose between big or small ears
Small ears
In color B
Rnd 1: 6 sc in a mr = 6 sc
Rnd 2: sc inc x 6 = 12 sc
Change color to A
Rnd 3: (1 sc, sc inc) x 6 = 18 sc
Fasten off and leave a long tail.
Big ears
In color B
Rnd 1: 6 sc in a mr = 6 sc
Rnd 2: sc inc x 6 = 12 sc
Rnd 3: (1 sc, sc inc) x 6 = 18 sc
Change to color A
Rnd 4: (2 sc, sc inc) x 6 = 24 sc
Fasten off and leave a long tail.
For both versions:
Pinch the base of the ear and sew back and forth a couple of times so it gets a little pointy.
Tail
Color A
Chain 25, fasten off. Leave a tail for fastening.
Assembly
Sew on the ears right after the color change between rows 10 and 11. 4 sc stitches apart. Use pins to determine the best position. Sew on the tail on the back.