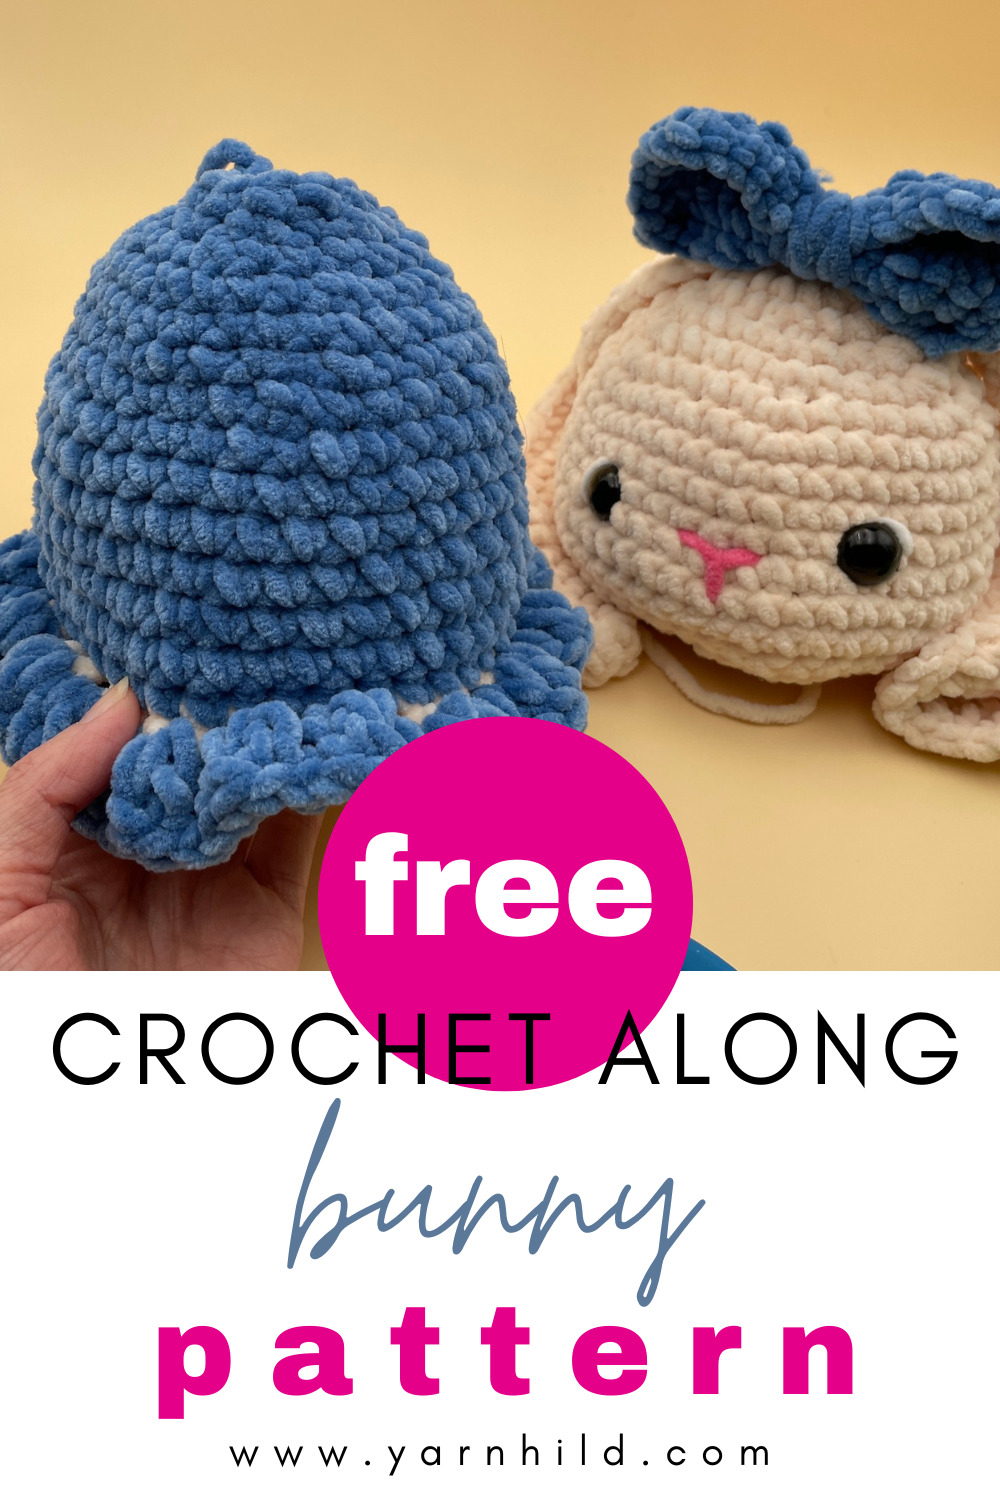
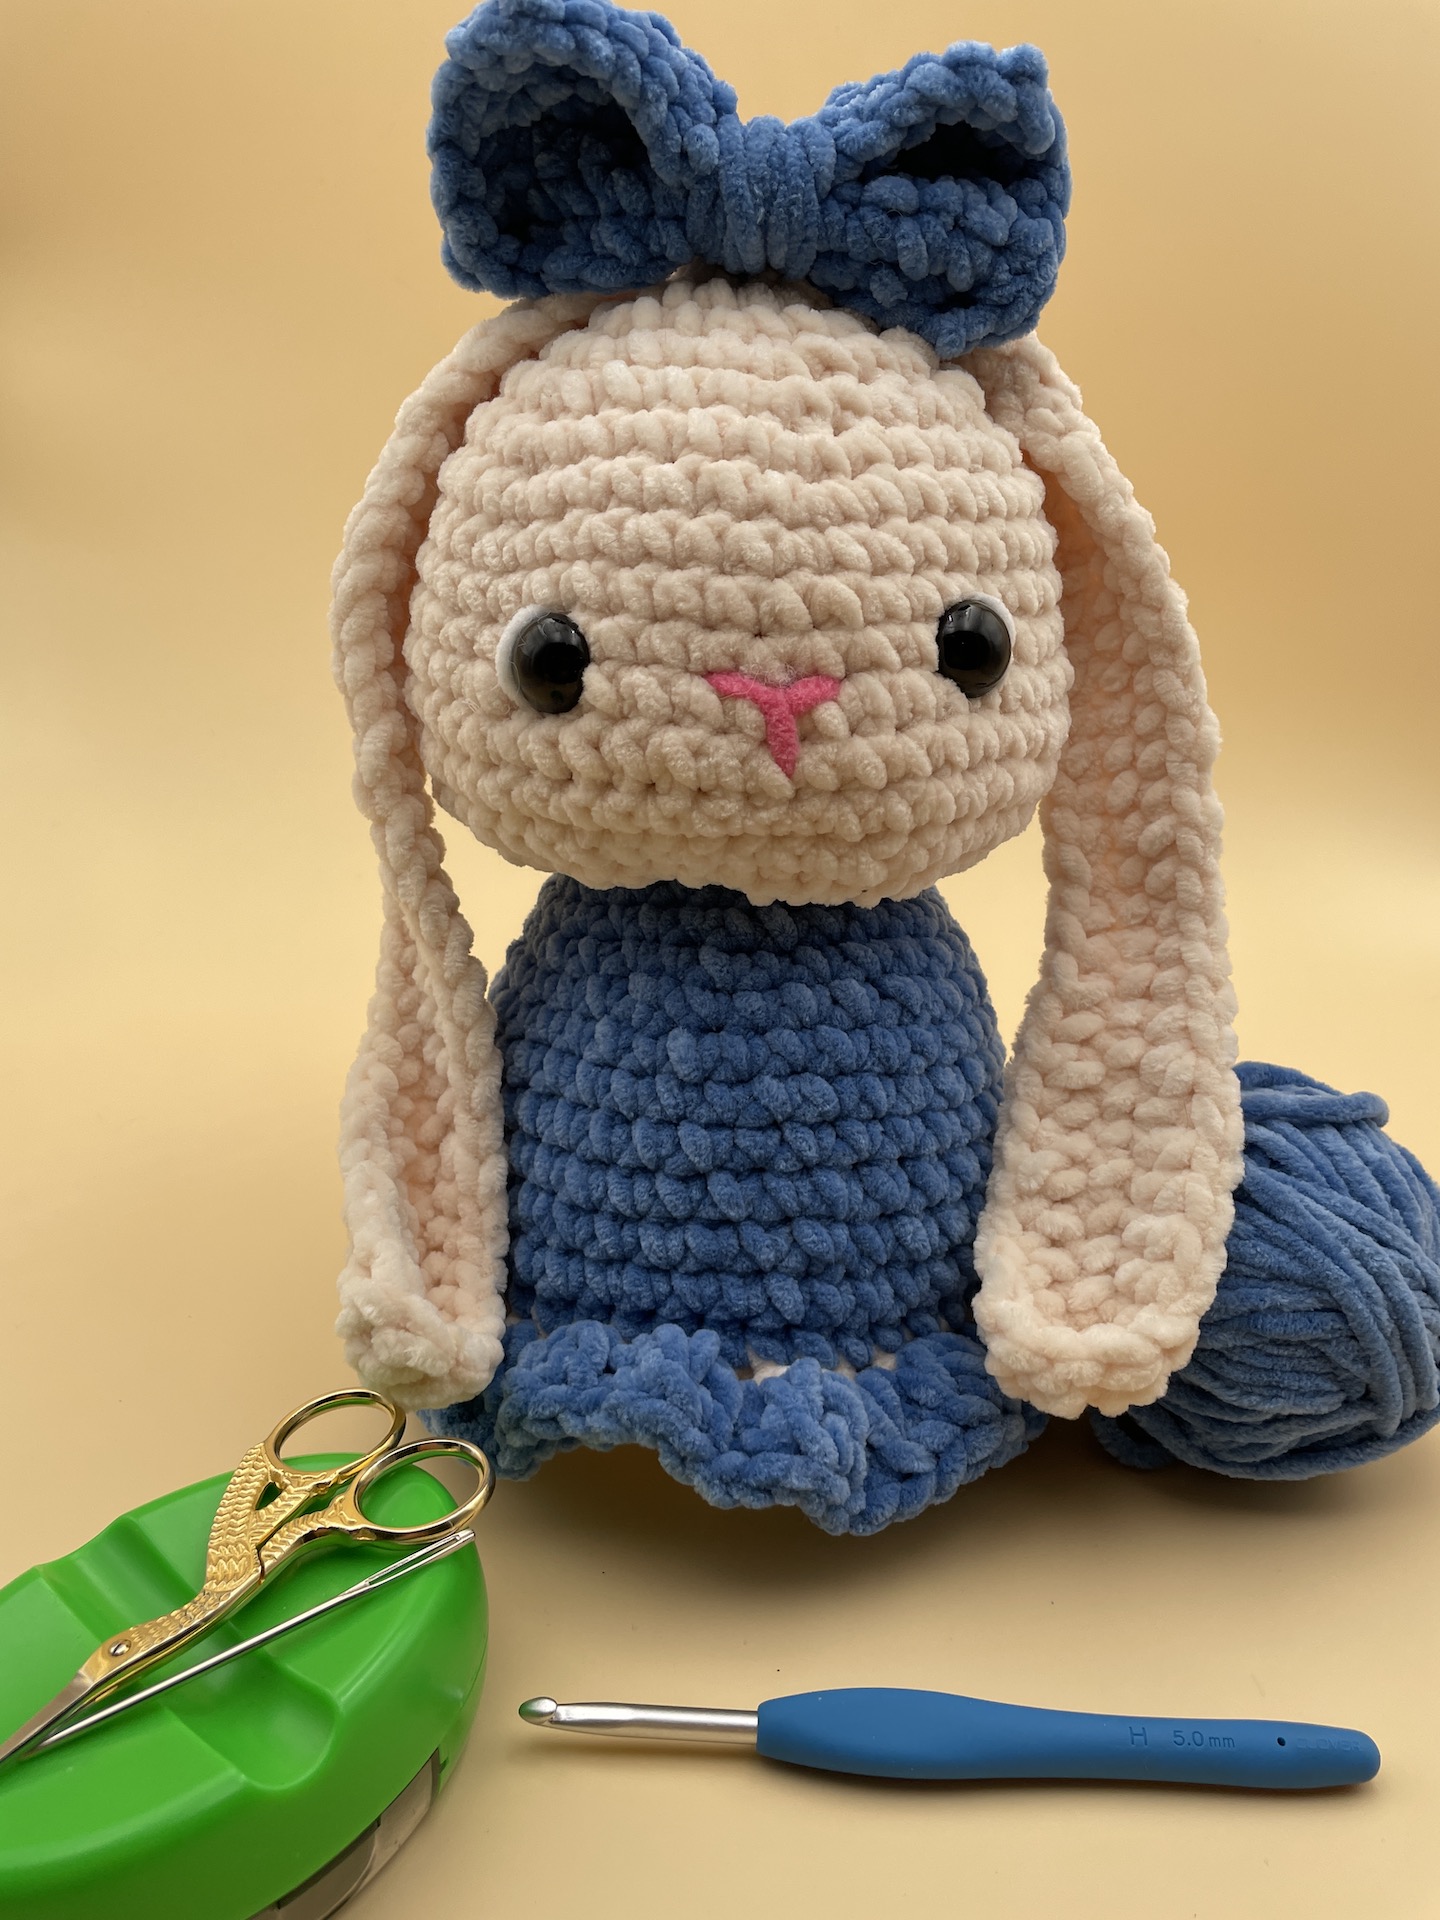
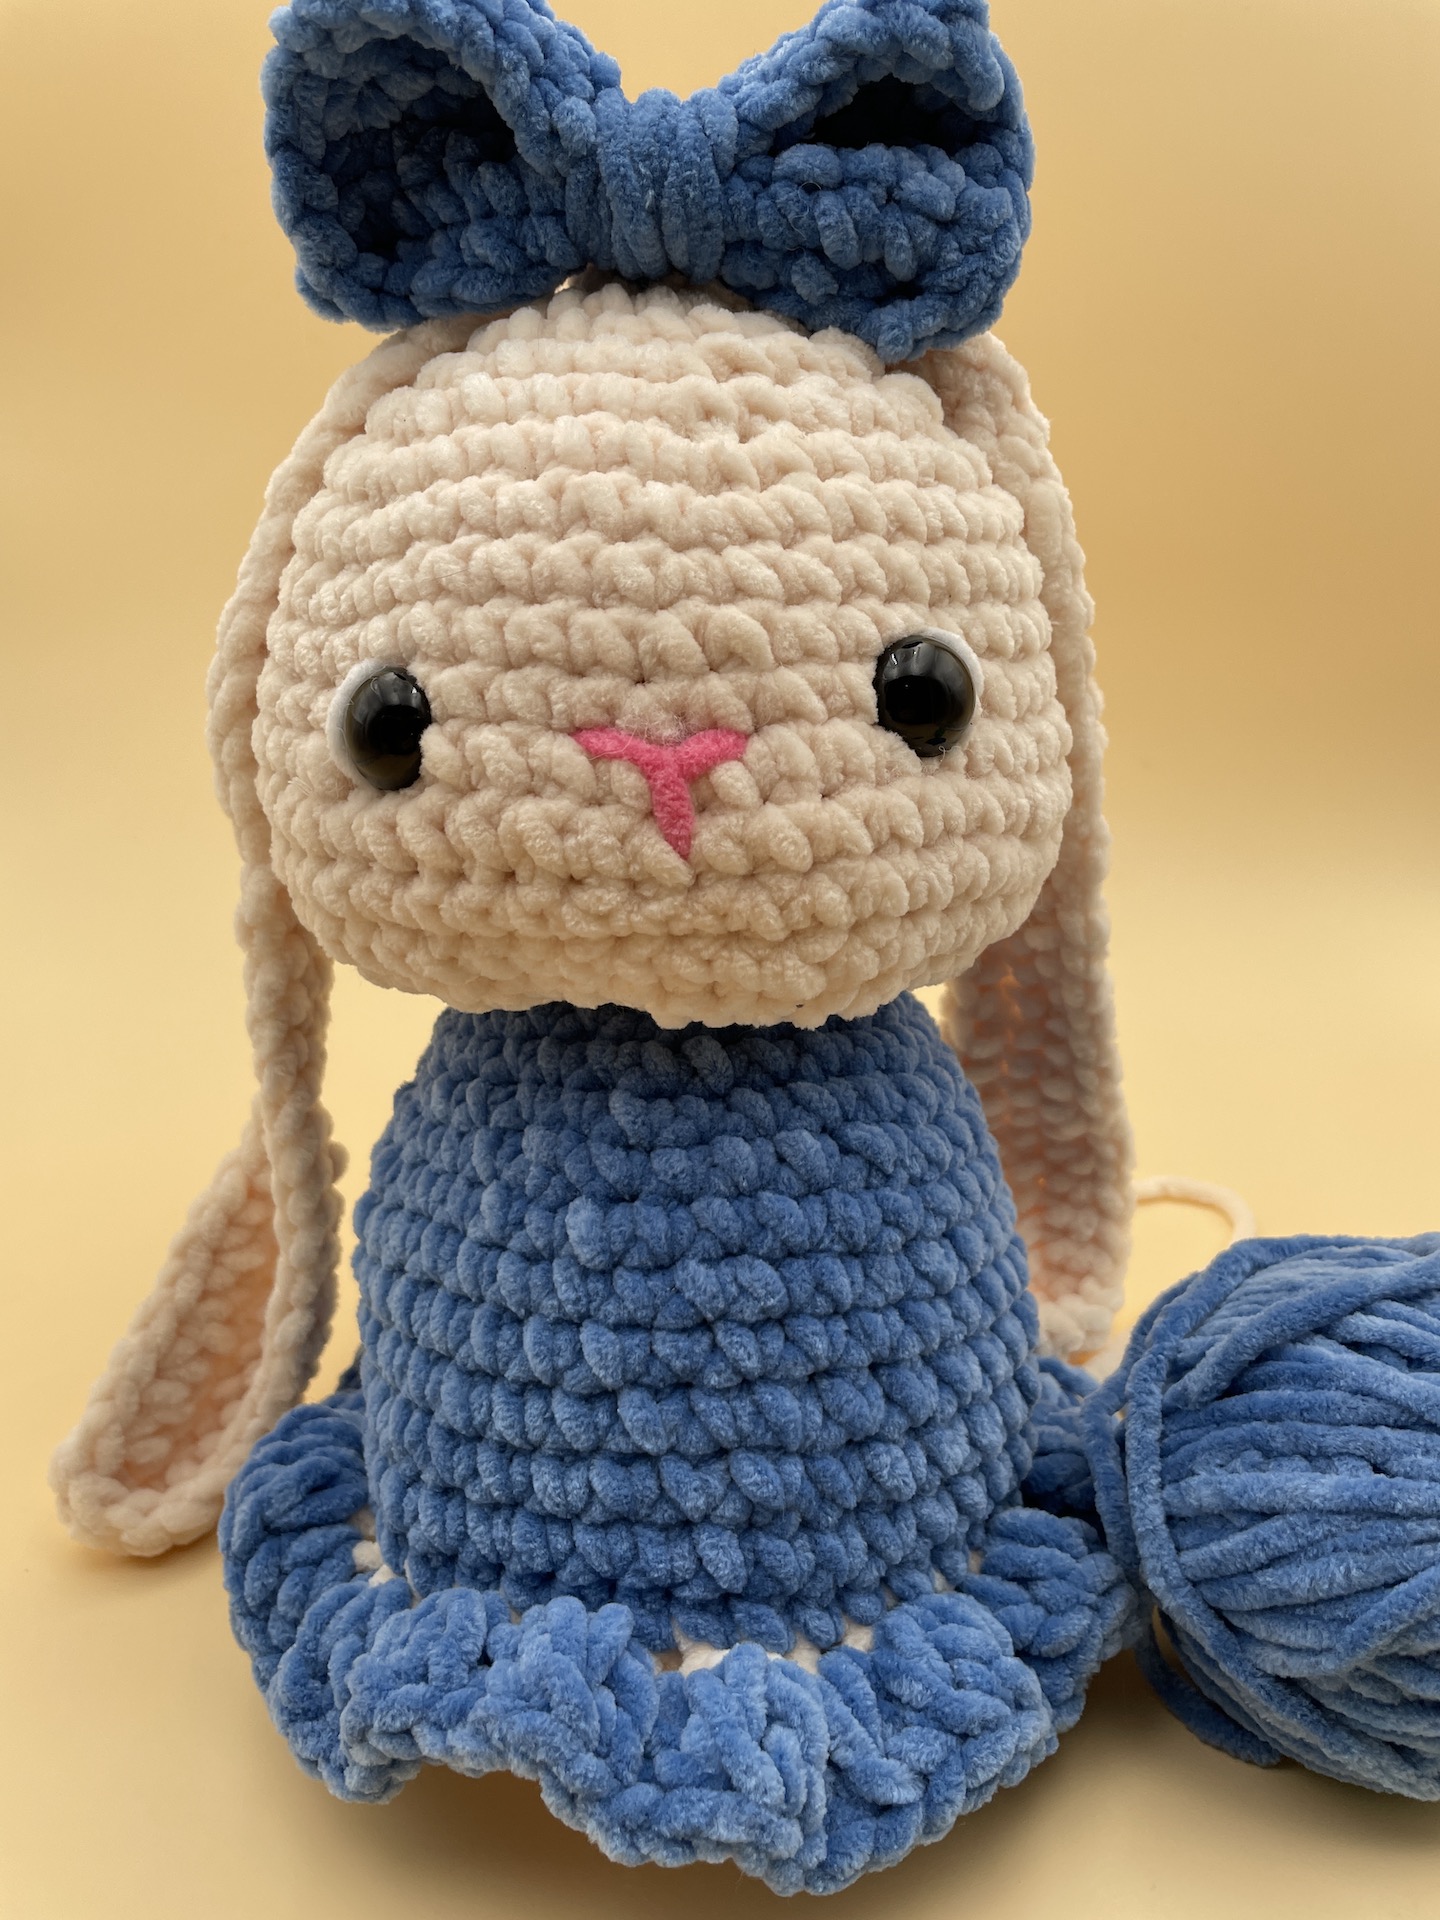
Today we are crocheting the 2. part of our amigurumi bunny! So excited to share the next part with you all. Today, we are crocheting the body of our cute bun!
Save this for later on Pinterest.
If you haven`t seen the first part, here it is:
Crochet bunny, part 1
We are making the body and adding a dress today. Please watch the video for more detailed explanations.
This adorable, soft crochet amigurumi bunny is perfect for children or as a gift for a loved one. Whether you’re a beginner or an experienced crocheter, this pattern and video tutorial will walk you through the process of creating your own little furry friend.
The video tutorial is available in German and English, scroll down to find your language.
The yarn
Firstly, here is the info about the yarn. One of the perks of being a crochet pattern maker is that yarn companies sometimes give me yarn to try out. This time I got to try the Honey Bunny yarn from Hobbii, and I HAD to make a bunny with it! Also, I got some safety eyes and stuffing!
You can also use a different yarn. It doesn’t really matter, find yarn that you like and a matching hook and you are good to go.
Grab your hooks, and let’s get started!
I sometimes include affiliate links in my blog posts. That means that I earn a small commission if you purchase a product that I recommend, at no extra cost to you. I appreciate your support!
Crochet amigurumi bunny – a free crochet pattern
All rights reserved. Please do not repost this pattern and claim it as your own. Do not sell this pattern to others. You are welcome to the finished item made (no mass production) from this pattern, but please refer to me @Yarnhild as the designer of the pattern. ©Yarnhild 2023.
English video
German video
Written pattern

Crochet Bunny CAL part 2
Materials
- Abbreviations – US terms
- Ch-chain
- Rnd–round
- St–stitch
- Sl st–slip stitch
- Sc–single crochet
- R–round
- Sc dec–single crochet decrease
- Sc inc–single crochet increase, 2 single crochet in one stitch
- Dc–double crochet
- Mr–magic ring
- Hdc–half double crochet
- Yo –yarn over
- Dc – doble crochet
- BLO - back loop only
Tools
- You`ll need:
- Honey bunny yarn in beige
- 1 skein in blue
- 5 mm crochet hook
- Yarn needle
- Filling materials
- Scissors
Instructions
Work in continuous rounds. Use a stitch marker and move it up as you go.
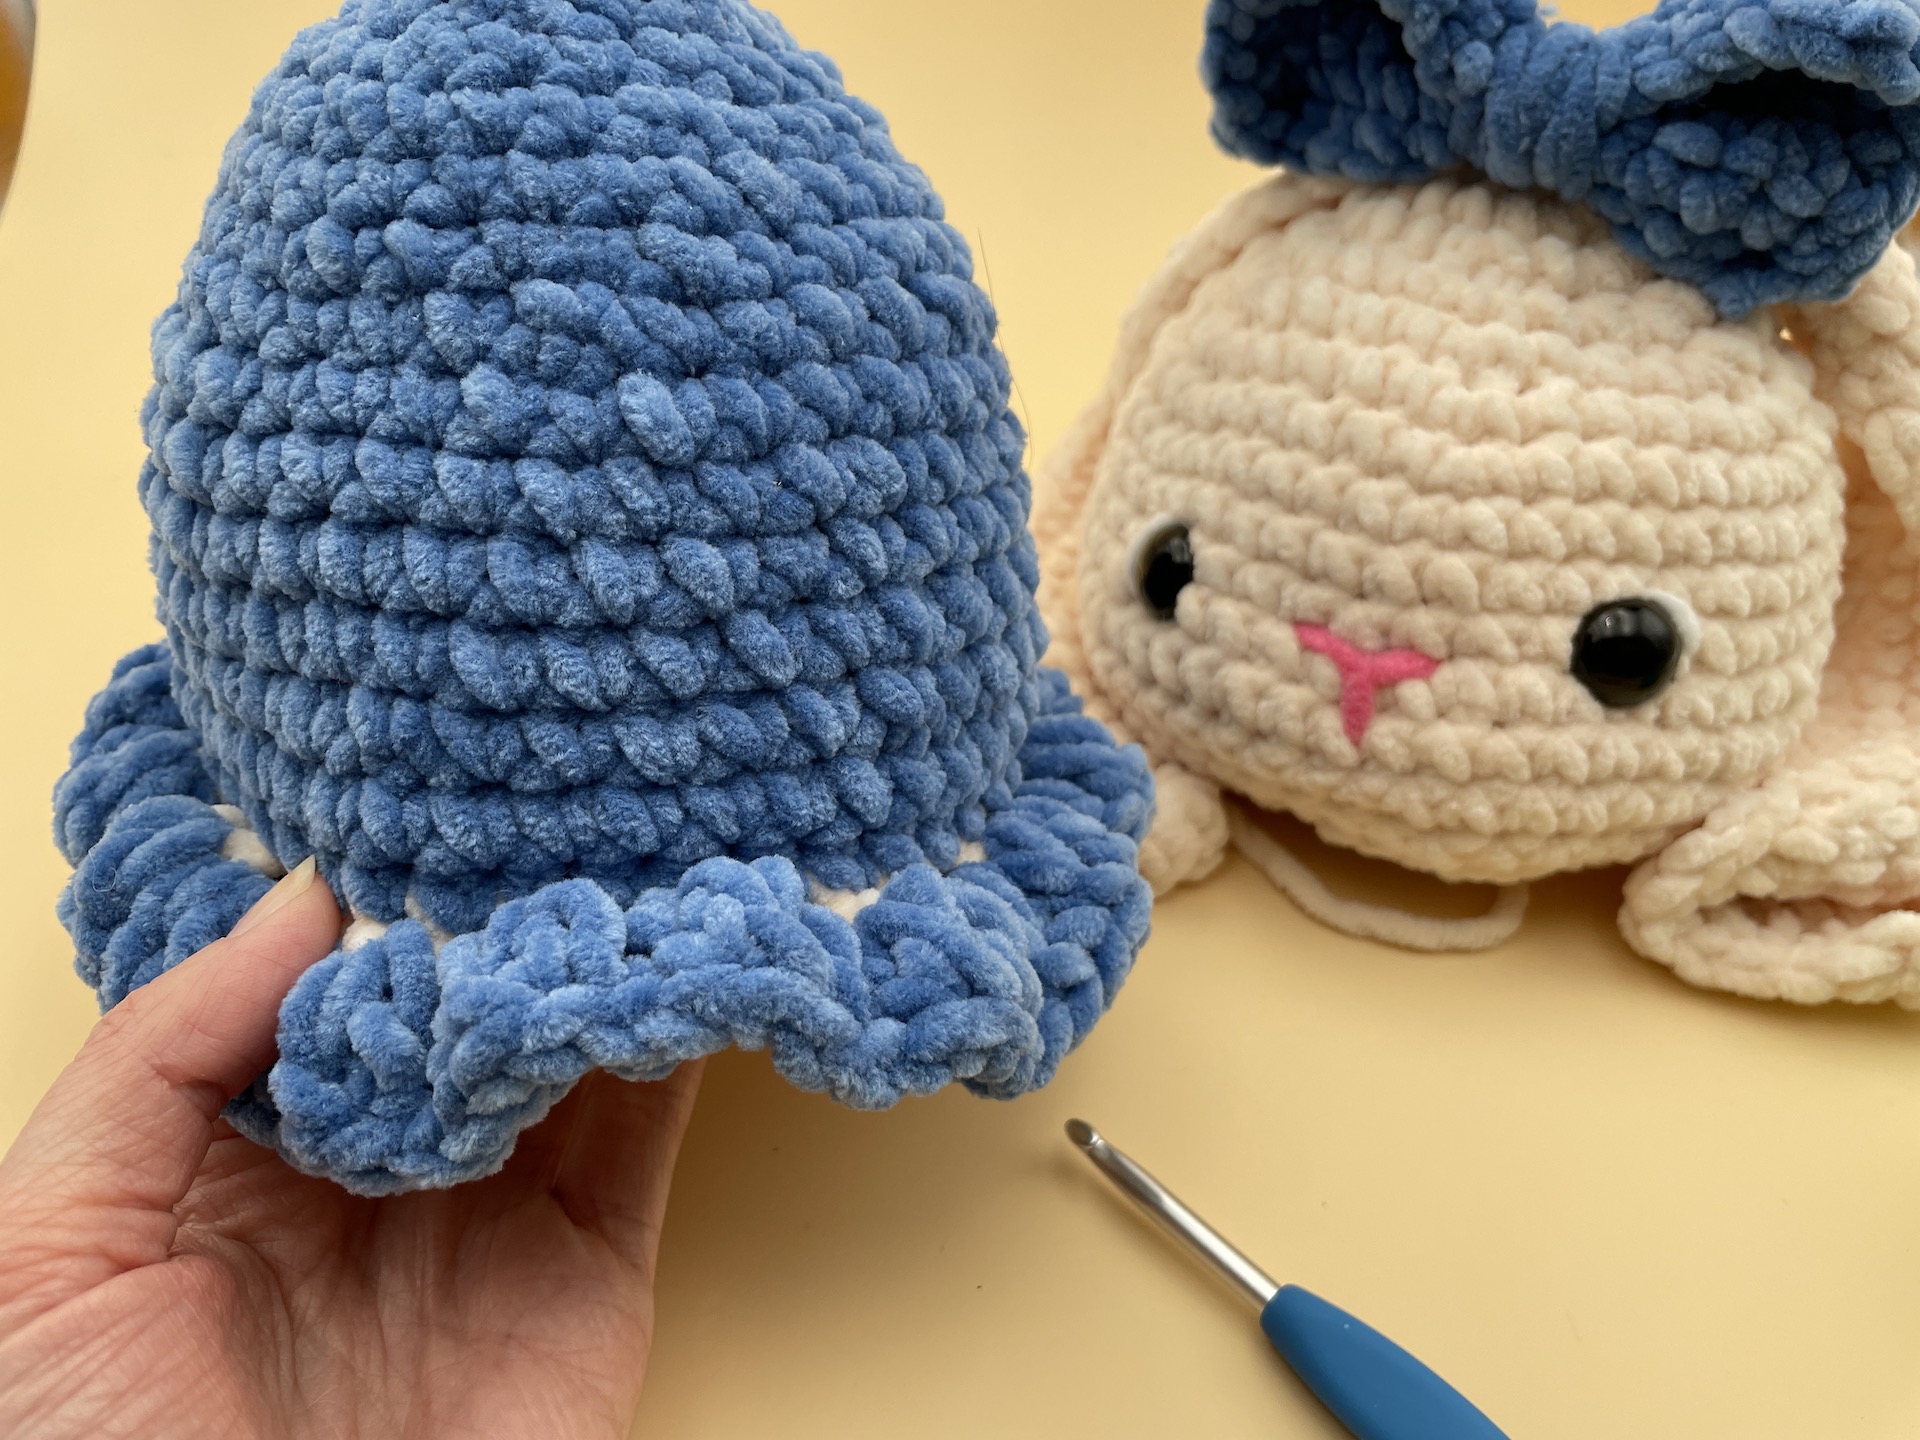
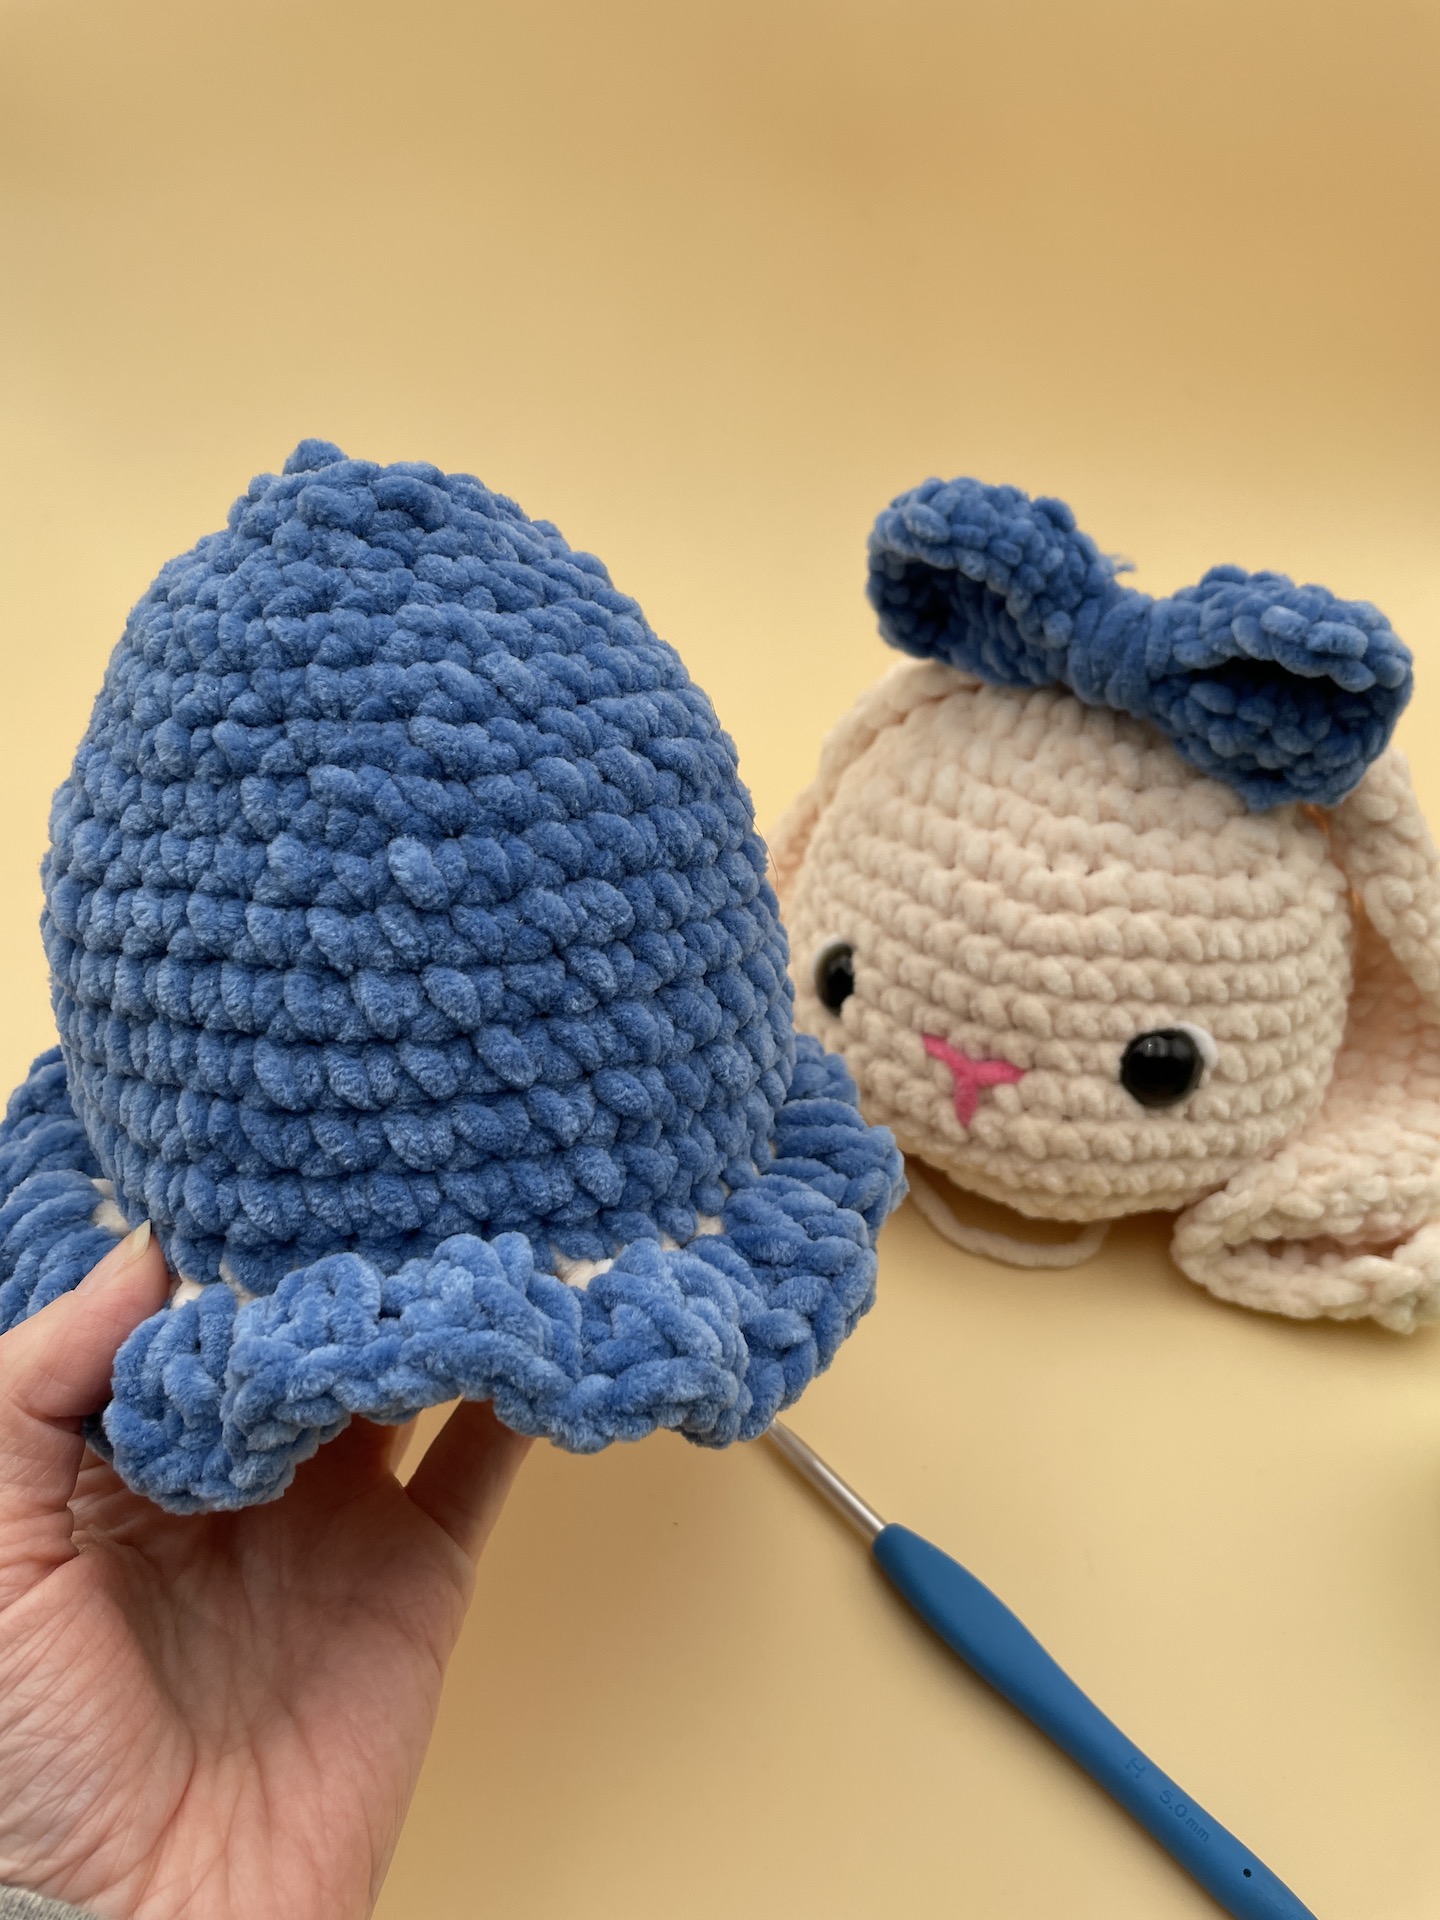
The body
In beige color and blue
Rnd 1: 6 sc in a mr = 6 sc
Rnd 2: sc inc x 6 = 12 sc
Rnd 3: (1 sc, sc inc) x 6 = 18 sc
Rnd 4: (2 sc, sc inc) x 6 = 24 sc
Rnd 5: (3 sc, sc inc) x 6 = 30 sc
Rnd 6: (4 sc, sc inc) x 6 = 36 sc
Rnd 7: (5 sc, sc inc) x 6 = 42 sc
Rnd 8: Change to blue. 1 sc in BLO = 42 scRnd 9: (5 sc, sc dec) x 6 = 36 sc
Rnd 10-13: 1 sc in each st.
Rnd 14: (4 sc, sc dec) x 6 = 30 sc
Rnd 15-16: 1 sc in each st.
Rnd 17: (3 sc, sc dec) x 6 = 24 scRnd 18: (2 sc, sc dec) x 6 = 18 sc
Add stuffing
Rnd 19: (1 sc, sc dec) x 6 = 12 scRnd 20: 1 sc in each stich
The Skirt
Find the loop remaining from round 8. We are going to crochet in the Front Loop Only (FLO for this round. Watch the video on how to do this
Sl st in a sc of round 8. Ch 3, 2 dc in the same stitch. 2 dc in all the stitches around the body. Sl st in the first st and fasten off.
That`s it for part 2! I`ll see you next week with the 3. part
Crochet amigurumi bunny - part 3 —
Thursday 9th of March 2023
[…] attached it to the body. We also added some cute little ears to give our bunny some personality.In part 2 we made the body with a cute skirt. Today, we are adding the feet and arms. Then, finally, we swing […]
Kelly Stamper
Thursday 2nd of March 2023
Hi! Will Part 3 be released soon? Thanks! Kelly
yarnhild
Thursday 9th of March 2023
It is out now :)
Free crochet amigurumi bunny pattern
Sunday 12th of February 2023
[…] Click here for part 2 […]